 My Small Nest
The average kitchen harbors 8–12 reusable water bottles, half of them lidless, all of them avalanching out of the cabinet. It’s a uniquely modern mess — and it has a uniquely simple fix.
These 15 ways to organize water bottles range from $3 magazine holders to clever repurposing tricks, all designed to give every bottle (and lid) a permanent home. This is for anyone whose cabinet has ever attacked them at 6 a.m. — renters, families, and tiny-kitchen dwellers especially. Pick your favorites and reclaim that cabinet this weekend.
1. Purge Orphans and Duplicates First
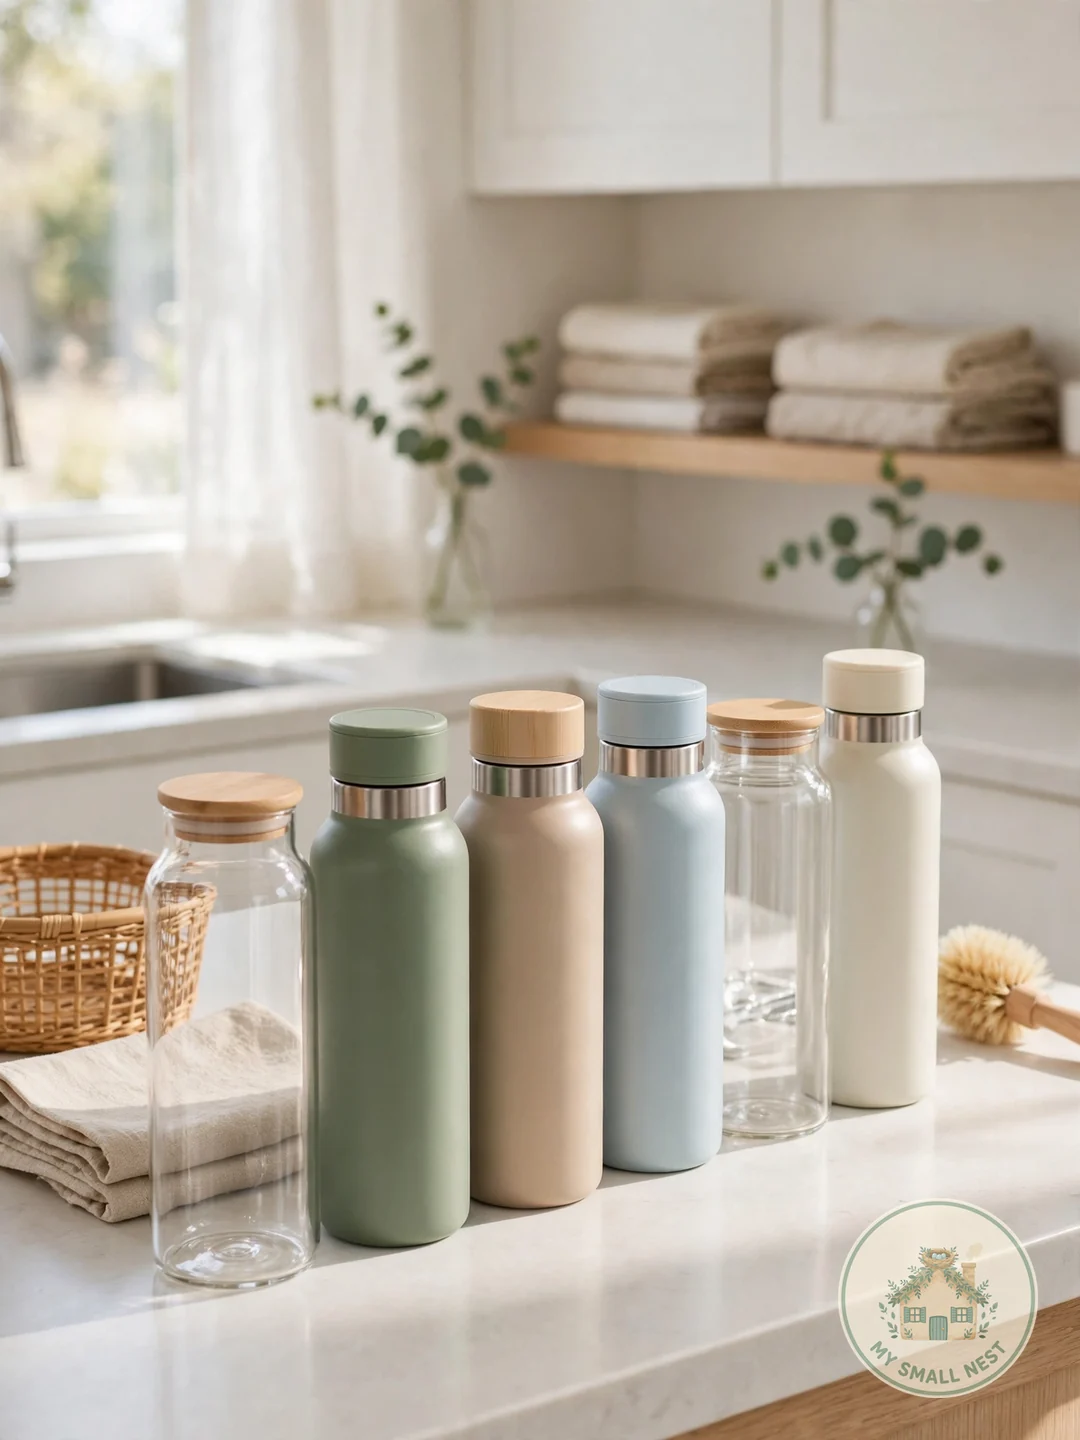
Start by pulling every bottle out and matching lids to bases — the average household has 3–4 orphan bottles or lids hiding in the back. Toss cracked, smelly, or lidless ones; donate duplicates in good shape. Keep one bottle per family member plus 2–3 spares. Fewer bottles means the organization system actually holds, and you’ll stop buying replacements for bottles you already own. This ten-minute purge is the unglamorous step that makes every other idea on this list work.
Make it work: Recycle old plastic bottles properly — most curbside programs take #1 and #2 plastics.
 Pin it
2. Repurpose a Stackable Wine Rack
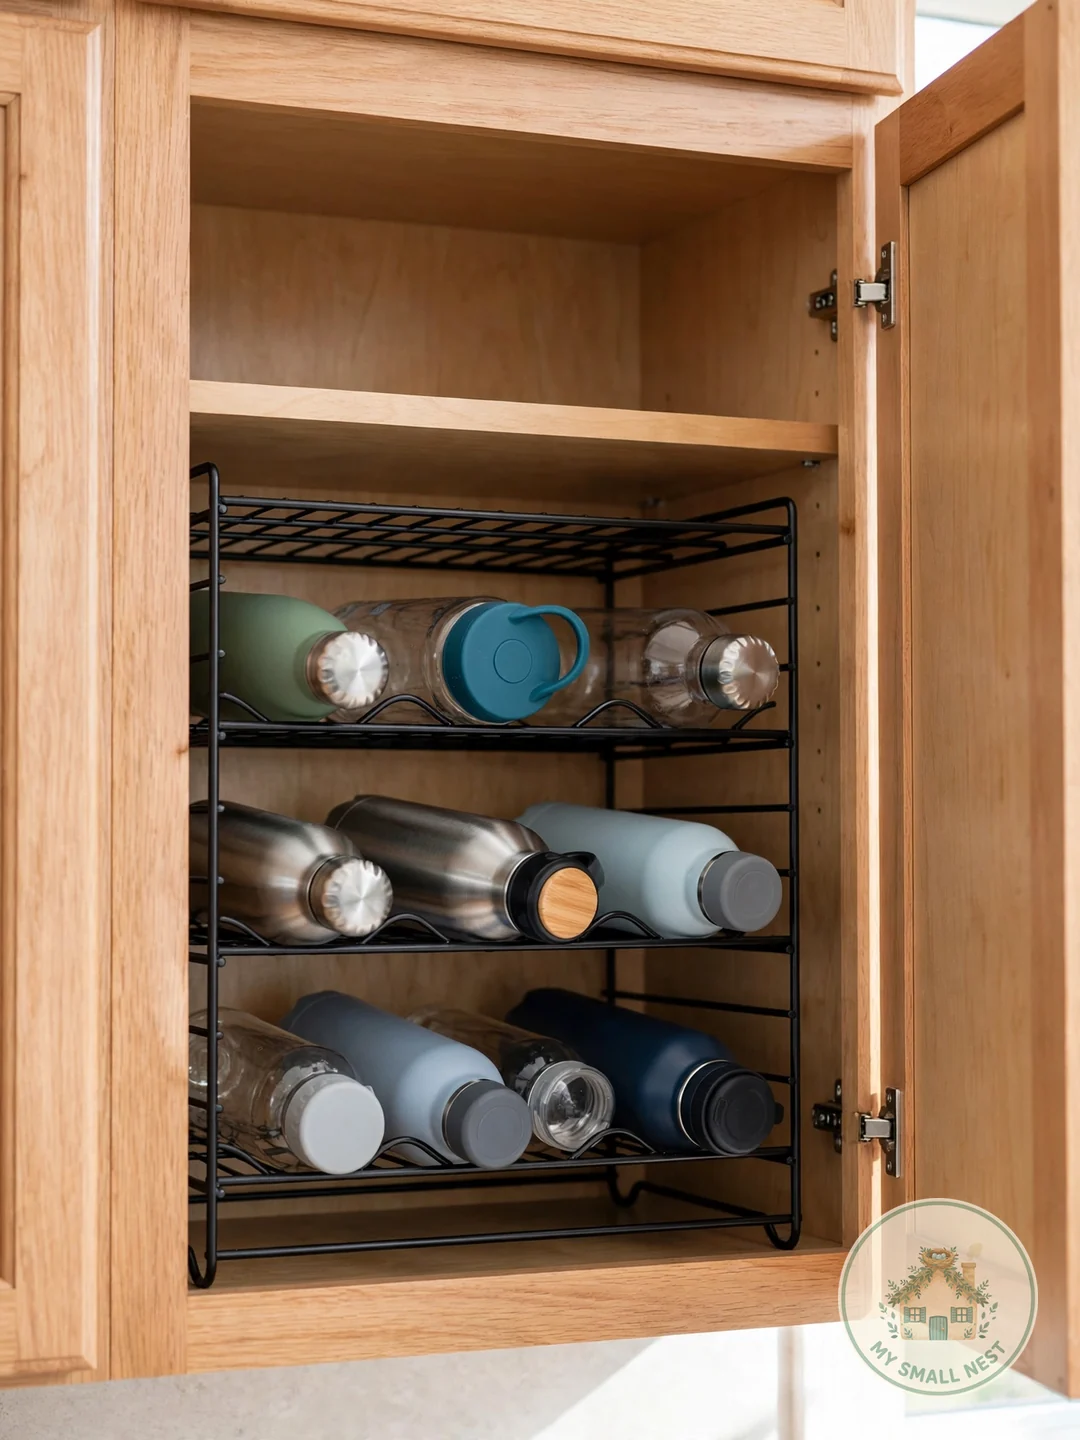
A stackable wine rack ($12–20) is the classic water bottle organizer — each cubby holds one bottle horizontally, visible and grabbable. It fits inside deep cabinets or on pantry shelves, and one rack typically holds 6 to 12 bottles depending on size. Measure your cabinet height first; standard wine racks fit most cabinets, but tall insulated bottles need the larger cubbies. Bamboo racks look nicer on open shelving, while metal stacking racks maximize cabinet space.
Make it work: Store bottles cap-down so any drips stay inside, not on the shelf.
 Pin it
3. File Bottles in Magazine Holders
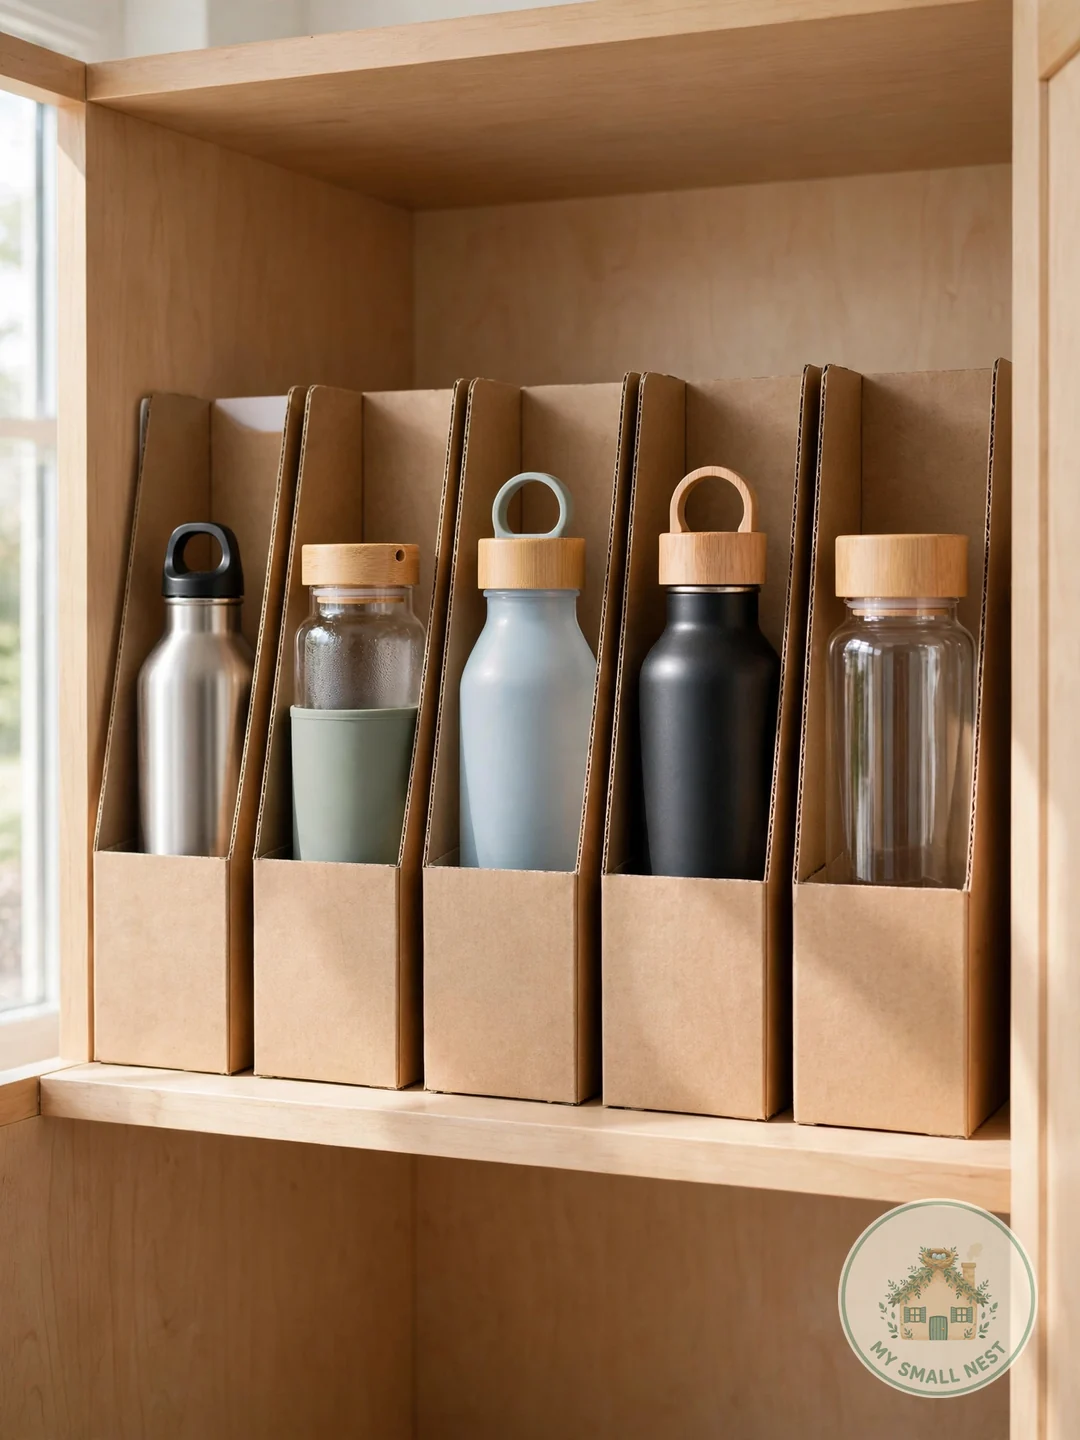
Magazine holders ($3–5 each) turned on their sides create perfect bottle cubbies — slide one bottle per holder, line them up in the cabinet. It’s the cheapest dedicated bottle storage there is, and a row of six holders costs less than one fancy organizer. Plastic holders wipe clean; pretty patterned ones look intentional on open shelves. Label each holder per family member and the system maintains itself, because everyone knows exactly where their bottle lives.
Make it work: Choose holders tall enough for your tallest bottle — measure before buying.
Emma’s note: I tried this in my studio kitchen, where cabinet space is measured in inches, not feet — six $3 magazine holders from Target turned one chaotic shelf into a proper bottle filing system. The patterned ones genuinely look like I planned it, and labeling them stopped my partner’s bottles from migrating into my slots.
 Pin it
4. Divide Cabinets With Tension Rods
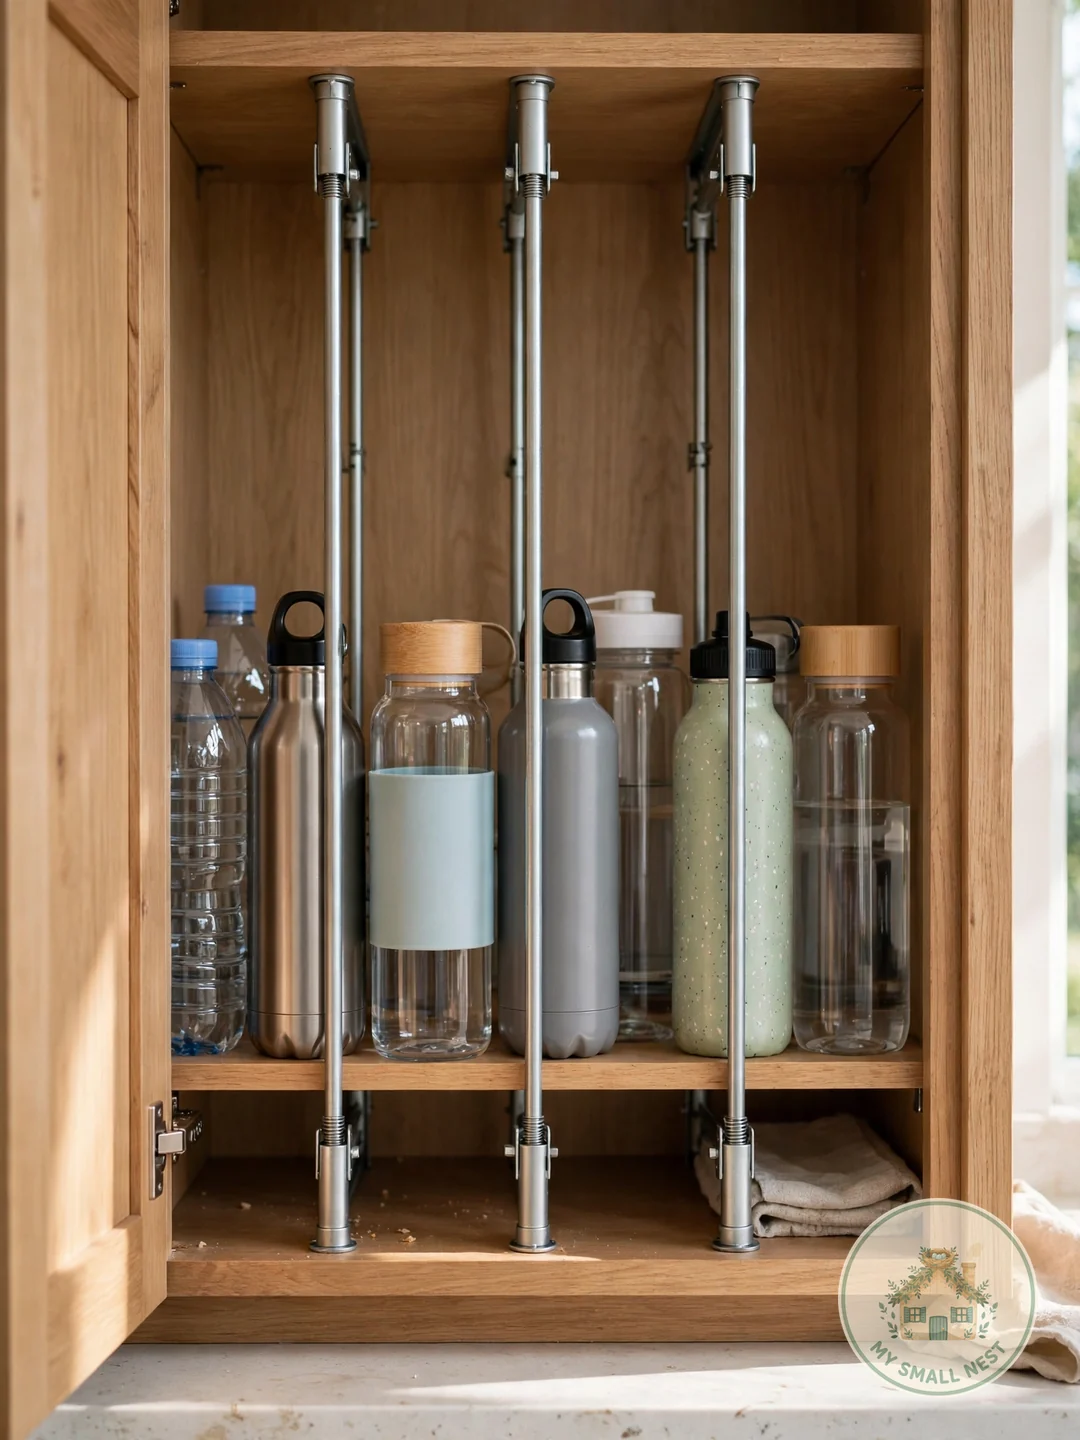
A tension rod mounted vertically in a cabinet creates dividers that keep bottles from toppling like dominoes. Two rods make neat rows; bottles slide in and out without disturbing neighbors. This $5 fix works in any cabinet depth — just twist to fit, no tools, no holes, fully renter-friendly. Position rods to create bottle-width slots, and the whole cabinet stays tidy with zero effort. It’s also the fastest of all these ideas to install: under two minutes per cabinet.
Make it work: Use square-profile tension rods if you can find them — round rods let bottles roll.
 Pin it
5. Hang an Over-the-Door Bottle Rack
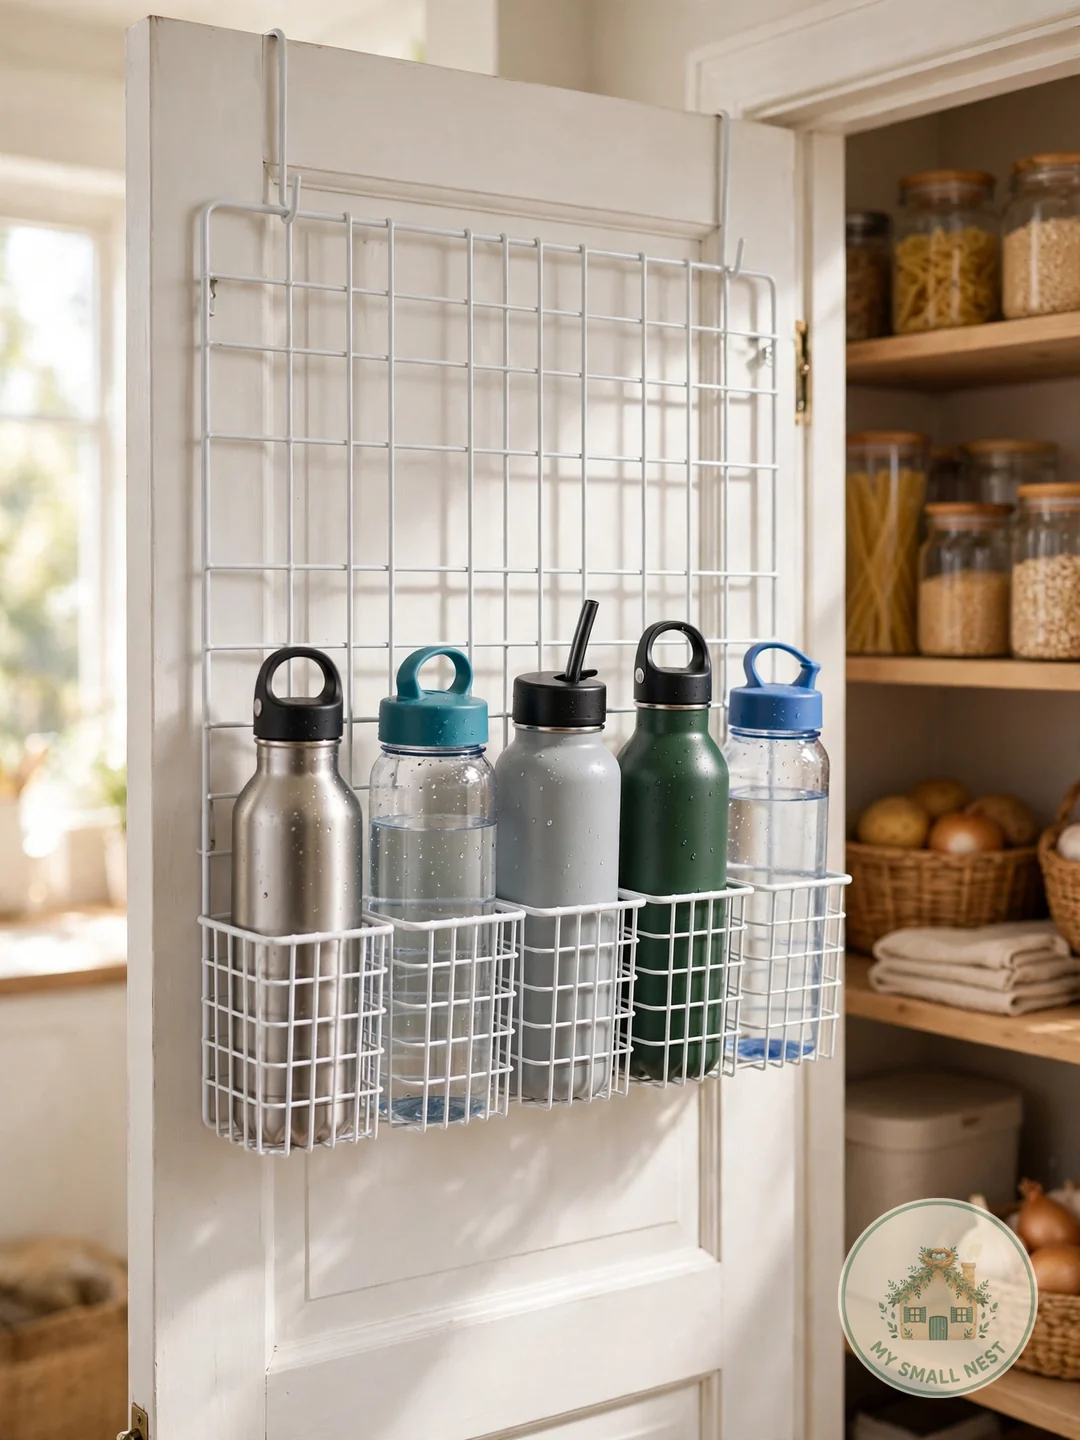
An over-the-door wire organizer ($15–20) on a pantry door holds 6–10 bottles in individual pockets — perfect if cabinet space is tight. Bottles stay visible and every family member gets a row. Choose a rack with deep baskets so tall bottles don’t tip, and check that your door still closes fully with the rack loaded — a packed rack adds an inch or two of depth. This also works inside a tall pantry cabinet door for a hidden version that keeps the kitchen looking calm.
Make it work: Keep kids’ bottles on the lowest rows so little hands can reach.
 Pin it
6. Dedicate a Deep Drawer to Bottles
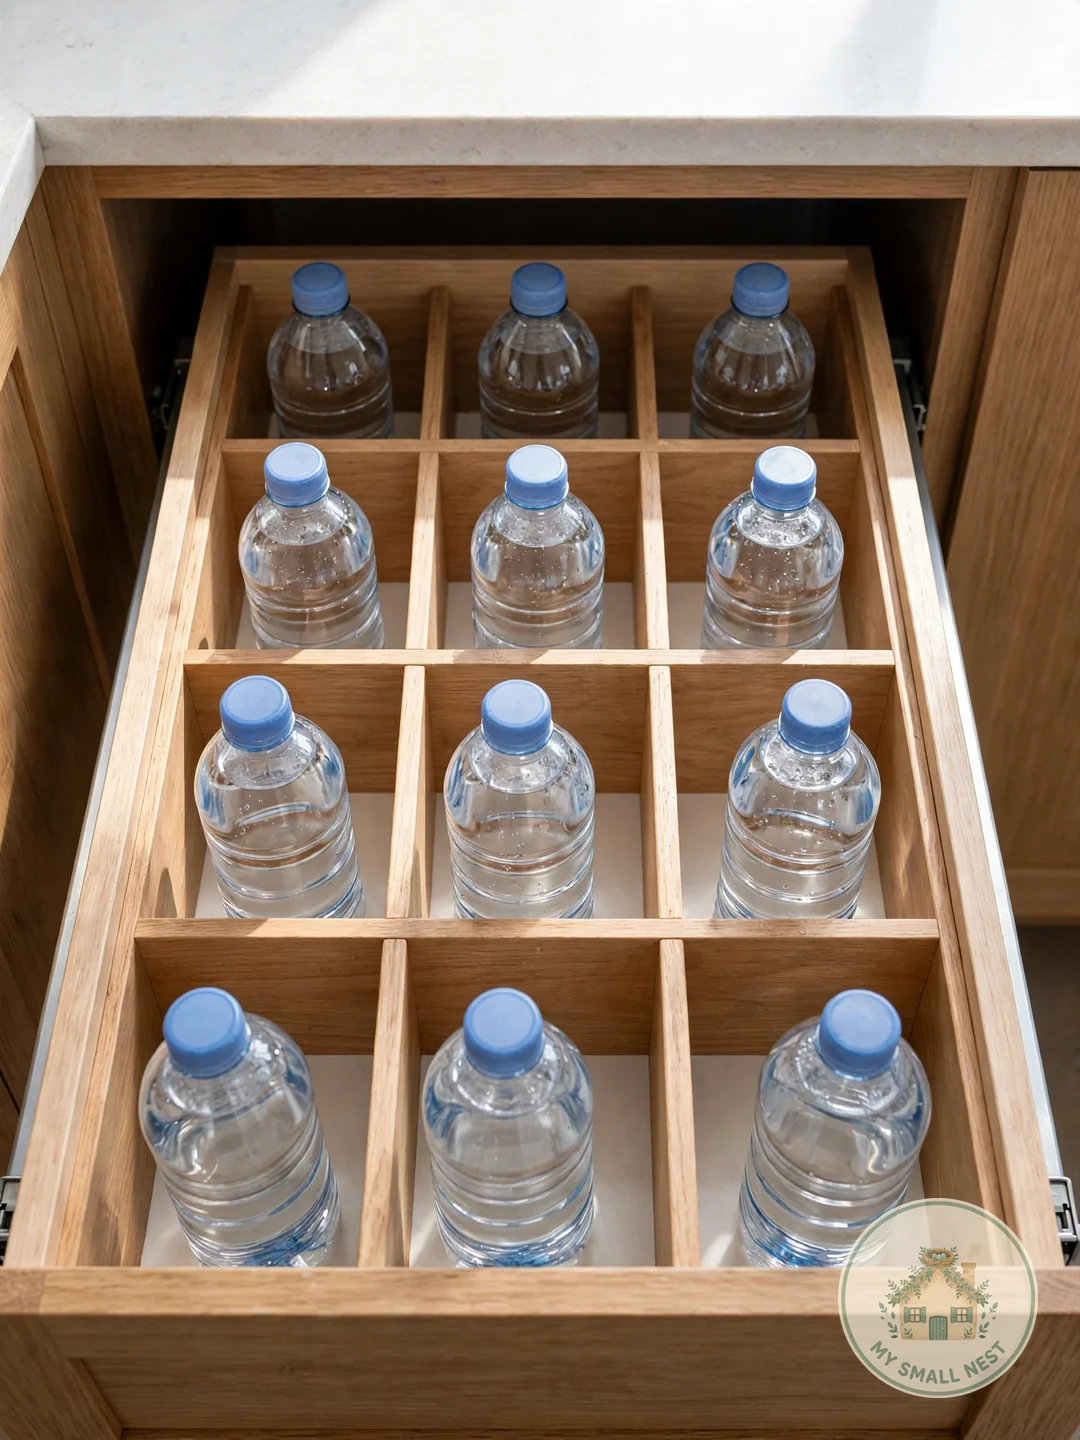
A deep drawer near the dishwasher beats a cabinet for bottles — you see every option at a glance. Add dividers or a pegboard insert so bottles don’t roll, and file lids in a small bin at the front. Drawer storage ends the deep-cabinet black hole where bottles vanish for months. If you’re renovating, request one deep drawer specifically for drinkware — it’s the single most-requested drinkware upgrade for a reason. Even without a renovation, converting one existing deep drawer takes an afternoon and a $10 divider set.
Make it work: Line the drawer with non-slip liner — bottles stay put when the drawer opens.
 Pin it
7. Assign One Bin Per Person
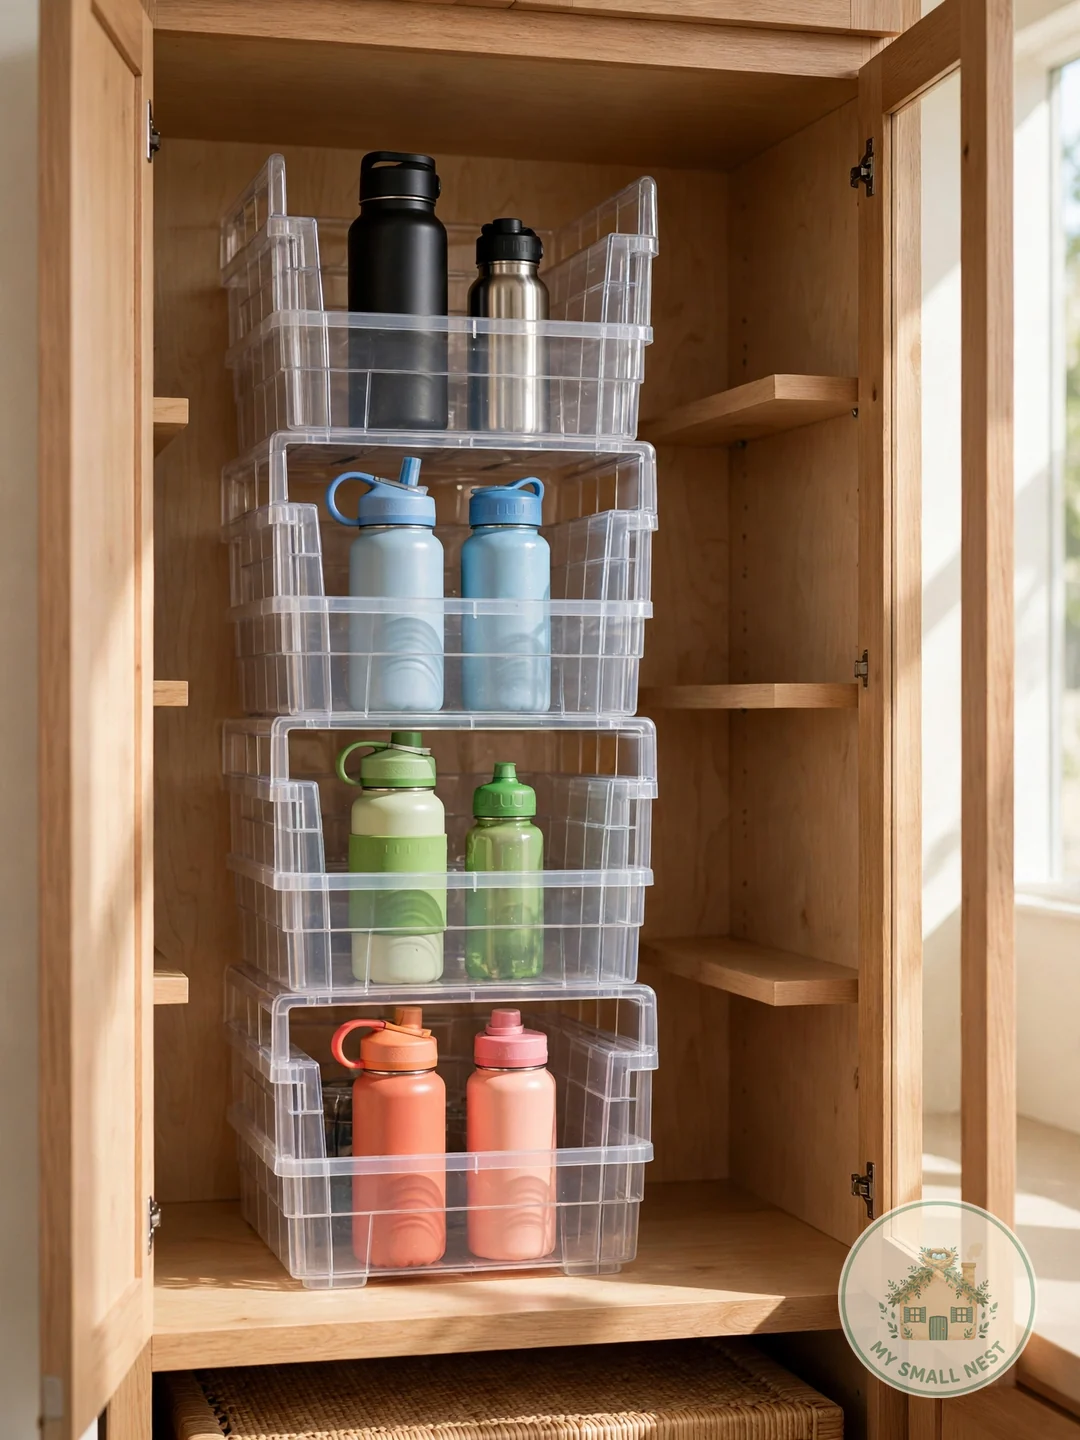
Small stackable bins ($4–6) corral bottles by user — one bin per person, lids in a separate small bin. Pull the whole bin out to choose, push it back when done. Clear bins let you see contents; colored bins assign ownership. This system survives kids, spouses, and roommates because the rule is dead simple: your bottle lives in your bin. It’s also the most forgiving system here — when someone’s bin overflows, the problem is visible immediately instead of hiding behind a cabinet door.
Make it work: Keep a ‘donate’ bin nearby — outgrown or unused bottles leave immediately.
Emma’s note: The one-bin-per-person rule saved my studio kitchen from the slow creep of free conference bottles and duplicates. My bin holds exactly four bottles — when a fifth shows up, one has to go. That physical limit does more than any organizing product ever could.
 Pin it
8. Store Lids Separately in a Small Bin
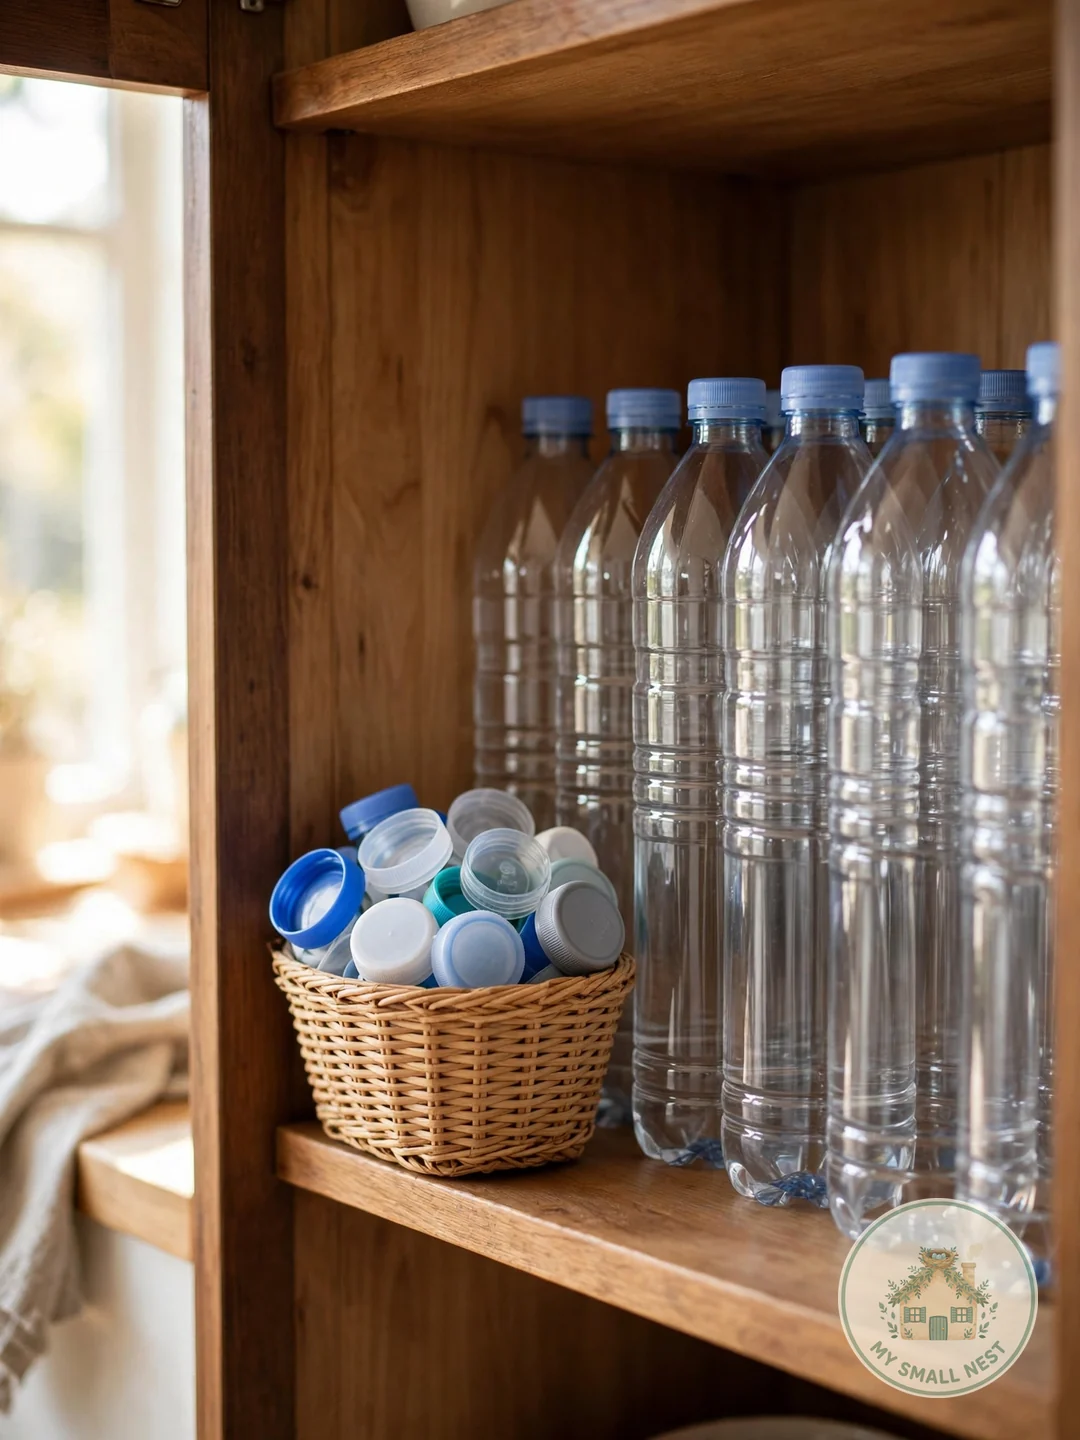
Store lids separately in a small bin, basket, or drawer divider — never screwed onto bottles. Lids stored on bottles trap moisture and double the space each bottle needs. A small lidded basket ($5) keeps lids contained and dust-free. Sort by size if you have many; most households need only one small lid bin. This one habit also ends the musty smell problem, because lids and bottles both dry fully when stored apart.
Make it work: Air-dry bottles upside down on a drying mat before storing — no musty smells.
 Pin it
9. Double Space With a Shelf Riser
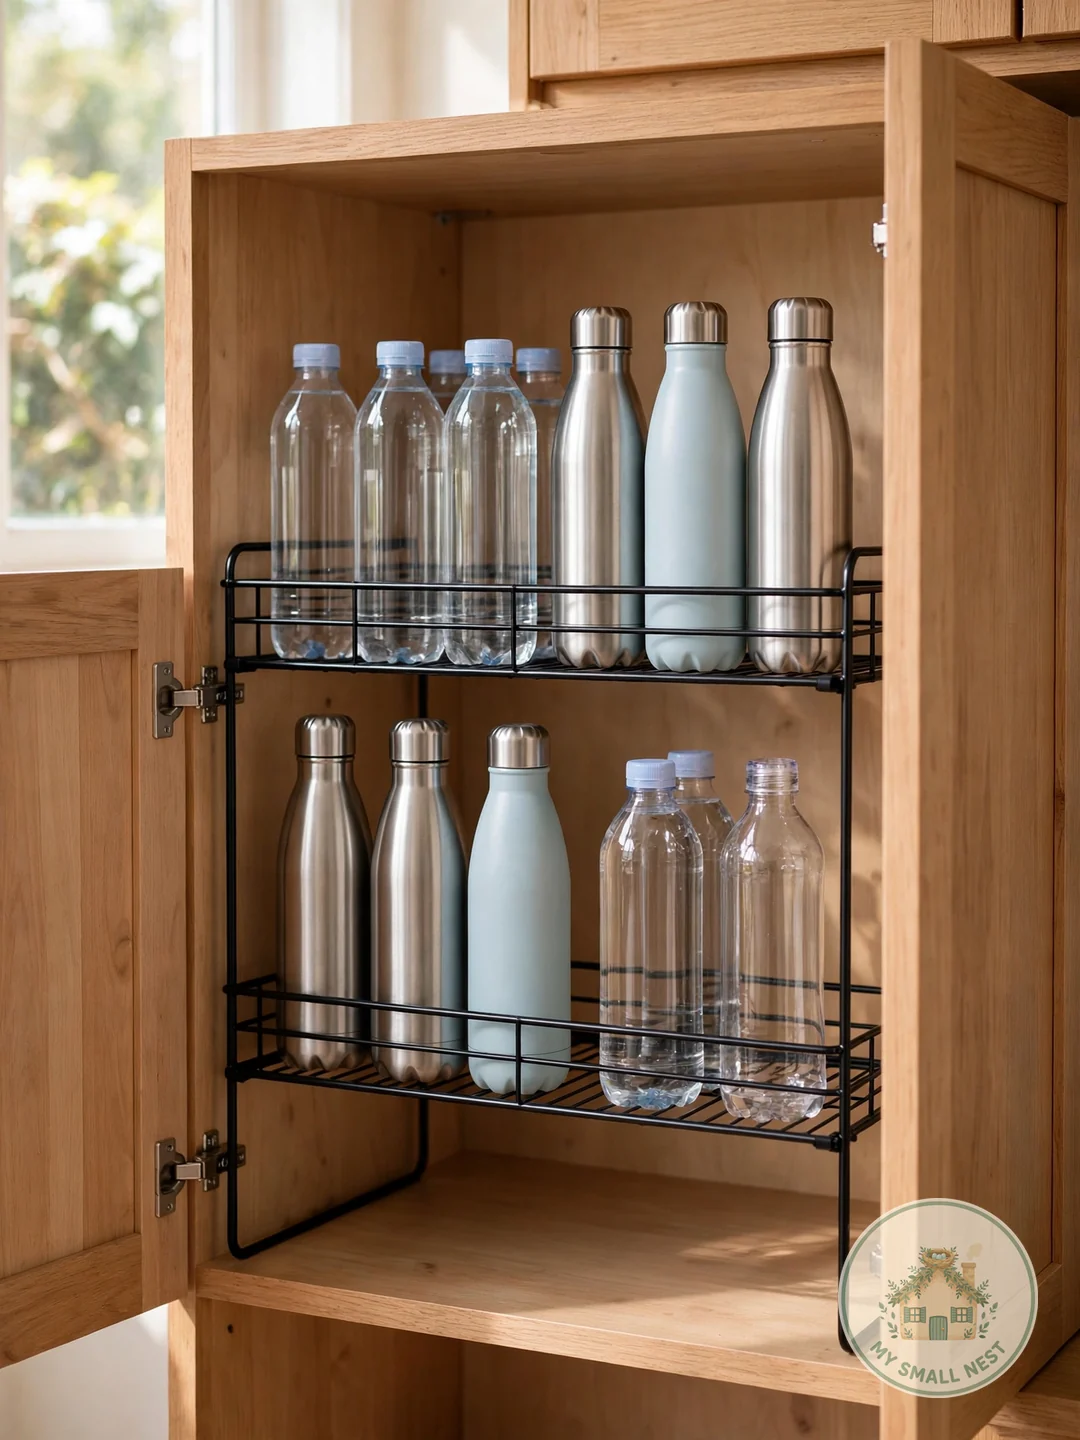
A two-tier under-sink or cabinet shelf riser ($12–15) doubles bottle storage in the same footprint — short bottles below, tall ones on top. No more stacking bottles precariously. Wire risers allow airflow (less mustiness); solid ones look cleaner. Measure cabinet height to ensure the top tier clears the shelf above — you need the tallest bottle’s height plus about an inch. It’s a five-minute, no-tools upgrade that works in rentals and owned kitchens alike.
Make it work: Put daily-use bottles on the easy-grab lower tier.
 Pin it
10. Hang Daily Bottles on Wall Hooks
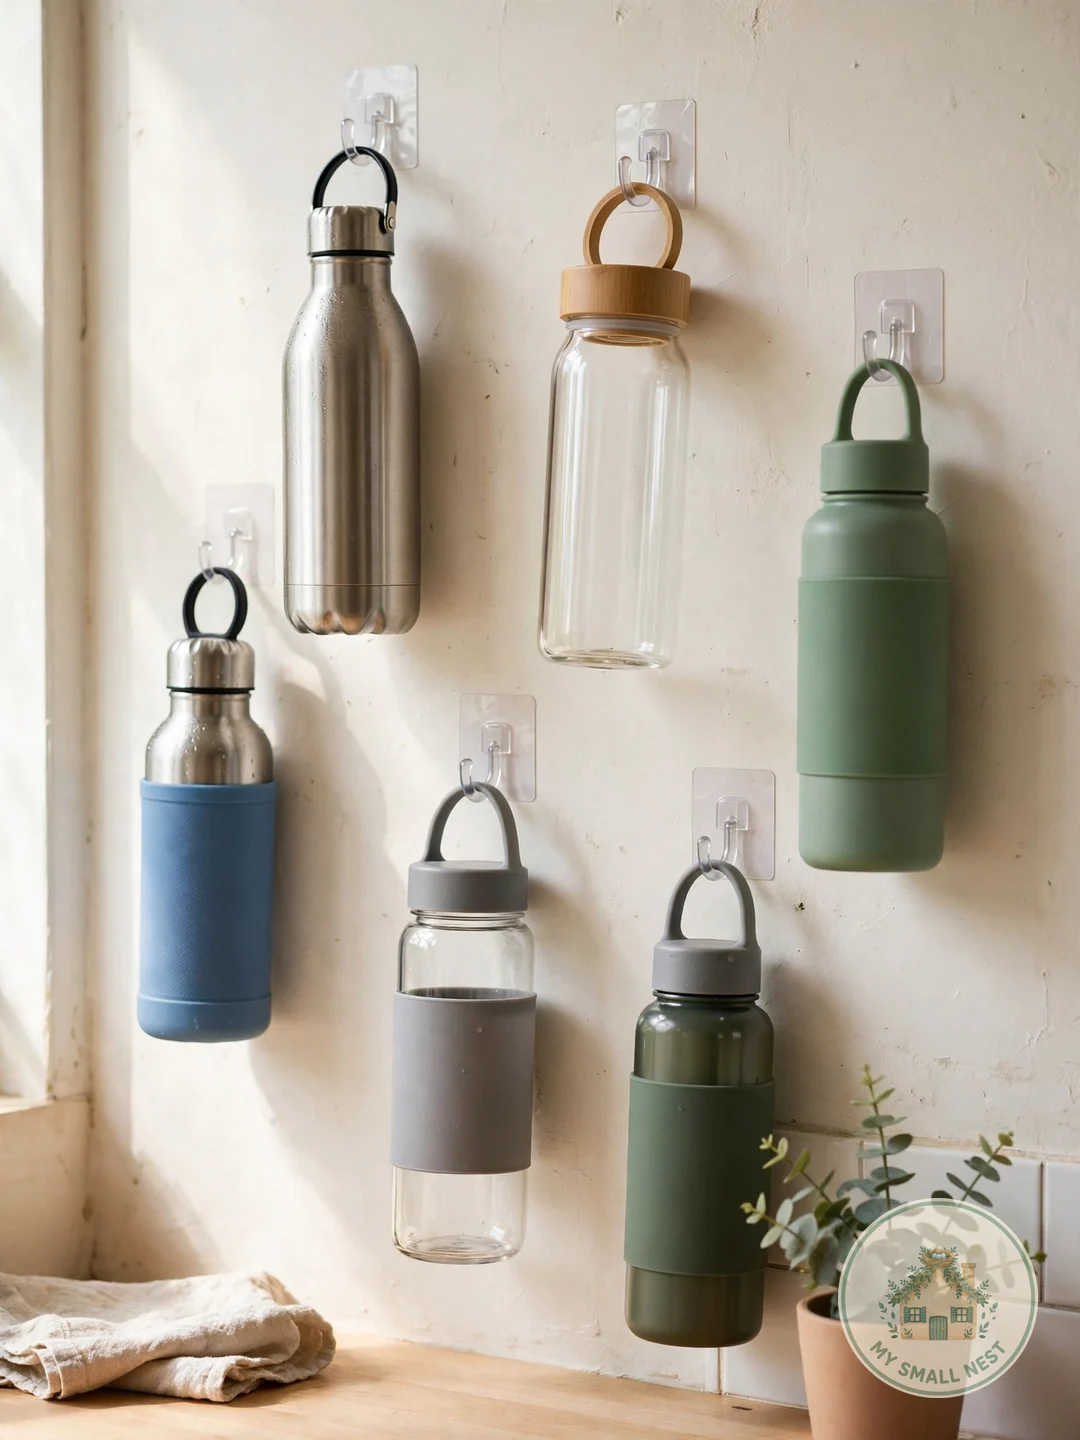
Adhesive hooks inside a cabinet door or on a pantry wall hold lightweight bottles by their handles or carabiner clips — dead space becomes storage. Command-style hooks work for renters and remove cleanly. This is ideal for the 2–3 daily-use bottles you grab constantly; the main collection stays filed in the cabinet. Hang near the water source or fridge for grab-and-go ease, so your morning routine never involves opening the big cabinet at all.
Make it work: Use hooks rated for at least 3 lbs — full bottles are heavier than they look.
 Pin it
11. Spin Bottles on a Lazy Susan
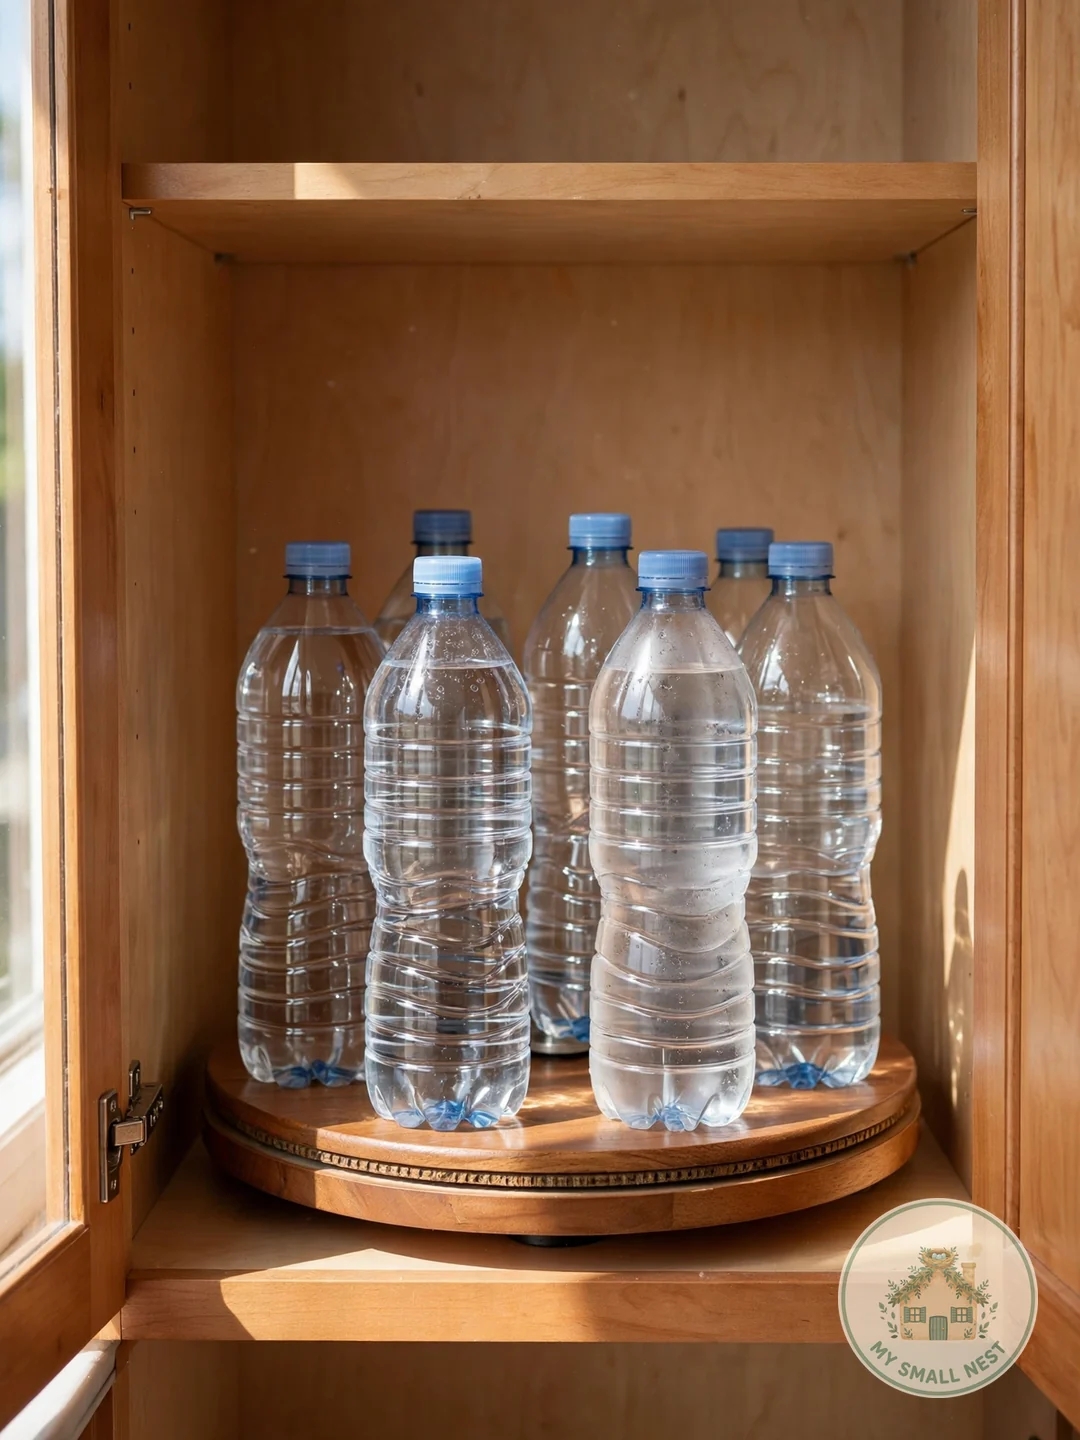
A lazy Susan in a deep cabinet or on the pantry shelf spins every bottle into view — no more knocking five bottles over to reach the one in back. Choose one with a rim so bottles don’t slide off. This is the best fix for corner cabinets, the Bermuda Triangle of kitchen storage. A 12-inch turntable ($10–12) holds 6–8 bottles and ends the excavation problem permanently. It also works beautifully for kids: one spin and they can reach their own bottle without climbing.
Make it work: Group bottles by size on the turntable — tall in back, short in front.
Emma’s note: My studio’s corner cabinet was where bottles went to die until I dropped in a $10 turntable — now it’s the most functional cabinet I own. Get the one with the non-slip surface and a low rim; the flat ones let bottles walk right off the edge when you spin with enthusiasm.
 Pin it
12. Air-Dry on a Bottle Drying Rack
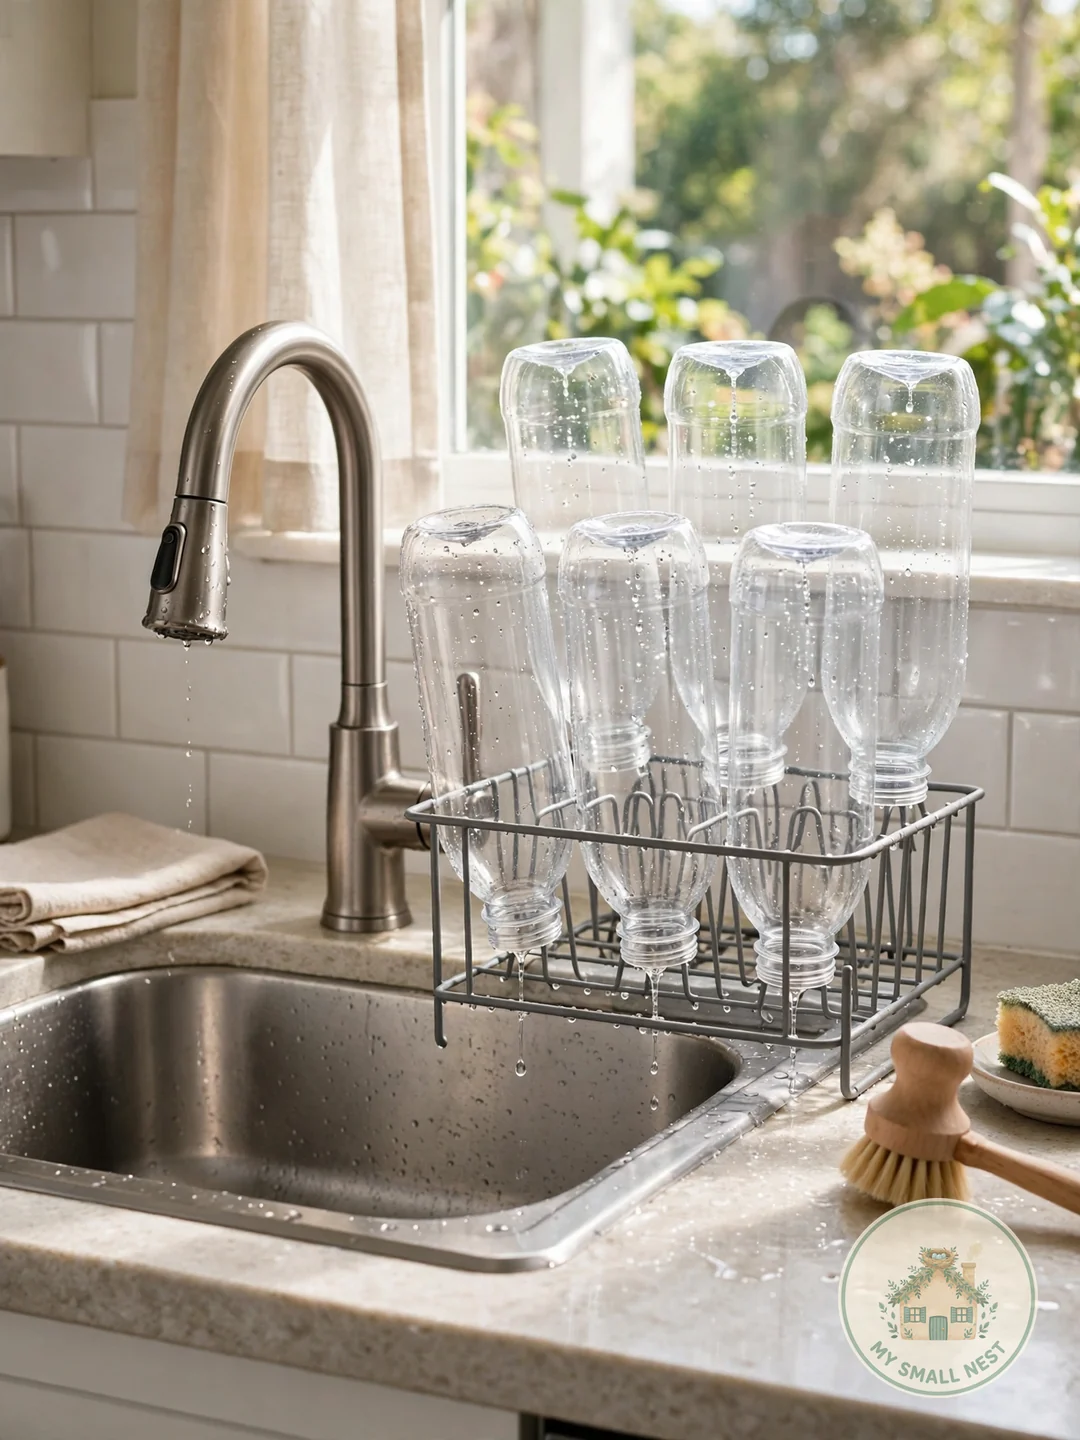
A bottle drying rack ($15–25) beside the sink gives washed bottles a home to air-dry fully before storage — the #1 defense against musty smells. Upright pegs hold bottles inverted for complete drainage. Once dry, bottles move to their cabinet home. The rack doubles as the ‘inbox’ — bottles land there after washing, then get filed. No more damp bottles sealed in dark cabinets, and no more mystery odors when you grab a bottle for the gym.
Make it work: Choose a rack with a drip tray — it protects counters and catches the last drips.
 Pin it
13. Color-Code Bottles Per Person
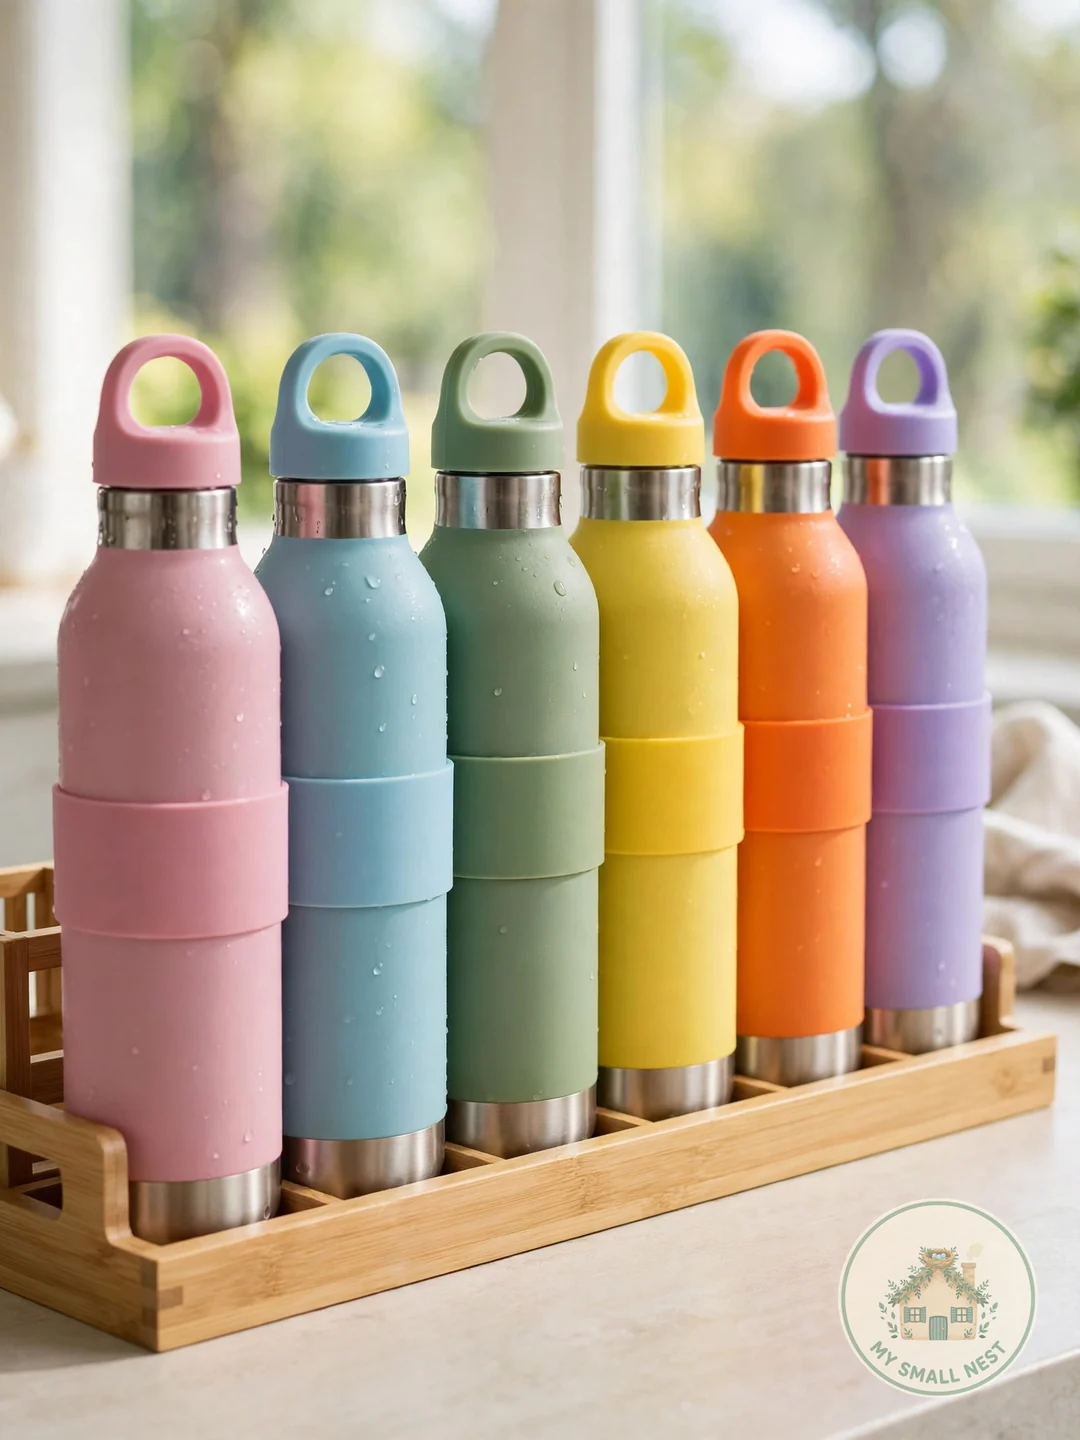
Assign each family member a bottle color or style and label it — no more mystery bottles, no more washing five identical ones. Silicone bands ($6 for a set) mark bottles without permanent labels. Kids get fun colors they’ll actually keep track of; adults get the insulated ones. When everyone owns their bottle, bottles stop multiplying — because the “whose is this?” bottle is the one that gets replaced by a new purchase.
Make it work: Write names with a paint marker on stainless bottles — it survives dishwashing.
 Pin it
14. Use the Above-Fridge Cabinet for Overflow
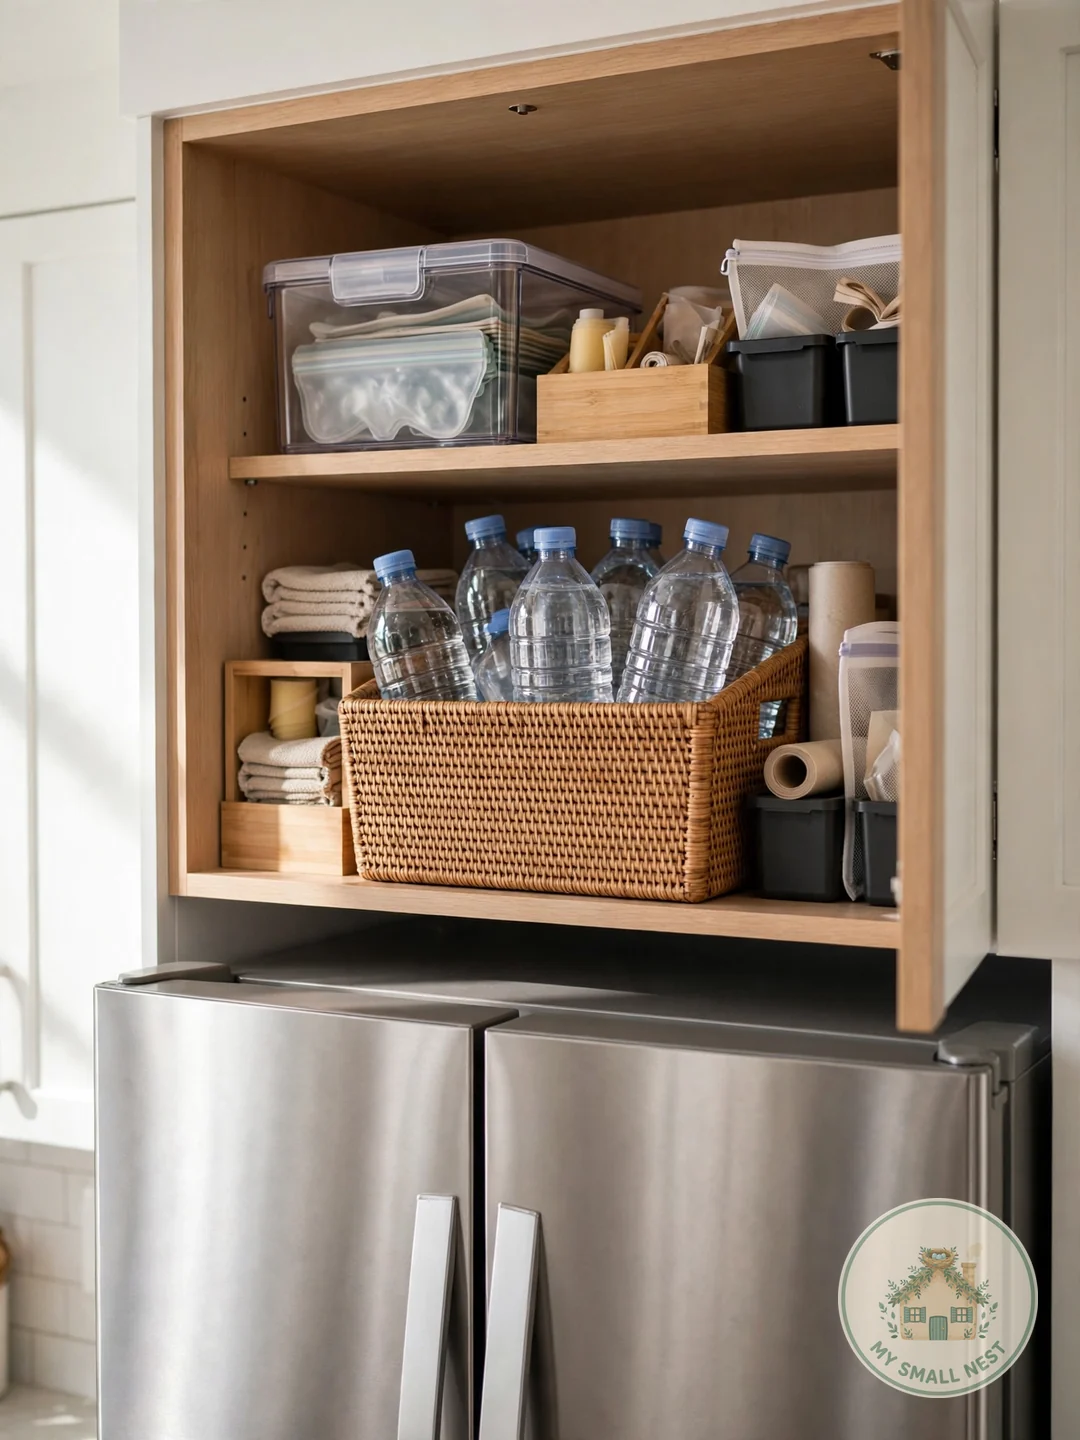
That awkward cabinet above the fridge is perfect for the overflow: out-of-season or spare bottles live up there in a labeled bin, while daily bottles stay at arm’s reach below. Keep a small step stool nearby so the high bin is actually accessible — storage you can’t reach is just clutter with extra steps. Rotate seasonally: insulated bottles up in summer, gym bottles down. One labeled bin keeps the overflow contained instead of spreading across every shelf.
Make it work: Never store daily-use items above the fridge — the heat shortens the life of plastic.
Emma’s note: In my 380 sq ft studio, the above-fridge cabinet is the only “attic” I have — one labeled bin up there holds spare bottles, the holiday tablecloth, and the blender I use twice a year. The step stool lives right beside the fridge, because a storage spot that needs a chair dragged across the kitchen never gets used.
 Pin it
15. Audit the Collection Quarterly
Once a quarter, spend five minutes re-matching lids, tossing worn bottles, and wiping the storage area. Bottles multiply silently — the audit catches it before chaos returns. Check for the warning signs: musty smells (not drying fully), cracked lids, and bottles nobody claims. A small, fresh collection beats a large, grimy one. Put a recurring phone reminder on the first Sunday of each quarter and it becomes a habit, not a project.
Make it work: Replace plastic bottles yearly — they degrade and harbor bacteria in scratches.
 Pin it
5 Mistakes to Avoid
Organizing before purging
Buying racks for 15 bottles when you need 6 just organizes the excess. Purge orphans and duplicates first — then organize what’s left. You’ll spend less and the system will actually fit.
Storing bottles with lids on
Sealed damp bottles grow musty smells and take twice the space. Air-dry fully, store lids separately in a small bin.
Using deep cabinets with no helpers
Bottles in a deep, dark cabinet become an excavation site. Add a lazy Susan, riser, or move bottles to a drawer where everything is visible.
Letting bottles multiply unchecked
Free conference bottles and duplicates creep in constantly. A one-in-one-out rule and quarterly audit keep the collection sane.
Ignoring the kids’ bottles
Small bottles get lost among adult ones. Give kids their own low bin or door-rack row — when you organize water bottles for a family, everyone needs an assigned spot.
FAQs
What’s the best way to organize reusable water bottles?
File bottles horizontally in a wine rack or sideways magazine holders inside a cabinet, store lids separately in a small bin, and keep daily-use bottles in a deep drawer or on hooks. The key to organize water bottles successfully is giving every bottle and lid a fixed home.
How should I store water bottle lids?
In a small dedicated bin, basket, or drawer divider — never screwed onto stored bottles. Air-dry lids fully first to prevent musty smells.
How many reusable water bottles do I need?
One per person plus 2–3 spares covers most households. Kids in sports may need one extra each. More than that is clutter, not convenience.
Why do my stored water bottles smell musty?
They were stored damp or with lids sealed on. Always air-dry bottles upside down completely (a drying rack helps), then store with lids off in a ventilated spot.
Where should I store water bottles in a small kitchen?
An over-the-door pantry rack, wall hooks for daily bottles, and a single deep drawer handle most collections. Above-fridge cabinets work for overflow spares.
Water bottle chaos ends the same way all clutter ends: fewer items, each with a home. Purge the orphans, file the keepers, bin the lids, and assign everyone their spot.
Start with the 10-minute purge tonight — then pick one storage method from these ideas to organize water bottles and enjoy opening that cabinet again.


What readers are saying
No comments yet — yours could be the first.