 My Small Nest
There is something magical about a glowing pumpkin on a front porch — it turns an ordinary October evening into pure Halloween. But if the thought of carving makes you nervous, you are not alone: most people assume pumpkin carving takes artist-level skills and scary-sharp knives, when the cutest designs are honestly the simplest ones.
Here are 20 easy pumpkin carving ideas anyone can pull off, from timeless jack-o’-lanterns and glowing scripted words to no-saw drill patterns and kid-safe no-carve options. Every idea includes the exact pumpkin size to buy, the tools that make it foolproof, and a pro tip to make it glow brighter and last longer. This one’s for beginners, busy parents, and apartment dwellers who want a great porch without the mess — grab a pumpkin and let’s make this your best Halloween yet.
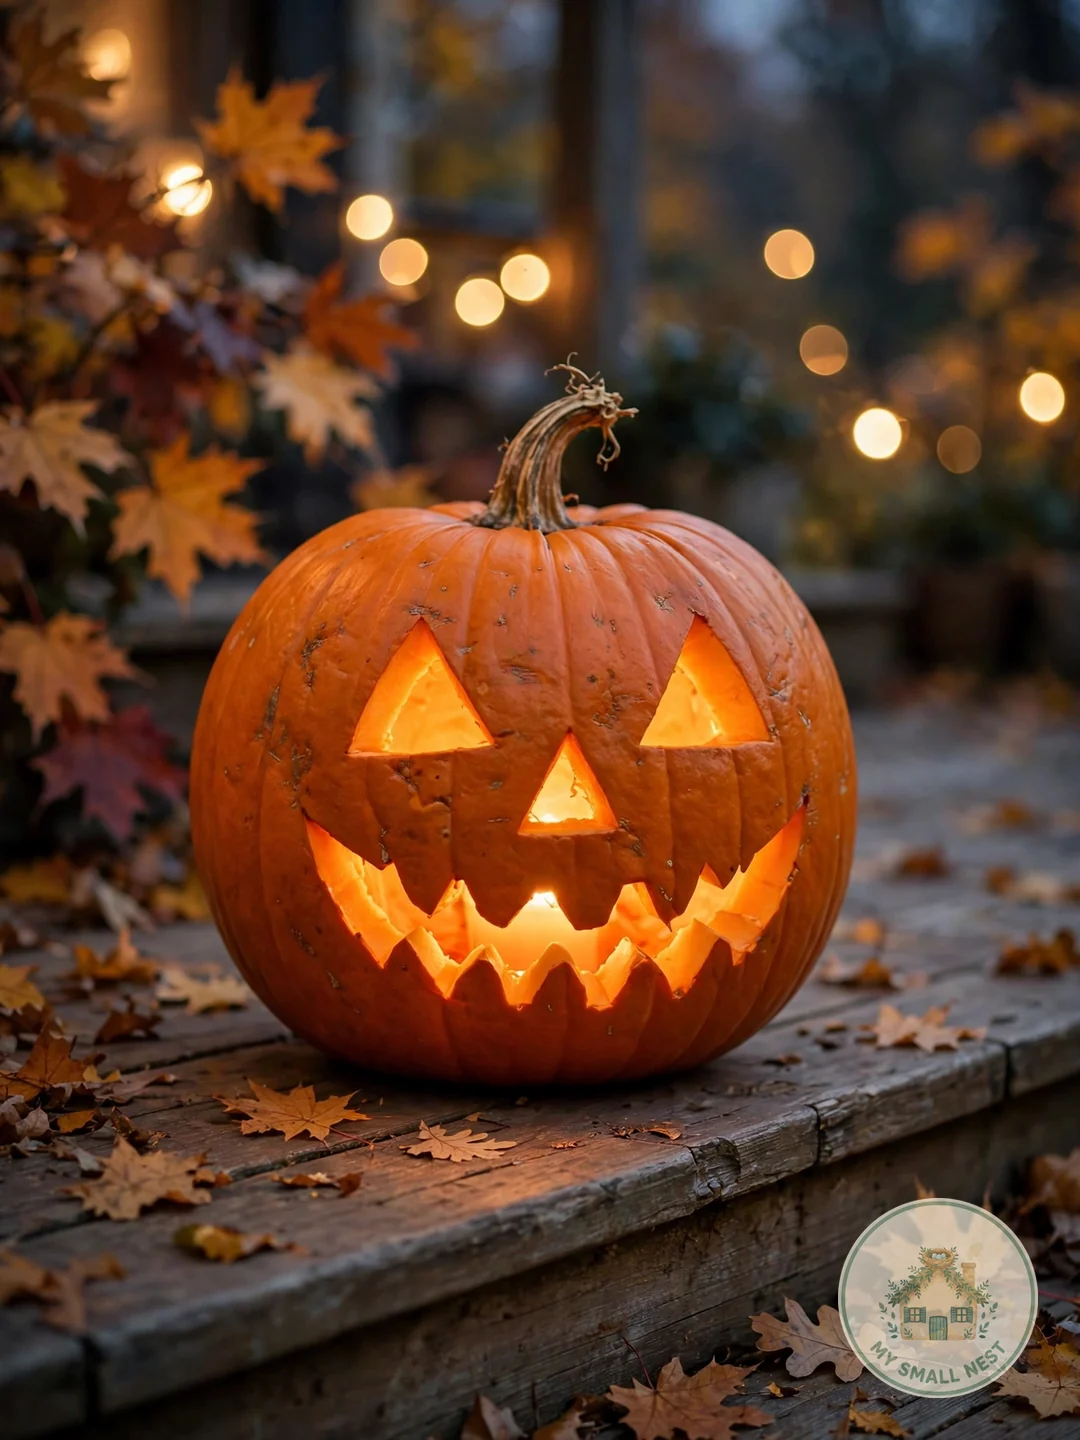
1. The Perfected Classic Jack-o'-Lantern
The triangle-eyed jack-o’-lantern is the icon of Halloween for a reason — it reads instantly from the street and takes under 30 minutes. Pick a pumpkin 10-12 inches tall with a flat base and a sturdy stem you can grip, then cut the lid at a 45-degree inward angle so it settles back on like a puzzle piece instead of dropping inside. Scrape the inner walls down to about 1 inch thick with an ice cream scoop so light shines through evenly, and sketch your triangle eyes, nose, and toothy grin with a dry-erase marker first so you can wipe and restart as many times as you like. Cut with a serrated pumpkin saw using short push-pull strokes, always working away from your body — and save the cut-out triangles to roast the seeds later.
Make it work: Rub petroleum jelly along every cut edge to seal in moisture — your classic jack-o’-lantern will stay fresh-looking on the porch for up to a week instead of shriveling by day three.
 Pin it
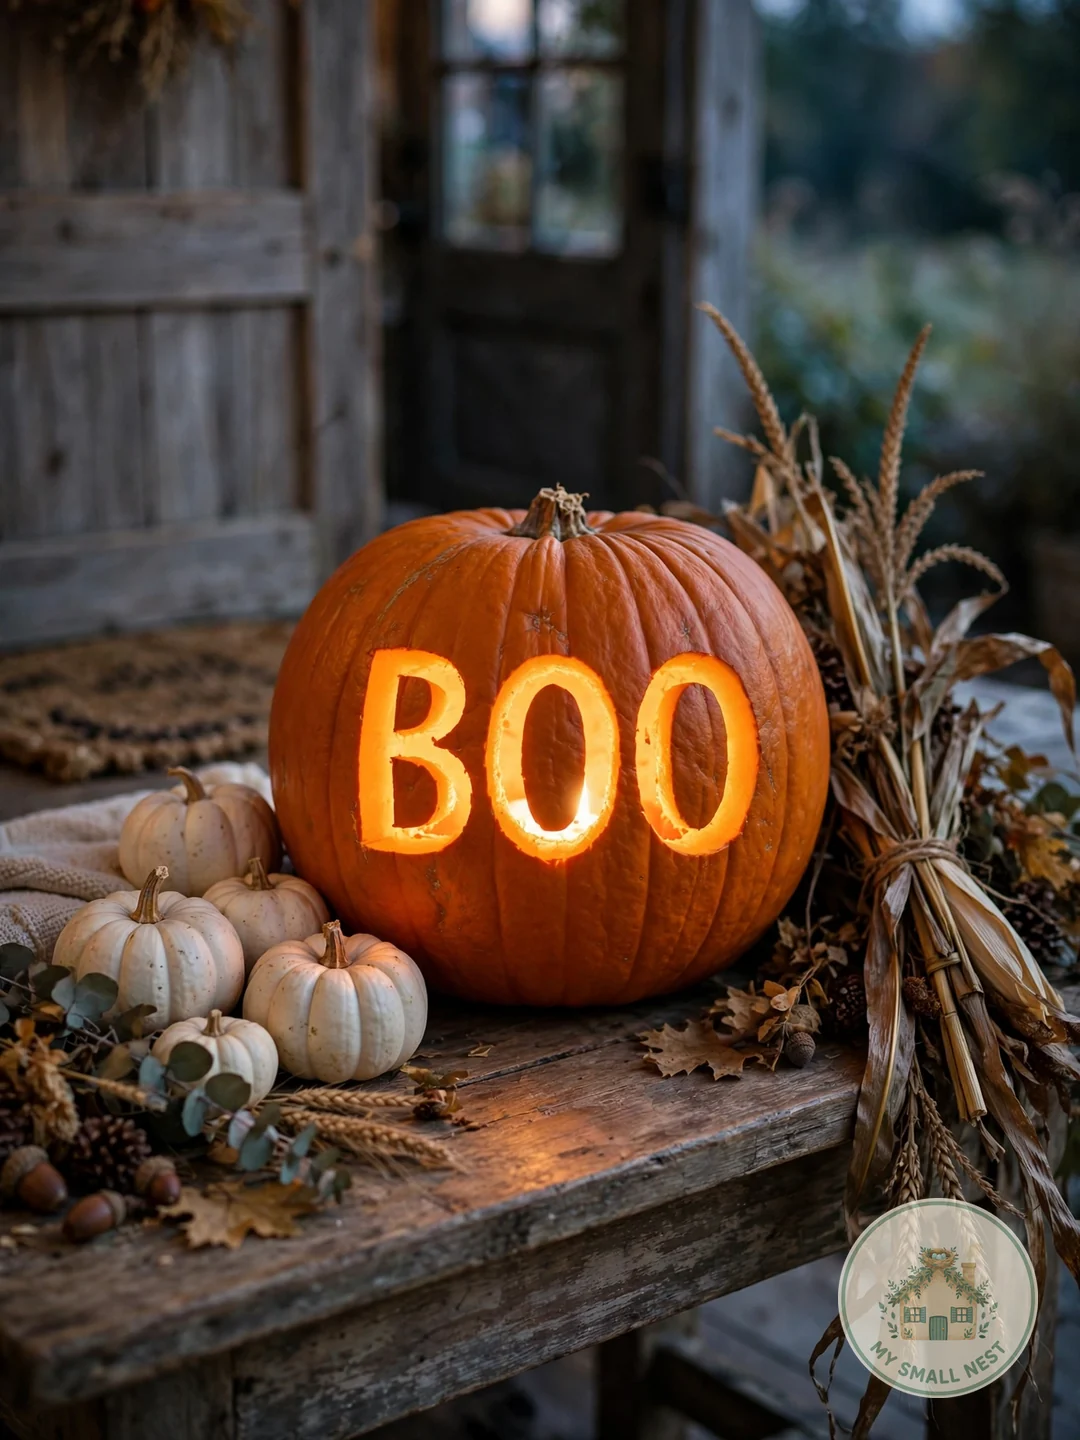
2. Sweet Scripted Boo Cutout
Nothing says cute Halloween like the word “BOO” glowing from a pumpkin, and it looks impressive while being secretly one of the easiest carving ideas — block letters are just straight cuts. Choose a round, smooth pumpkin 9-11 inches wide so the letters have a flat canvas, print the word BOO in a bold font at about 6 inches wide, and tape the paper to the pumpkin. Poke along the letter outlines with a pushpin to transfer the design as a dot pattern, connect the dots with a marker, then carve each letter out completely with your serrated saw. The open letters let maximum light pour through, so this design glows brighter than almost any other on this list.
Make it work: Place two battery tea lights inside instead of one — the double light source makes scripted letters pop crisply with no dark spots in the middle of the O’s.
 Pin it
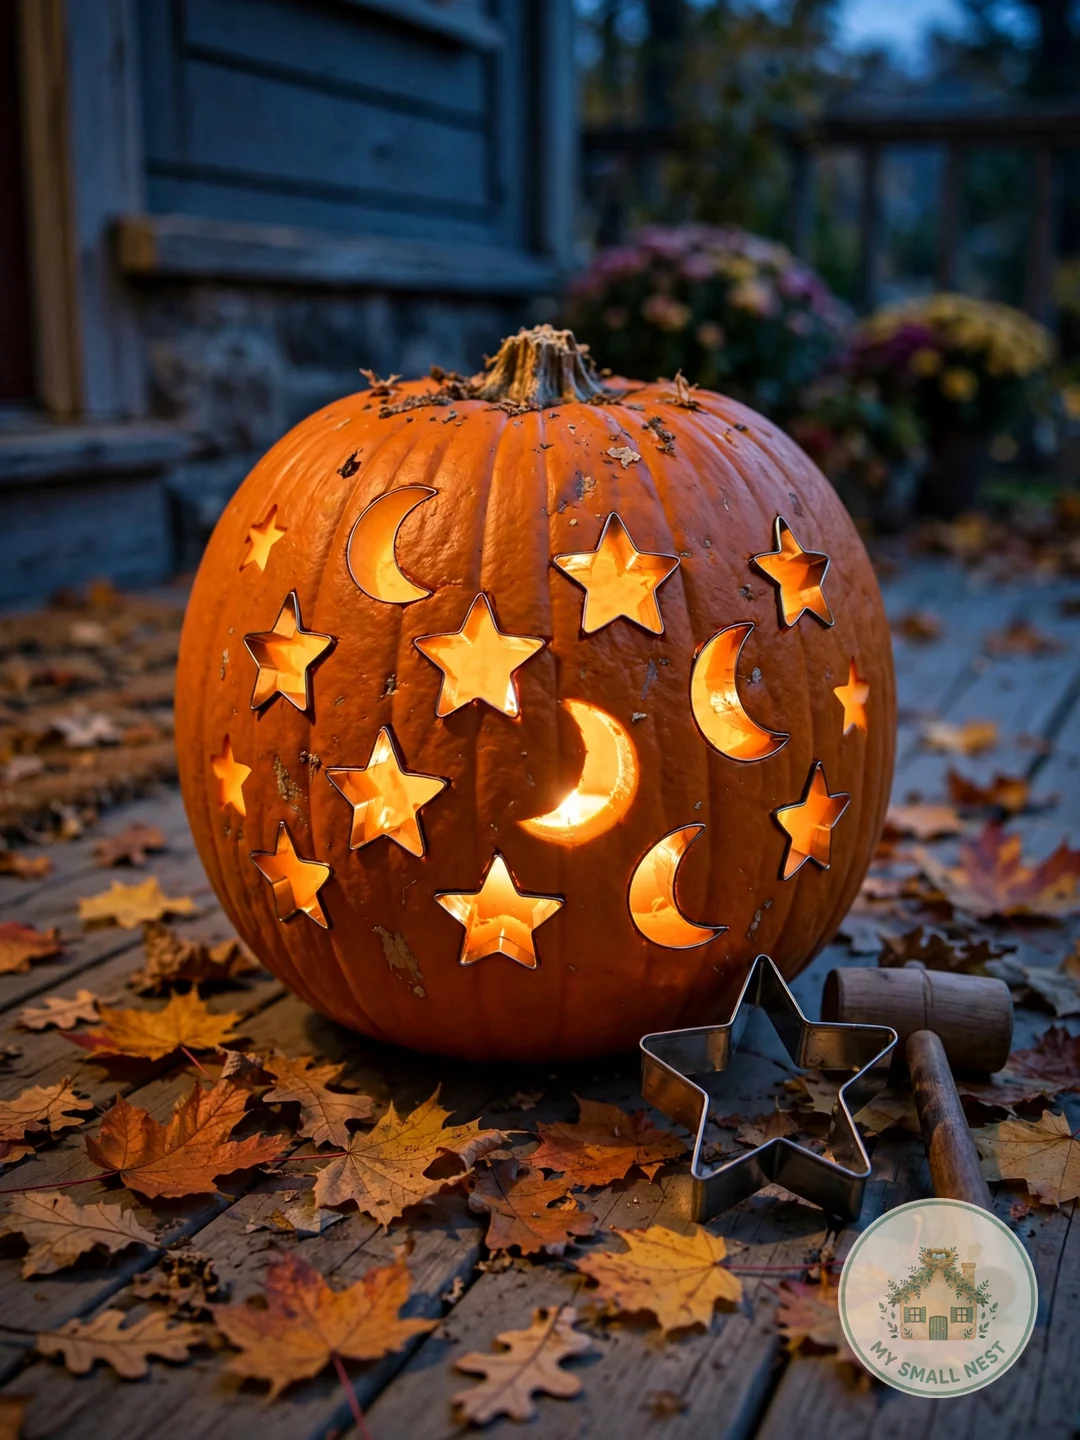
3. Cookie-Cutter Shape Magic
Metal cookie cutters are the ultimate pumpkin carving cheat code: stars, hearts, moons, and leaves become perfectly shaped cutouts in seconds with zero drawing skill required. Use a firm pumpkin 8-12 inches tall and choose metal cutters (not plastic) in 2-3 inch sizes — a $10 set from the Michaels or Joann baking aisle gives you a dozen shapes. Press the cutter firmly where you want the shape and tap it gently with a rubber mallet until it punches about halfway through the rind, then finish the outline with your saw or simply push the shape through. A scattered pattern of stars and moons looks like a Halloween night sky and takes about 15 minutes total. Little hands can place the cutters while an adult does the tapping, which makes this wonderfully kid-friendly.
Emma’s tip: I tried this in my studio with zero counter space — I carved on a baking sheet on the floor, and the cookie-cutter method was the only one that didn’t make a mess everywhere. Dip the cutter edge in vegetable oil before each punch; it slides through the rind cleanly instead of tearing, giving you crisp edges with half the effort.
 Pin it
4. Drill-Bit Dot Constellation
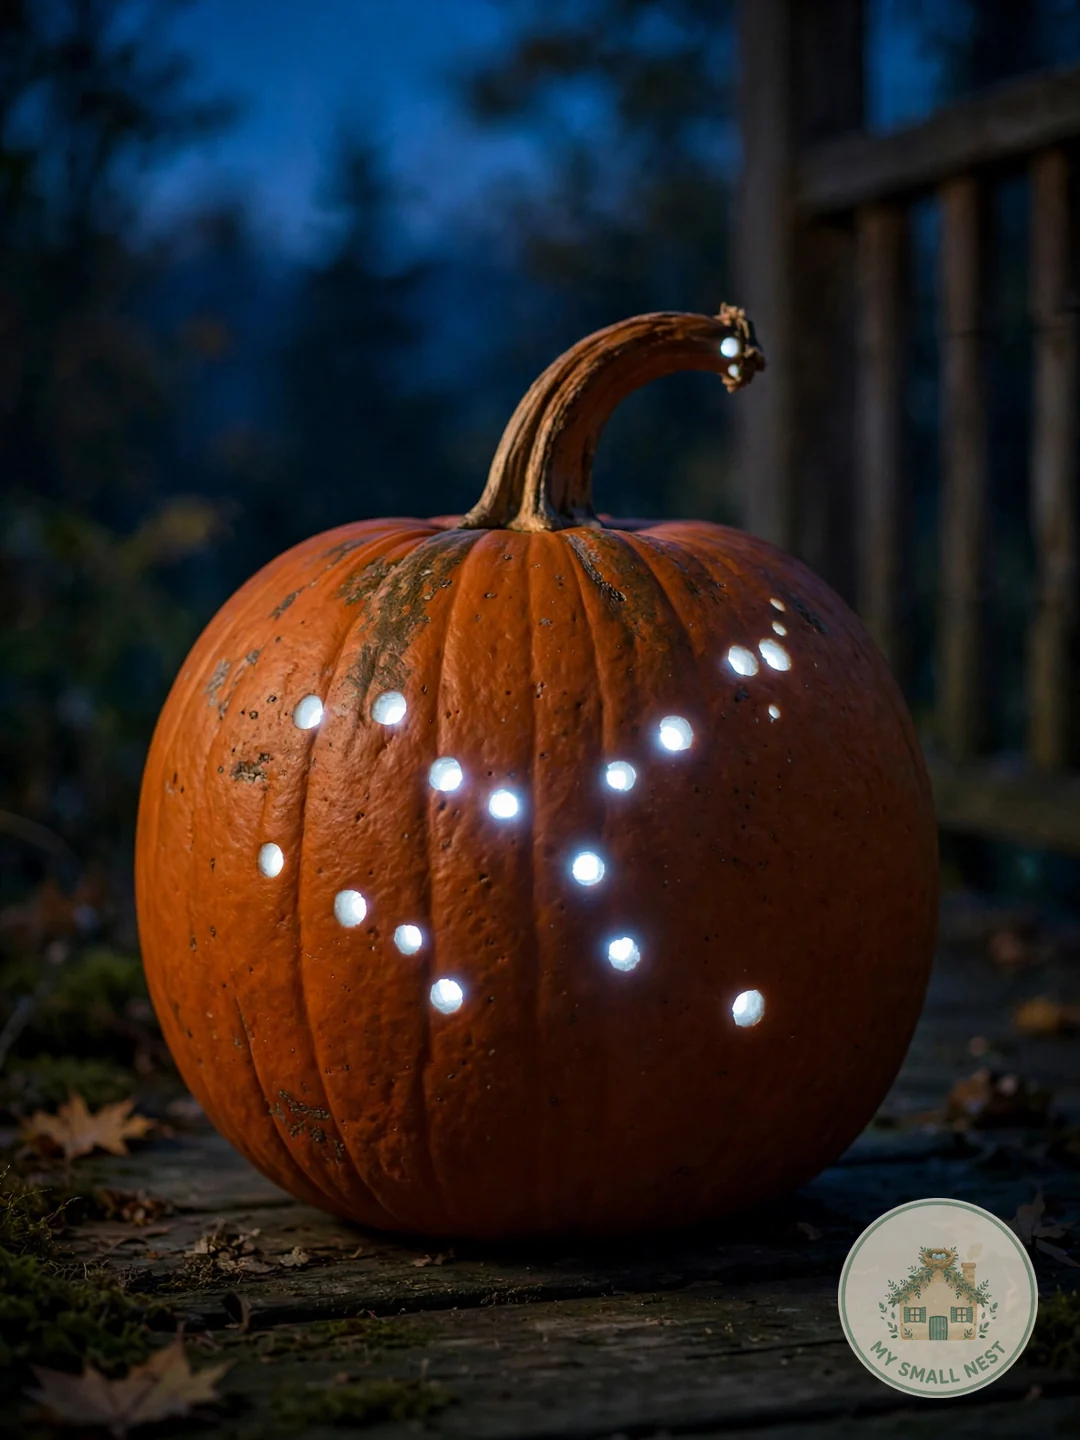
Put down the saw and pick up a drill — dotted constellation pumpkins are the easiest carved look that still wows the neighbors. You only need a power drill and two bit sizes: 1/4 inch for small dots and 1/2 inch for bold ones. Sketch a simple constellation like the Big Dipper, or just a swirl pattern, on the pumpkin with chalk, then drill straight through at each mark, pulling the bit out cleanly. Varying the dot sizes creates depth, with bigger holes glowing brighter like real stars. Because there is no sawing and no lid to cut, this is one of the fastest easy pumpkin carving ideas — most people finish in 20 minutes — and it works beautifully on small 6-8 inch pumpkins lined up as a glowing constellation row.
Make it work: Drill from the outside in and keep a steady speed — rushing the bit cracks the rind, while slow, steady pressure leaves perfect round holes every time.
 Pin it
5. Pumpkin Family Cluster
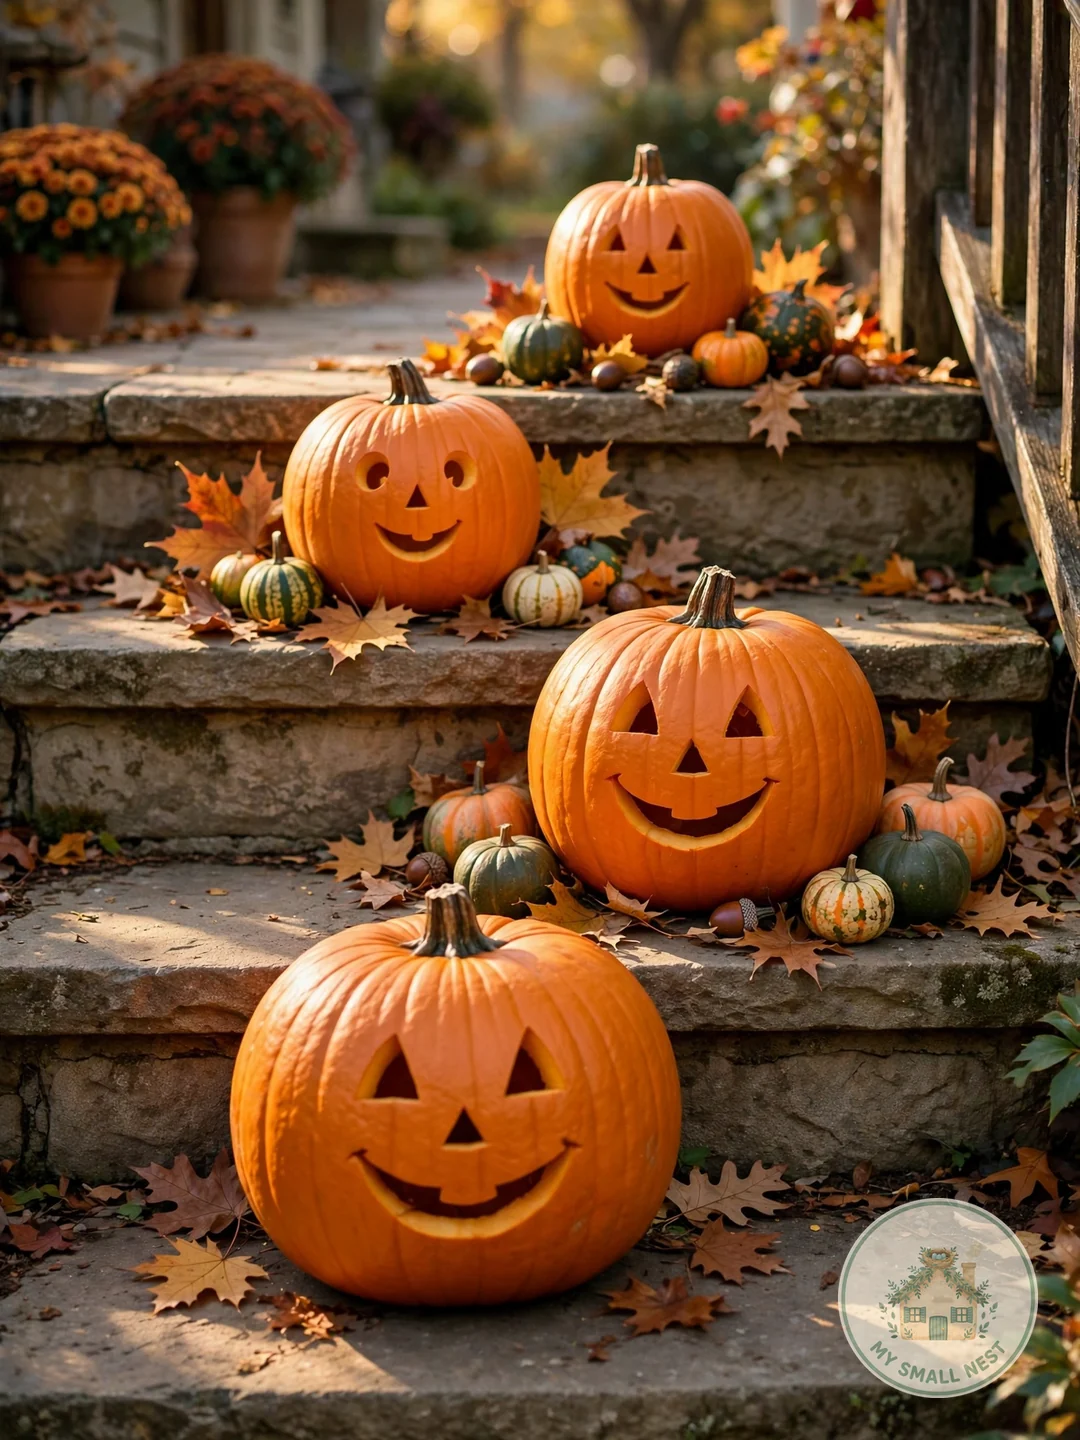
A pumpkin family is instant porch charm: three to five pumpkins in descending sizes, each with its own simple expression. Shop for a graduated set — roughly 12, 10, 8, and 6 inches tall — with similar orange coloring so they read as a group; grocery stores like Trader Joe’s and Aldi sell small pumpkins for $1-3 each in October. Give the biggest a happy grin, the next a surprised round O mouth, then a sleepy face and a tiny toothy smile for the littlest one. Simple circle eyes and basic mouths are all you need — the cuteness comes from the size variety, not carving skill. Arrange them on your steps with the tallest in back, spacing them 2-3 inches apart, and tuck fall leaves or mini gourds between them. Add a battery light to just two or three of them; not every pumpkin needs to glow for the cluster to look magical at night.
Make it work: Carve the faces slightly above center on each pumpkin so they are all visible when the pumpkins sit at different heights on your steps.
 Pin it
6. Wide-Eyed Woodland Owl
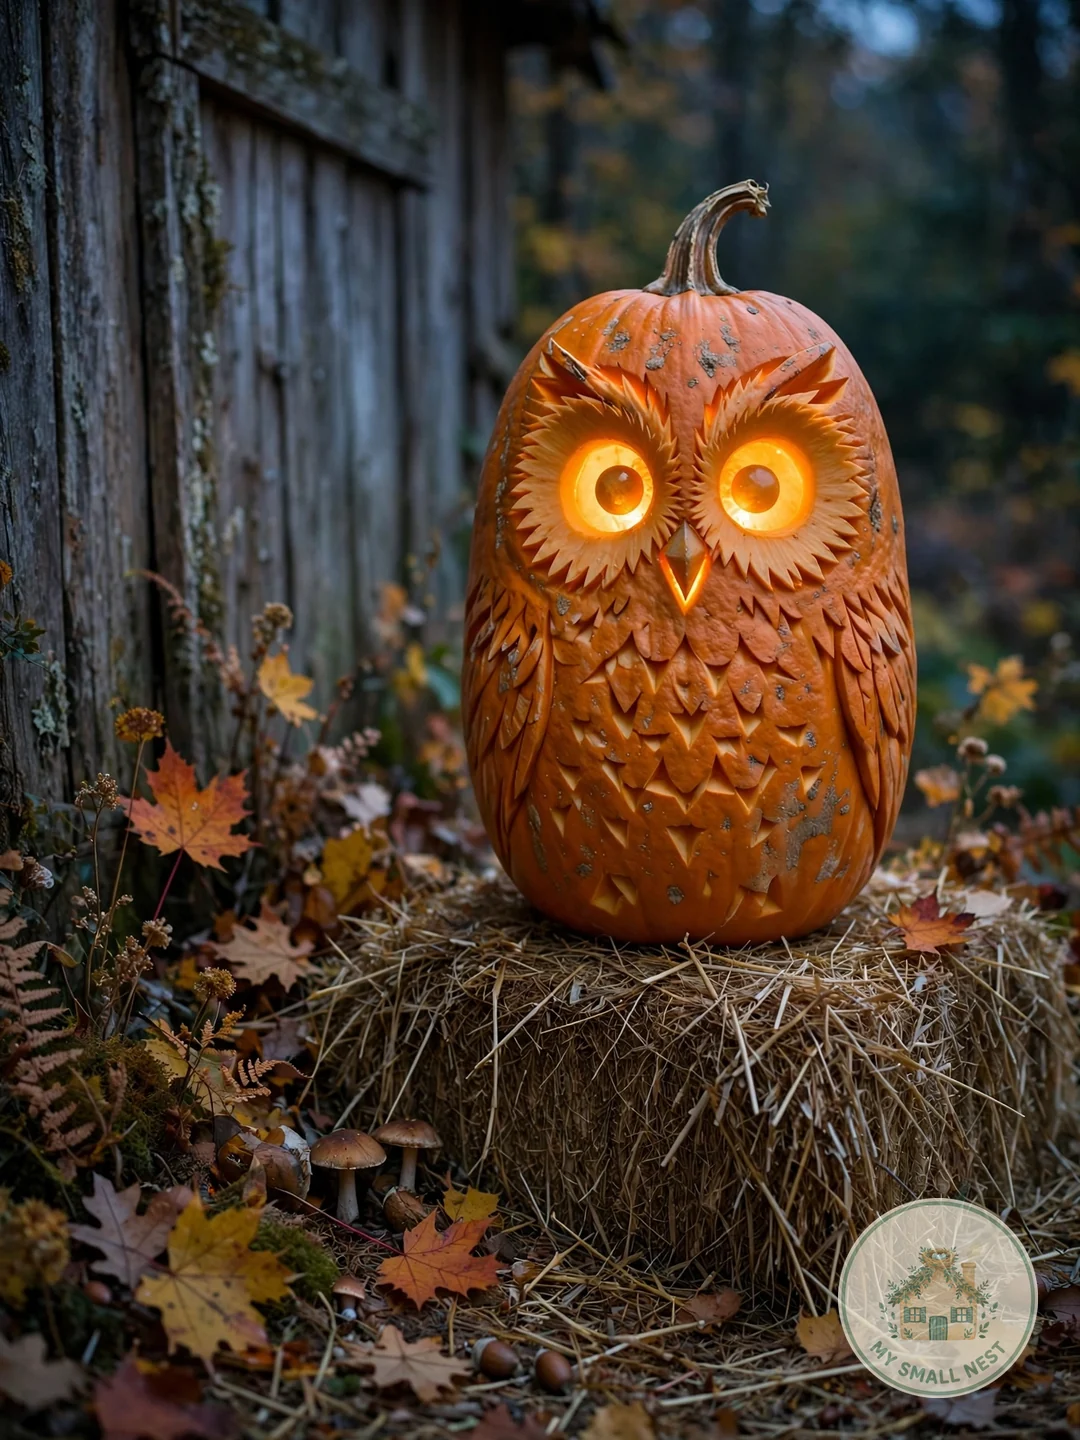
An owl pumpkin looks wise and adorable at the same time, and it is easier than it appears because the whole design is just circles and one triangle. Start with a tall oval pumpkin 11-14 inches high — the elongated shape naturally reads as an owl body. Carve two large 3-inch circles for eyes and one small downward triangle for the beak, positioned in the upper third of the pumpkin. For feathers, skip carving and instead scrape shallow crescent shapes into the rind with a linoleum cutter or the edge of a spoon; the scraped areas glow softly while the deep-cut eyes blaze bright, creating a lovely two-tone effect. Perch your owl on a hay bale or a stack of books so it sits at eye level, where the big glowing eyes have maximum impact.
Make it work: Place the light low inside the pumpkin, near the base — light from below makes the owl eyes look bigger and more dramatic, like a real night hunter.
 Pin it
7. Friendly Floating Ghost
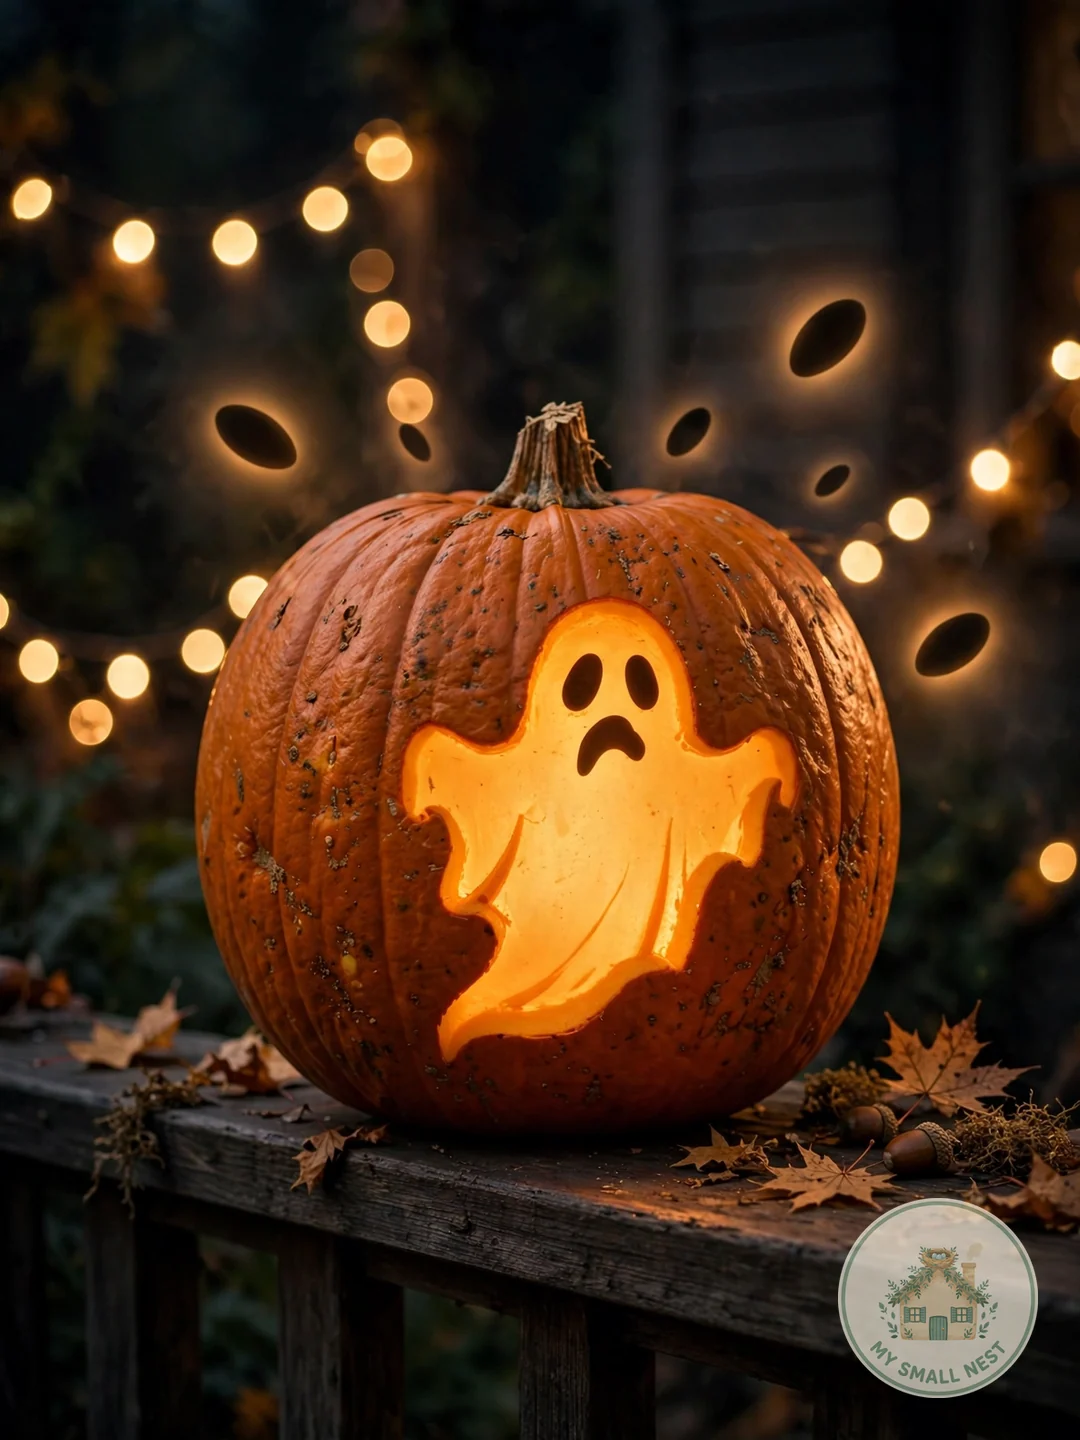
This ghost design skips the face entirely — you carve the ghost’s silhouette and let the whole shape glow like a friendly spirit. Draw a classic sheet-ghost outline about 8 inches tall on the side of a 10-12 inch pumpkin: rounded head, wavy bottom edge, with two oval eyes and a small oval mouth left as solid pumpkin within the cutout. Carve around the ghost shape so the rind becomes the ghost’s glowing body against the dark night. Because the eyes stay uncut, they appear as dark spots floating in the light, which looks wonderfully spooky-cute. This is one of the best easy pumpkin carving ideas for beginners since the wavy outline hides any wobbly cutting — imperfections just make your ghost look more characterful.
Emma’s tip: I tried this in my studio with a pumpkin from the corner grocery’s $4 bin, and the silhouette method forgave every wobble in my cutting. Hang a string of warm fairy lights ($8 on Amazon) behind the pumpkin on your porch or windowsill — the extra backlight makes the ghost silhouette glow with a soft halo effect that looks genuinely professional.
 Pin it
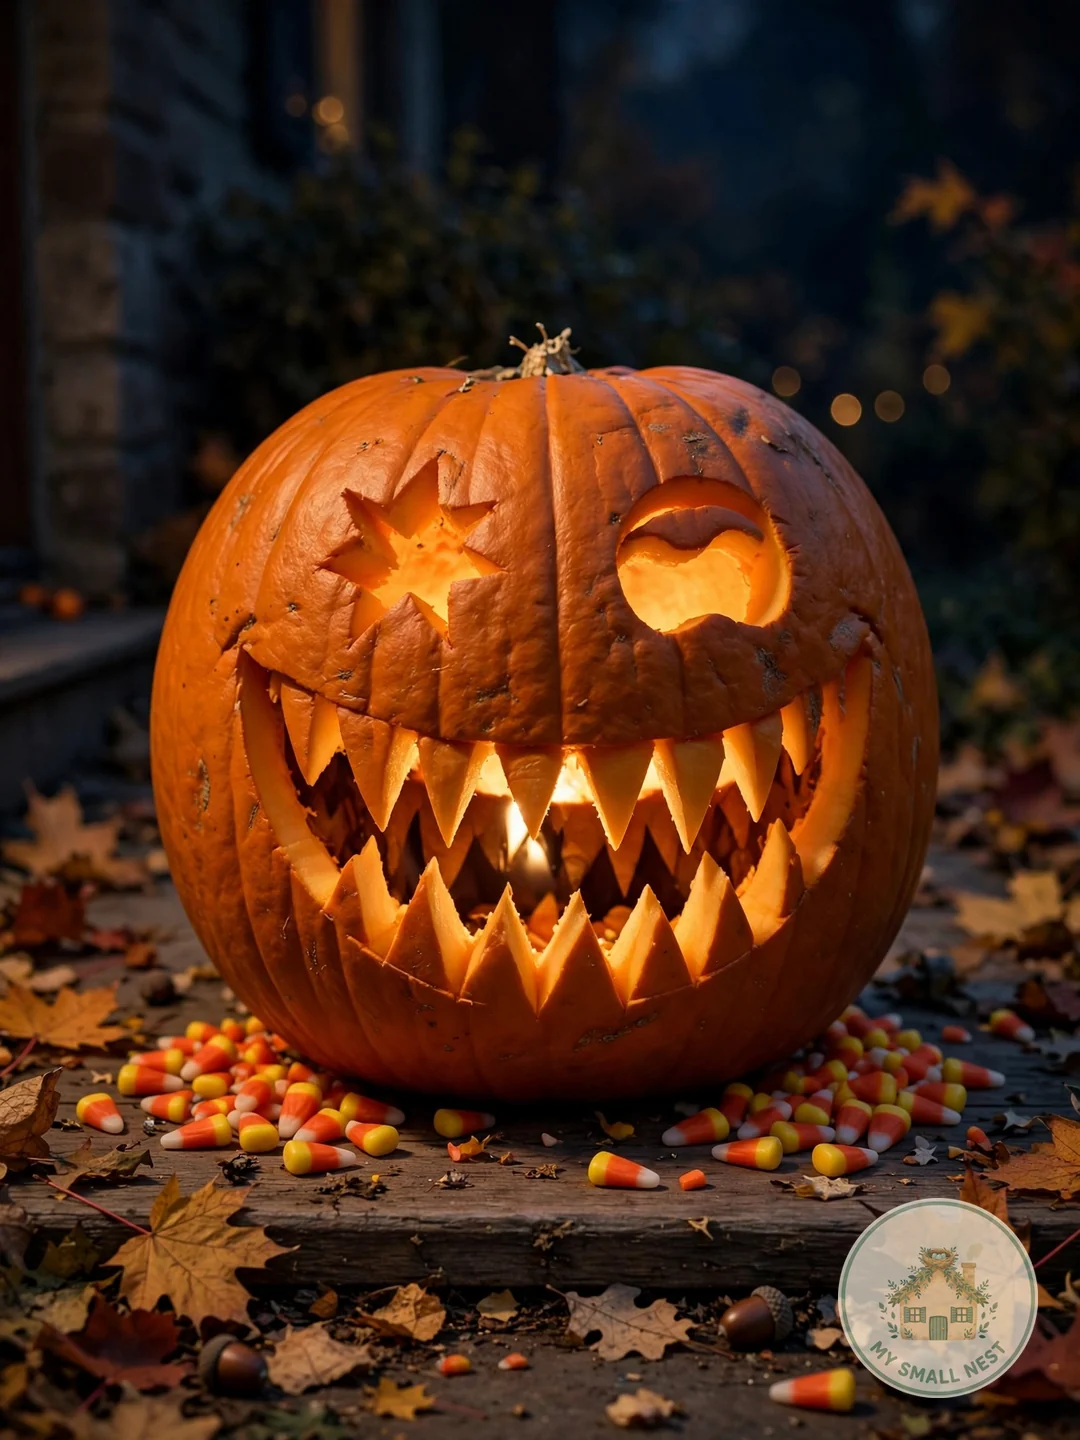
8. Sharp-Toothed Monster Grin
A jagged monster mouth turns any plain pumpkin into a creature with personality, and zigzags are far easier to cut than curves. Draw a wide grin stretching 6-8 inches across the pumpkin, then mark triangles pointing up along the top edge and down along the bottom edge — these become the teeth. Carve out the mouth shape in one piece, leaving the triangles attached as sharp fangs, and add two mismatched eyes (one big circle, one small triangle) to make it look playfully monstrous rather than scary. This design is endlessly customizable: add horns with small triangle cutouts on the lid, or carve a second smaller mouth on the back so trick-or-treaters get a surprise from every angle. Kids especially love this one because it looks fierce but takes mom or dad only about 25 minutes.
Make it work: Use a flickering LED candle inside — the moving light makes the teeth shadows dance, and your monster looks like it is actually chomping.
 Pin it
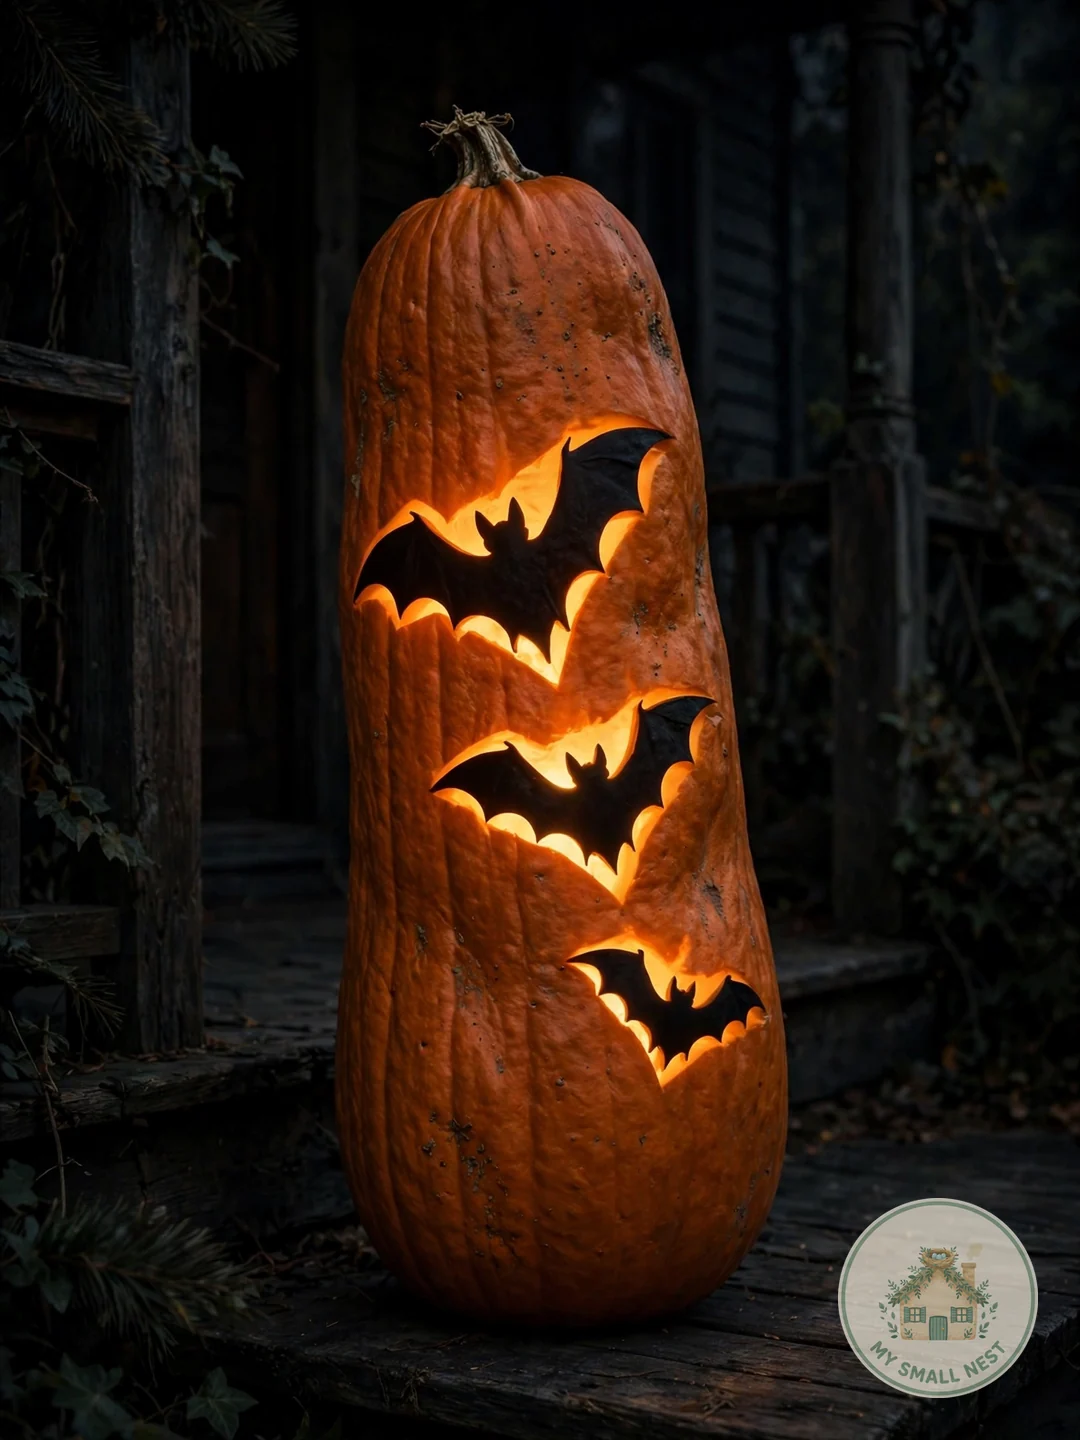
9. Flying Bat Silhouette
A bat silhouette is Halloween minimalism at its finest: one bold shape, maximum atmosphere. Find or draw a bat template about 7 inches wide with scalloped wings (free printables are all over Pinterest), then transfer it to the pumpkin with the pushpin-dot method. A tall pumpkin 12-14 inches high gives the wings room to spread dramatically. Carve the entire bat shape out so it becomes a dark silhouette glowing from within — the scalloped wing edges catch the light beautifully. For extra drama, carve three bats in descending sizes (7, 5, and 3 inches) flying diagonally across the pumpkin as if swooping past the moon. This design photographs incredibly well because the bold silhouette reads clearly even in a phone photo taken from the sidewalk.
Make it work: Paint the inside of the pumpkin with glow-in-the-dark paint (a $5 bottle from Michaels) before adding your light — the bat edges will keep glowing softly even after the candle is off.
 Pin it
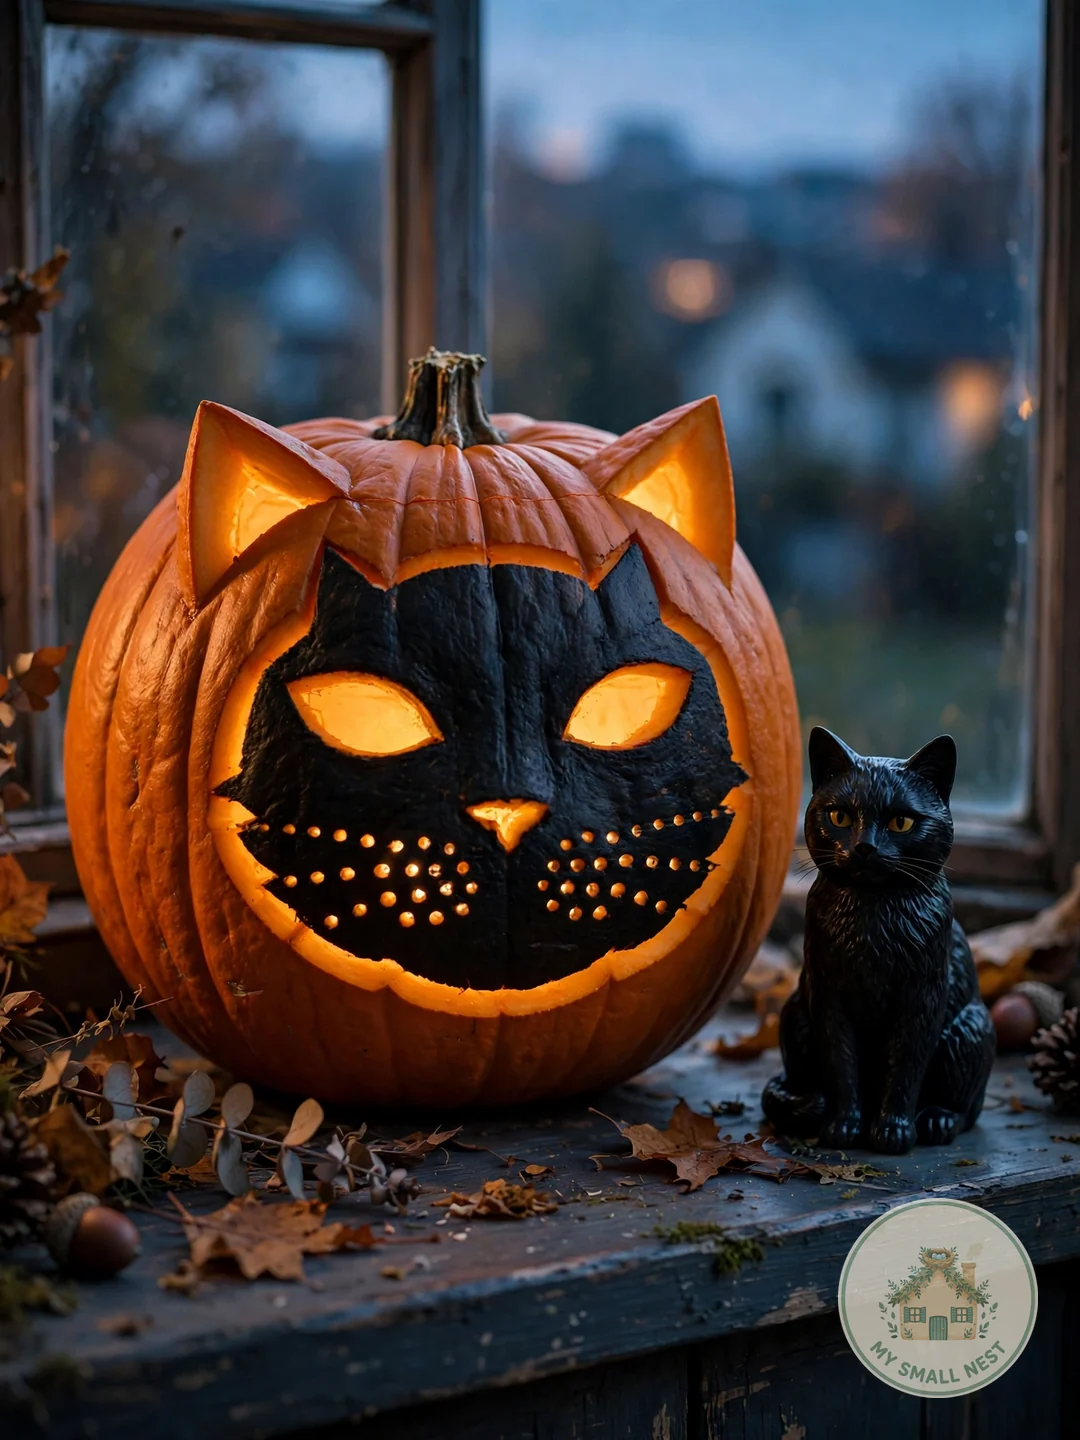
10. Cat Face with Whisker Holes
Black-cat energy without the black paint — this carved cat face is a Halloween classic that cat lovers adore. Choose a round pumpkin 9-11 inches wide and cut two triangle ears directly into the top edge (or carve separate triangles and pin them on with toothpicks for a 3D effect). Carve two almond-shaped eyes and a small triangle nose, then drill three thin whisker holes on each side of the nose with a 1/8-inch bit — the tiny holes glow like delicate light freckles. A small w-shaped mouth under the nose completes the look. The whisker holes are the secret upgrade here: they add intricate detail that looks impressive but takes literally two minutes with a drill. Pair it with a real black cat figurine on the porch for a themed vignette.
Make it work: Angle the whisker holes slightly upward as you drill — the tilted holes catch the inner light better and glow brighter than straight-punched ones.
 Pin it
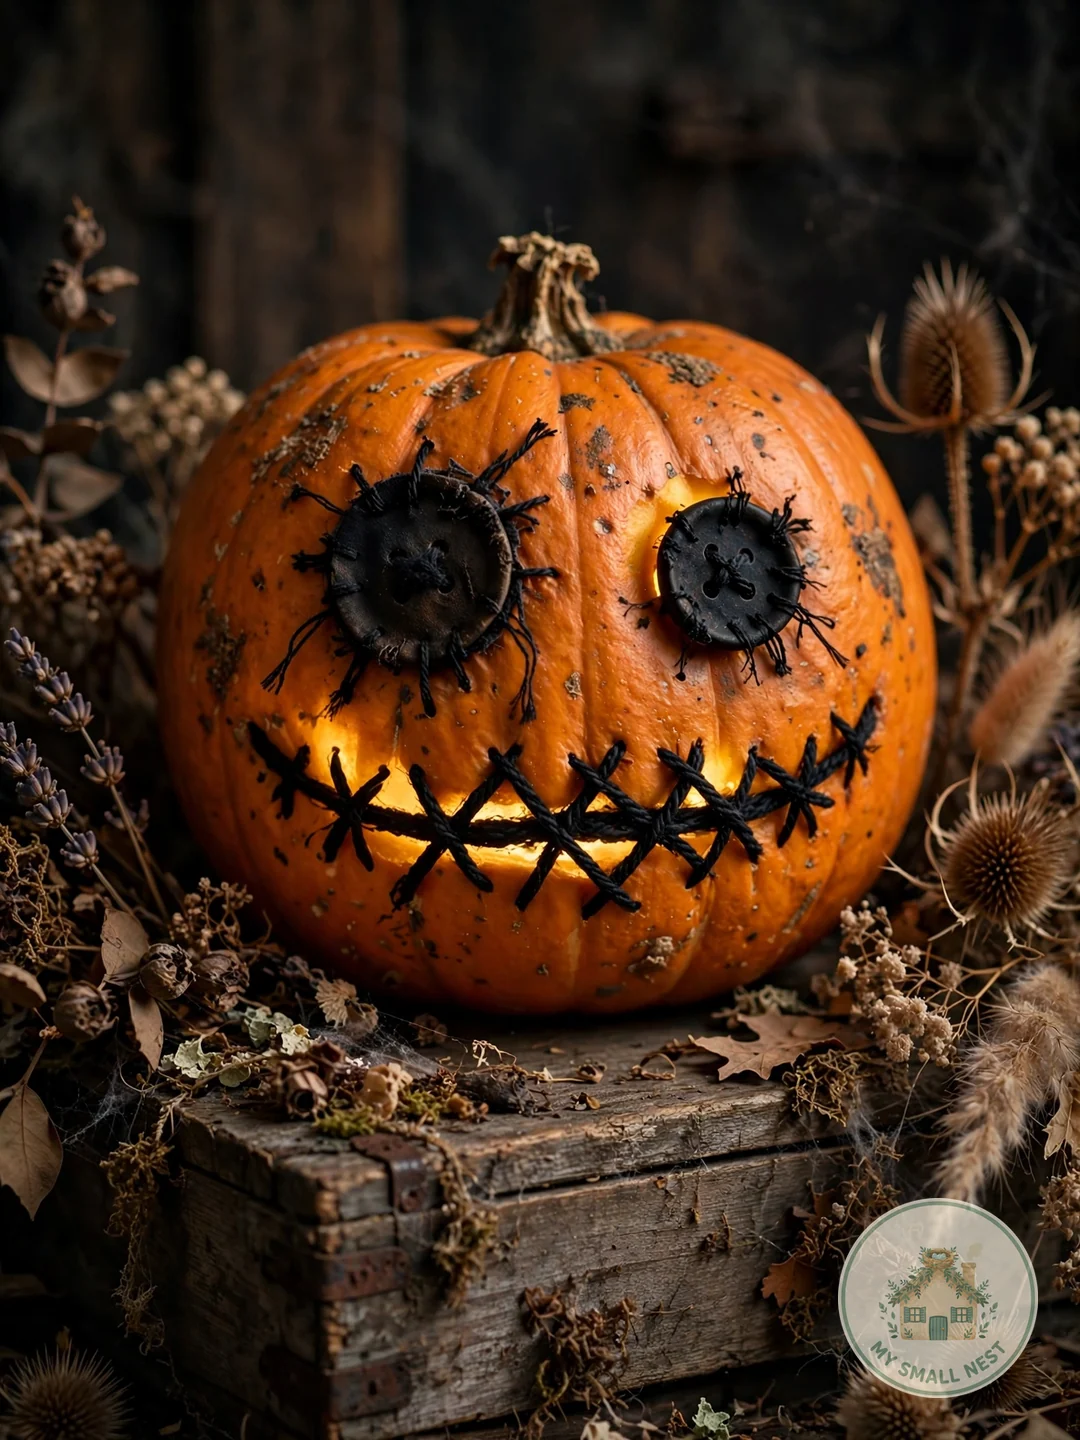
11. Stitched-Up Sewn Mouth
Inspired by spooky dolls and Frankenstein’s monster, a stitched mouth is creepy-cute and shockingly simple. Carve a straight horizontal mouth line about 5 inches long across the pumpkin, then drill a row of small holes above and below the line, spaced about half an inch apart. Thread thick black yarn or orange embroidery floss through the holes in crisscross X patterns to create the “stitches.” Add two uneven button-style eyes (one circle, one X shape) and you have a haunted-doll face that looks like it took hours. The mixed-media trick — carving plus stitching — makes this one of the most unique easy pumpkin carving ideas on the block. Use yarn in contrasting black for spooky or purple for playful; both pop beautifully against orange rind when lit from within.
Emma’s tip: I tried this in my studio and the yarn kept loosening as the pumpkin softened — dab a tiny dot of hot glue on each yarn end inside the pumpkin and the stitches stay taut for weeks. Use embroidery floss from the dollar store’s craft aisle ($1.25 a skein); you need about two skeins and the color options are endless.
 Pin it
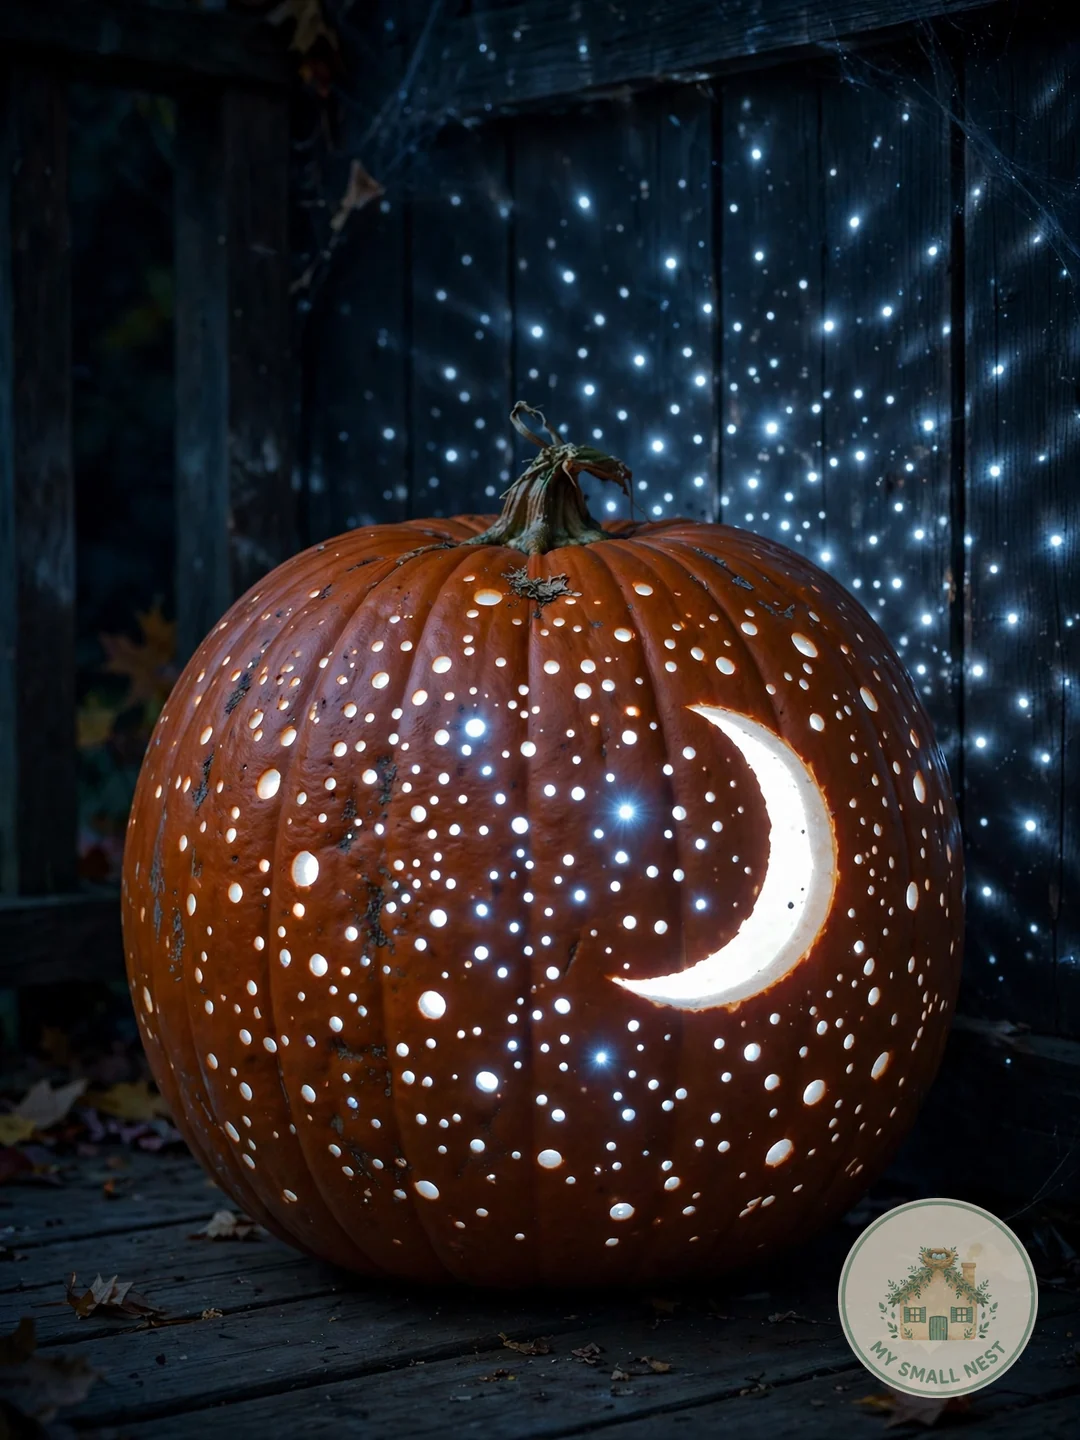
12. Starry Night Glow
Turn your pumpkin into a miniature night sky with nothing but holes in graduating sizes. Drill dozens of holes across the whole pumpkin — tiny 1/8-inch holes for distant stars, 1/4-inch for medium stars, and a few bold 1/2-inch holes as the brightest stars. Cluster them denser on one side like the Milky Way and sparser elsewhere, and add one crescent moon shape with your saw as the centerpiece. When lit, the pumpkin throws constellations of light dots across your porch walls and ceiling — it becomes a light projector, not just a decoration. This design is nearly impossible to mess up since randomness is the whole aesthetic, making it perfect for first-time carvers and impatient kids alike.
Make it work: Use a cool-white LED light instead of warm — the bluish tone reads as authentic starlight and makes the moon cutout look genuinely luminous.
 Pin it
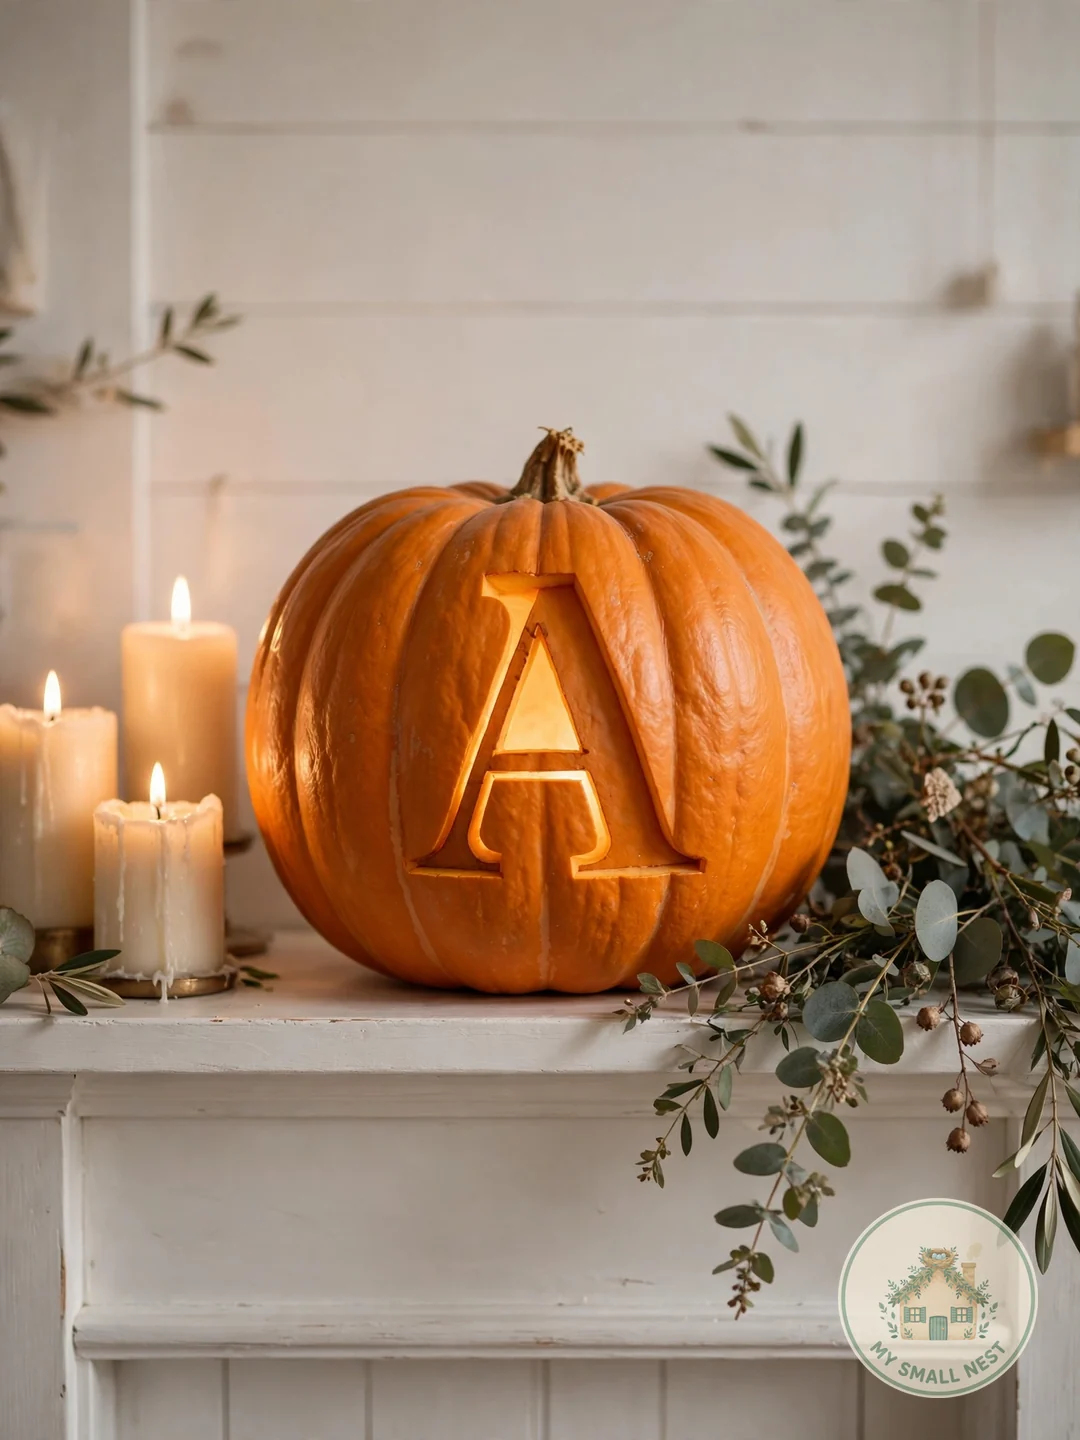
13. Monogram Initial Pumpkin
A single elegant initial makes your pumpkin look custom and classy — think boutique Halloween rather than haunted house. Print your family initial in a serif or script font at 7-8 inches tall and transfer it with the pushpin method onto a smooth, blemish-free pumpkin 10-12 inches tall. Carve the letter completely through so it glows like a neon sign. For letters with enclosed spaces like A, O, or P, leave thin bridges of pumpkin connecting the inner pieces so nothing falls out — two 1/4-inch bridges are invisible at night but keep the design structurally sound. This is a gorgeous choice for wedding-season Halloween parties or housewarming fall decor, and it pairs beautifully with white-painted pumpkins for a modern farmhouse look.
Make it work: Trace the letter twice and carve just inside the lines — letters look sharper when the cut edges are clean, and a slightly smaller cutout glows with crisper definition.
 Pin it
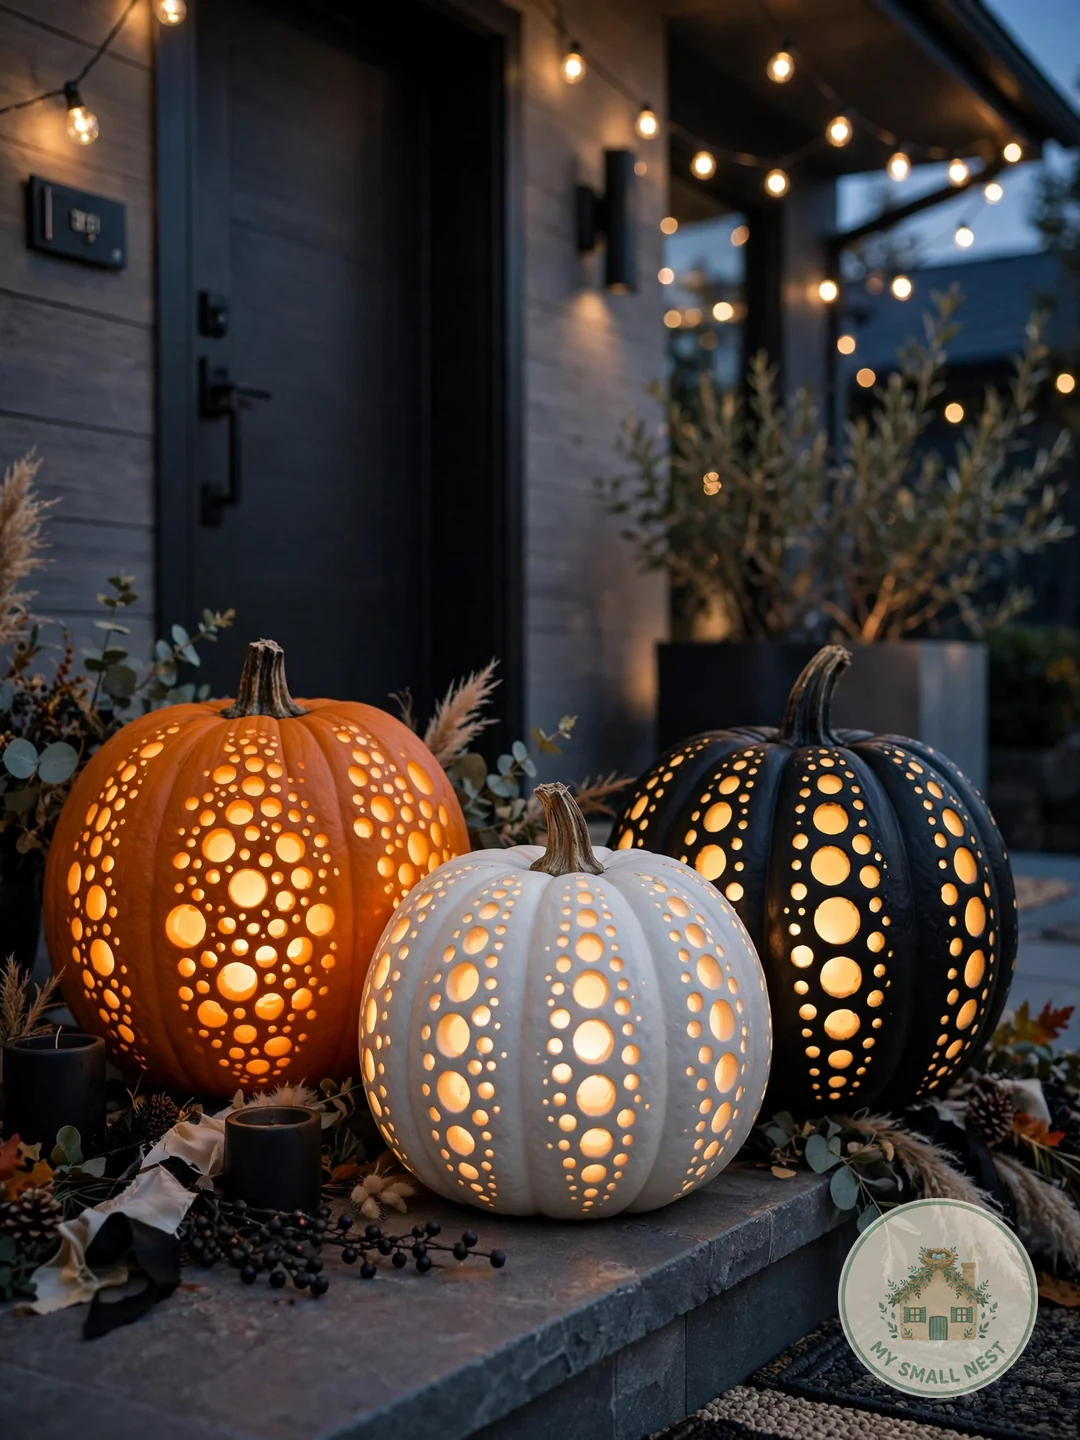
14. Confetti Polka-Dot Pumpkin
Polka dots are pure joy in pumpkin form — festive, modern, and almost comically easy. Drill holes in three sizes (1/8, 1/4, and 3/8 inch) scattered randomly over the entire pumpkin, denser at the top and sparser toward the base for a champagne-bubble effect. The randomness is the design, so there is no template and no way to get it wrong. For a party-ready upgrade, paint the pumpkin white or pastel pink first with two coats of acrylic craft paint (the $0.59 bottles at Michaels), let it dry fully, then drill — the colored rind with glowing dots looks like designer Halloween decor from a boutique. A cluster of three dotted pumpkins in orange, white, and black makes a stunning entryway display that takes under an hour total including paint drying time.
Make it work: Paint first, then drill, then touch up the hole edges with a small brush for the cleanest finish — drilling after painting keeps every dot crisp.
 Pin it
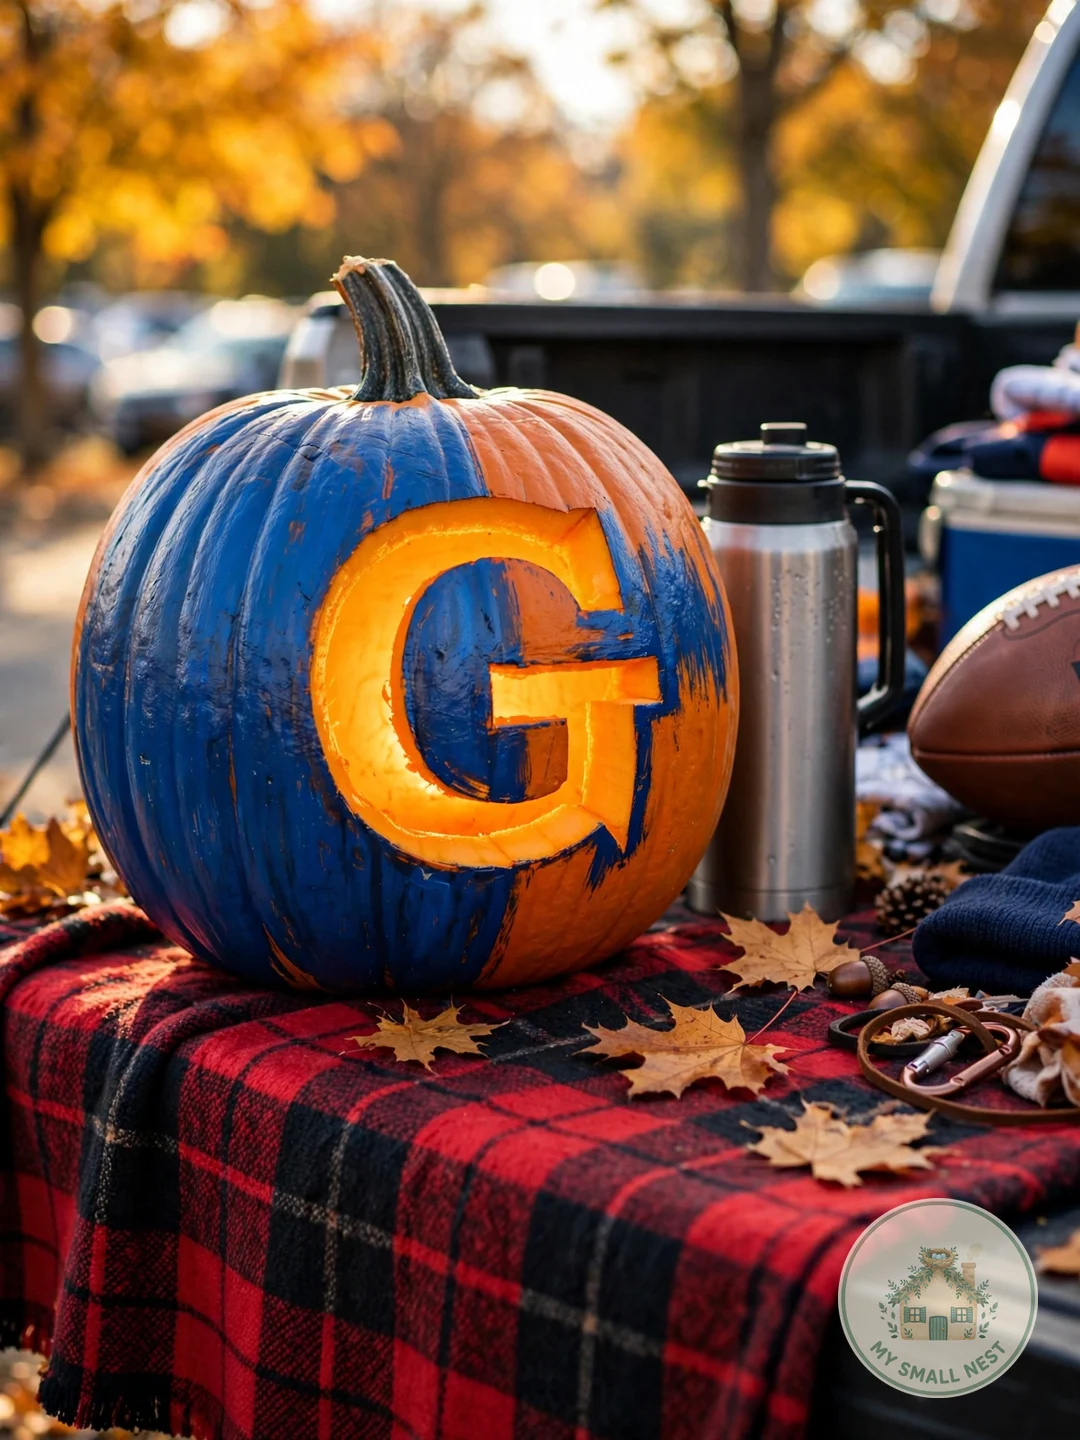
15. Team Spirit Logo Pumpkin
Game day meets Halloween with a team-spirit pumpkin that fans will love. Pick a pumpkin 10-12 inches tall and paint it in your team’s colors with two coats of acrylic paint — white pumpkins take team colors especially well. Once dry, carve a simplified version of the logo or just the team’s initial using the pushpin transfer method; simple bold shapes work far better than detailed mascots. Add stripes or dots in the secondary color with paint around the base for a finished look. This is a tailgate-party showstopper and a fun alternative for households that want festive fall decor without the spooky factor. Seal everything with a clear matte craft sealer so the paint survives October rain on the porch.
Emma’s tip: I tried this in my studio for a friend’s tailgate — painter’s tape is the whole secret. Mask clean stripes and color blocks with tape before painting, and the crisp lines make the difference between craft-project and pro-level fan decor. A $4 roll of blue painter’s tape from the hardware aisle outperforms every steady hand.
 Pin it
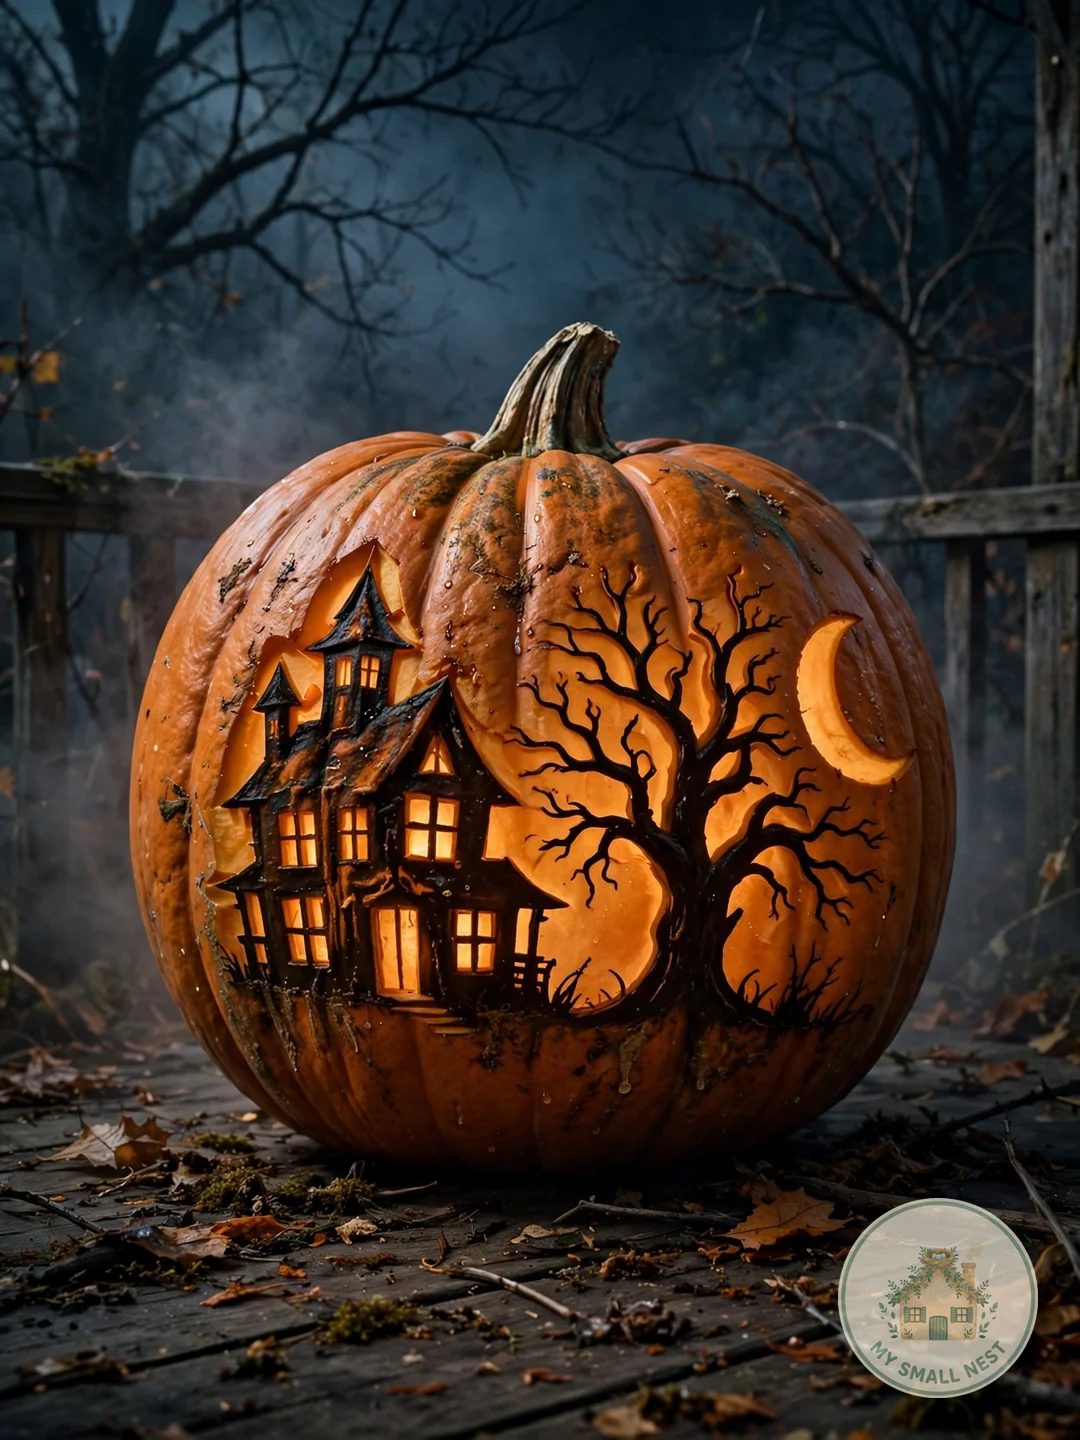
16. Haunted House Window Scene
A haunted house scene turns your pumpkin into a tiny glowing diorama. On a large pumpkin 12-14 inches tall, draw a simple house silhouette — crooked roof, tall chimney, and a row of square windows — about 8 inches wide. Carve out the house shape but leave the windows as solid pumpkin; from inside, the lit windows glow warm yellow against the dark house cutout, like lights left on in a spooky mansion. Add a dead tree (just a trunk with three branches) beside the house and a crescent moon above for the full scene. The magic here is negative space: you carve everything except the details you want to glow. This design looks advanced but it is really just one big shape with rectangles left behind.
Make it work: Scrape the window areas thinner from the inside — about half an inch — so the windows glow bright amber while the thick house walls stay dark for contrast.
 Pin it
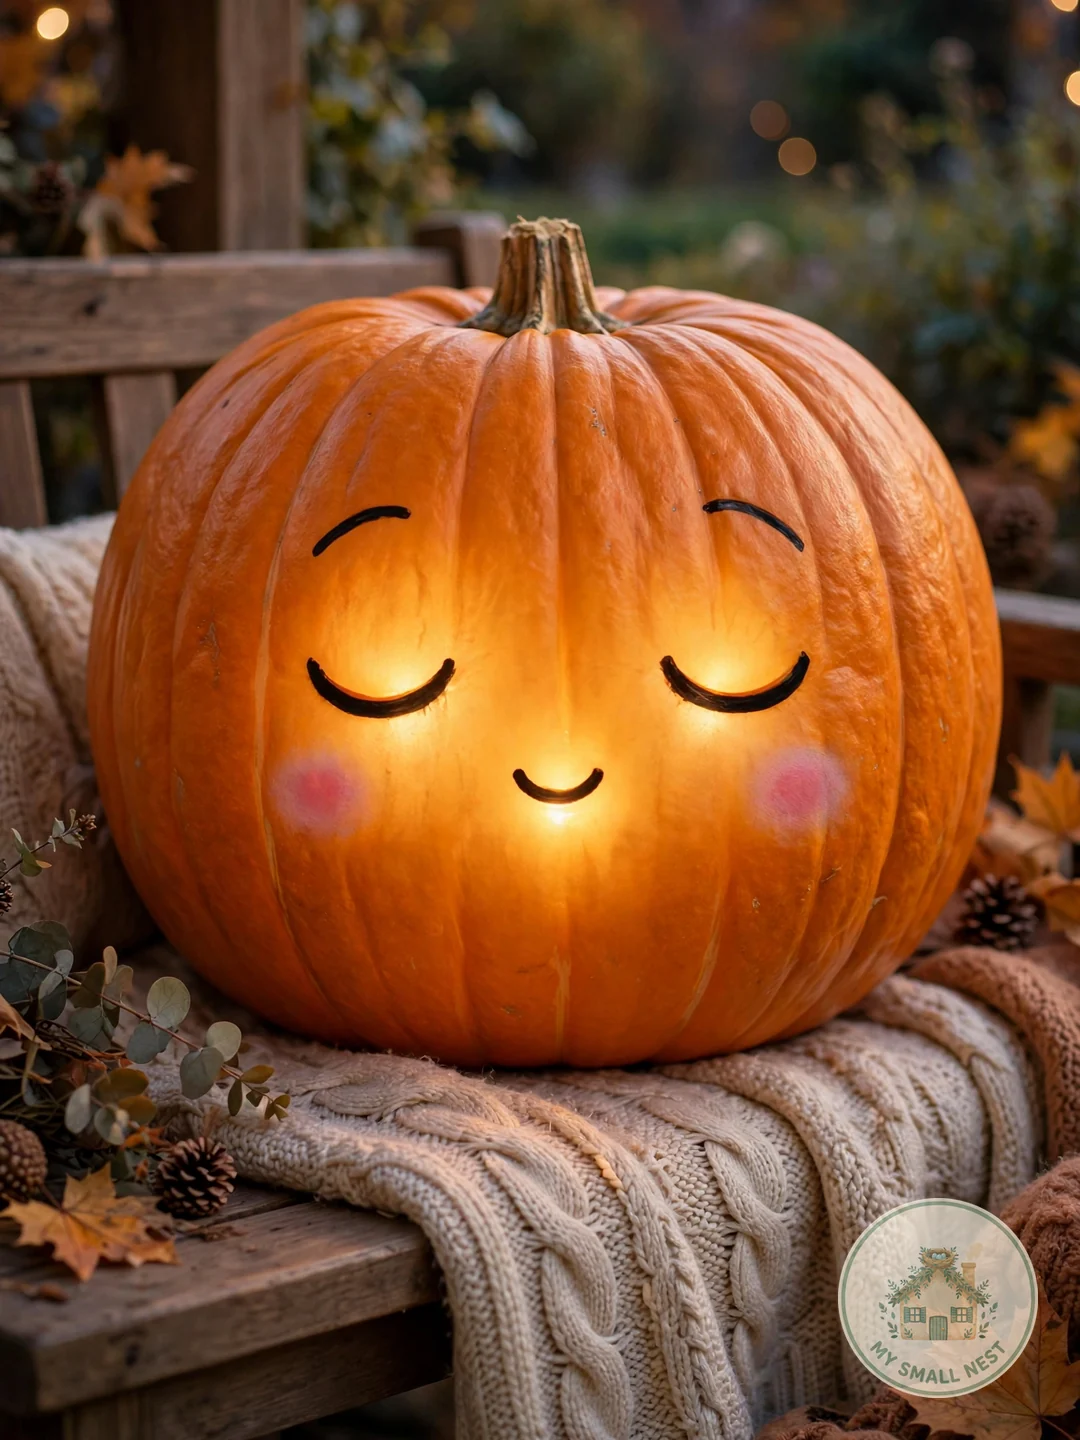
17. Sleepy Cute Face
Sleepy faces are the kawaii queens of pumpkin carving — two curved closed eyes and one tiny mouth, and suddenly your pumpkin looks like it is dreaming. Draw two downward-curving arcs (like upside-down U shapes) about 2 inches wide for closed happy eyes, and a small circle or tiny cat-like mouth below. That is the entire design: three small cuts, five minutes of work. This style looks adorable on mini pumpkins 4-6 inches tall grouped as a sleepy trio, or as one big statement pumpkin 12 inches tall with an oversized sleepy face. Because the features are small and simple, it is nearly impossible to mess up — wobbly lines just add to the drowsy charm. Add blush circles with pink acrylic paint for extra cuteness that shows even in daylight.
Make it work: Use a warm amber LED rather than bright white — the soft golden glow matches the cozy sleepy mood instead of fighting it.
 Pin it
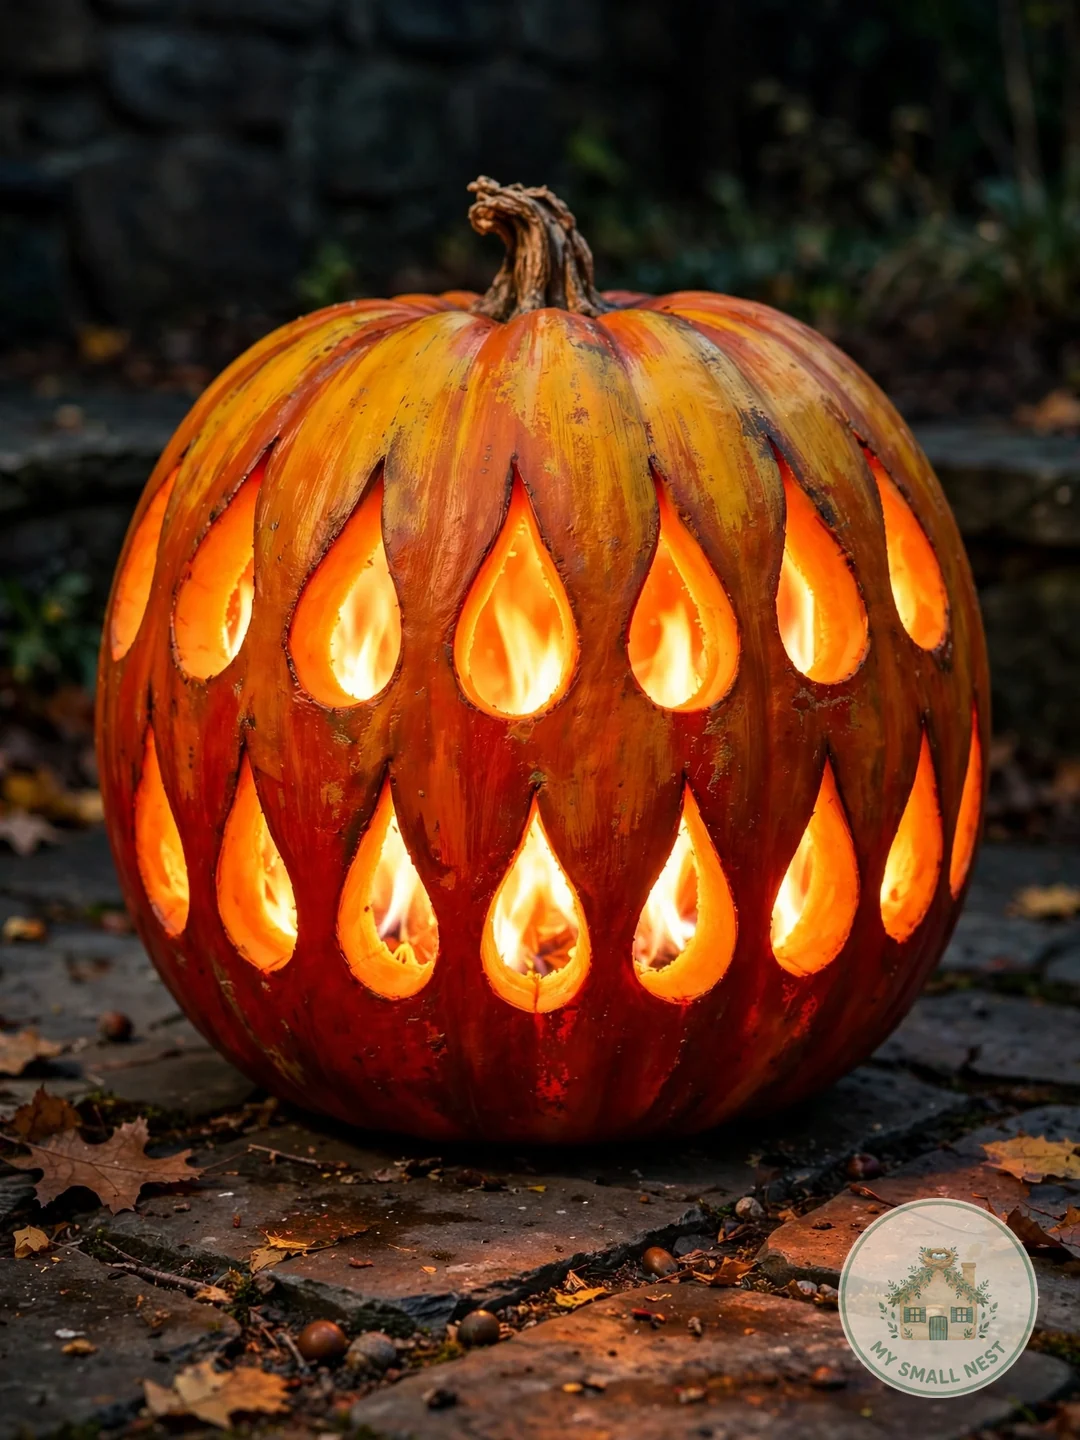
18. Flame-Tipped Ombre Lantern
Flame shapes give your pumpkin a wild, flickering look even before you light it. Carve teardrop flame shapes 2-4 inches tall ringing the pumpkin in two staggered rows, like a crown of fire. Alternate the flame sizes — tall, short, tall, short — for a natural licking-flames rhythm; a medium pumpkin 10-12 inches tall fits about 10-12 flames around its circumference. The pointed flame tips are easier to cut than they look: just two straight cuts meeting at a point. When lit, the flames appear to dance because the light flickers through the pointed tips unevenly. For a fiery ombre effect, paint the pumpkin in gradient shades of red, orange, and yellow before carving — the painted rind plus glowing flames looks like the pumpkin itself is ablaze.
Make it work: Cut the flames slightly larger than your sketch — flame tips glow brightest when the openings are generous, and undersized tips look dim and muddy.
 Pin it
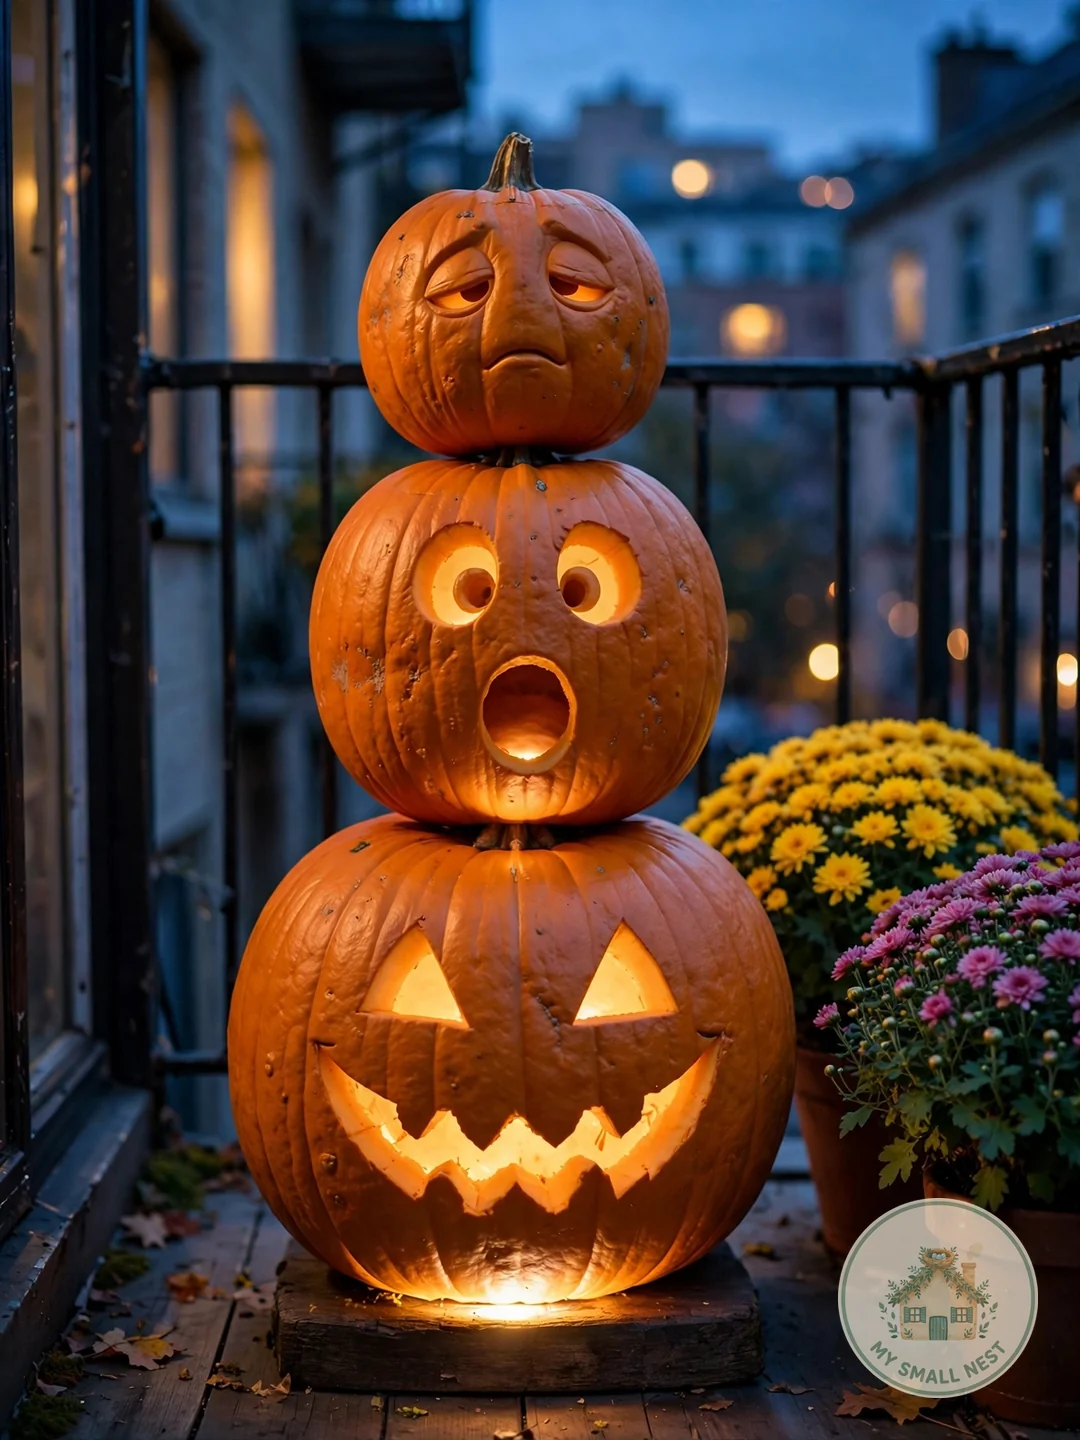
19. Stacked Totem Pumpkins
Stack two or three pumpkins into a totem pole of faces for a display with serious presence. Choose pumpkins in descending sizes — 12, 9, and 6 inches — with flat tops and bottoms so they sit stably. Carve a different expression on each: grinning on the bottom, surprised in the middle, sleepy on top. Cut the lids off the bottom two pumpkins so light travels up through the whole stack, and run a 1/2-inch wooden dowel vertically through all three to lock them together against wind. The dowel trick is what separates a wobbly stack from a sturdy totem that survives all October. This vertical display is perfect for narrow porches and apartment balconies where you want big Halloween impact in a tiny footprint — it delivers three carved designs in one square foot of floor space.
Emma’s tip: I tried this in my studio on a 2-foot-wide balcony and it was the highest-impact Halloween decor I’ve ever had for the footprint. Place one strong LED light in the bottom pumpkin only — the light rises through the open lids and illuminates all three faces with a haunting upward glow. A $3 dowel from the hardware store is all the engineering it needs.
 Pin it
20. Paint-Only No-Carve Pumpkin
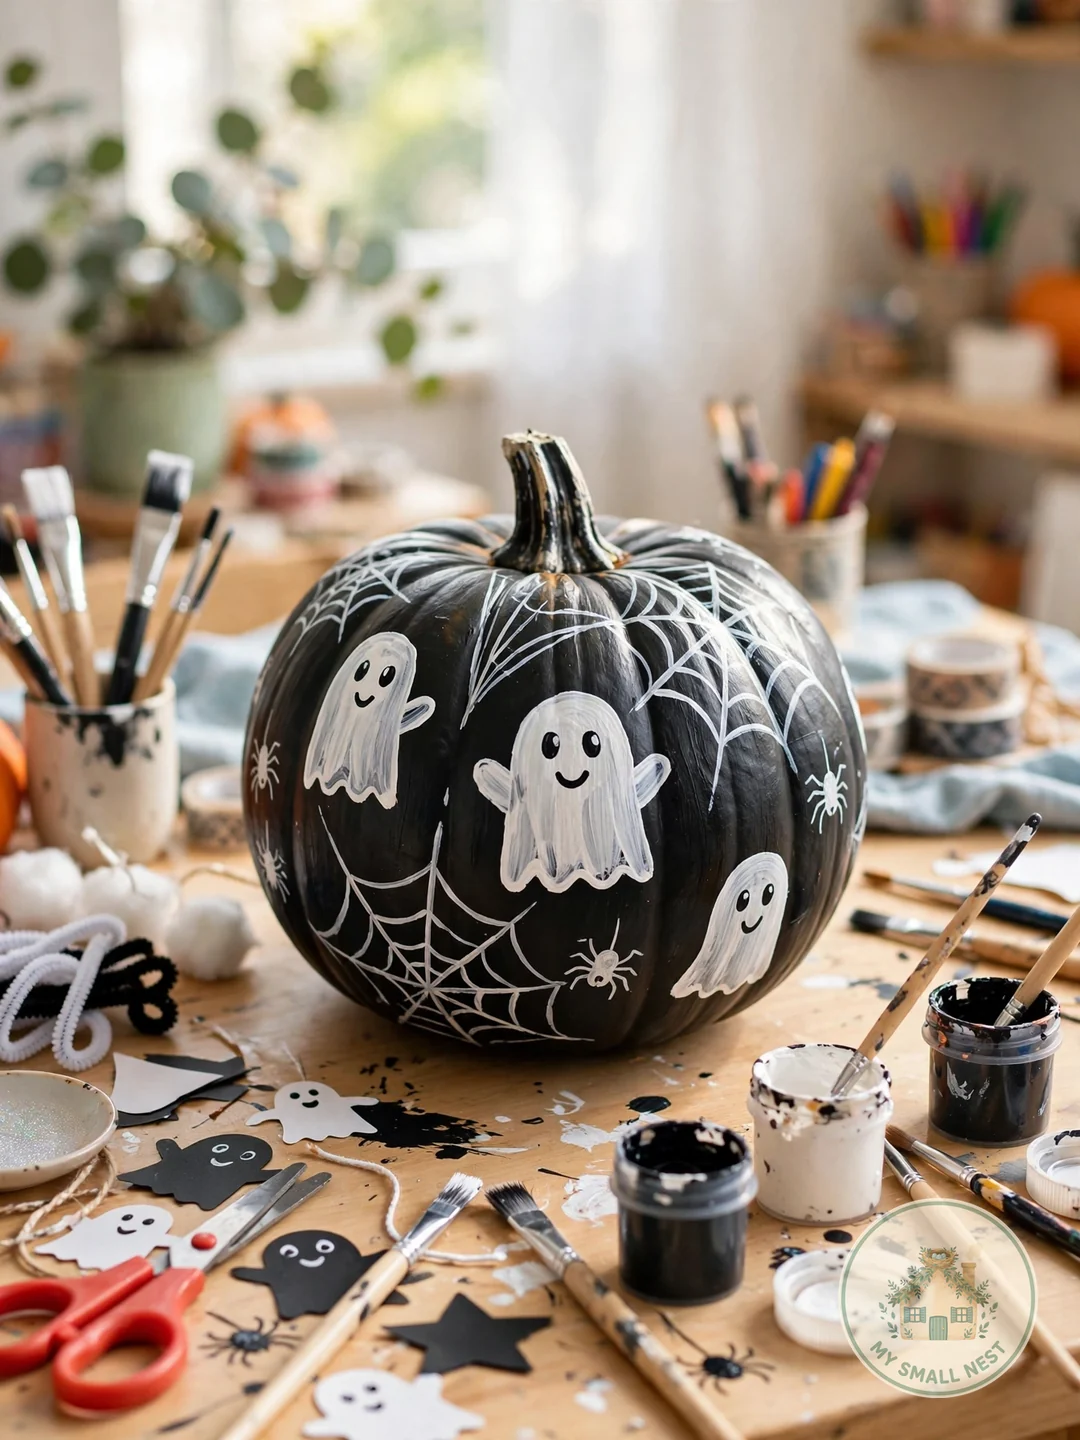
No knives, no stress, no problem — painted pumpkins are the ultimate kid-safe and apartment-friendly option. Start with any size pumpkin and wipe it with a damp cloth so paint adheres. Use acrylic craft paint (two thin coats beat one thick coat) to create designs that would be hard to carve: candy corn stripes, cute ghost faces, spider webs, or an entire galaxy. A 50-cent foam brush gives smooth coverage on large areas while small detail brushes handle faces. Painted pumpkins last the entire season since the rind stays intact — often 4-6 weeks versus days for carved ones. Seal with clear matte sealer for outdoor use. This is the perfect pick for toddlers, dorm rooms, and anyone who wants Halloween decor without the pumpkin-gut mess.
Make it work: Sketch your design in pencil first — light pencil lines erase easily on pumpkin rind and give little artists the confidence to paint boldly.
 Pin it
4 Mistakes to Avoid
Cutting the lid straight down instead of at an angle
A lid cut straight down will fall straight into the pumpkin the moment it softens. Always cut the lid at a 45-degree inward angle so it wedges back into place like a puzzle piece, and cut a small notch on one edge so you always know which way it faces.
Leaving the inner walls too thick
Thick walls block light, making your design look dim and muddy from the street. Scrape the carving-side wall down to about 1 inch thick with a sturdy spoon. Thinner walls also make sawing dramatically easier – your hand will thank you.
Using a real candle in a dry pumpkin
Dried pumpkin flesh is flammable, and a toppling candle inside a pumpkin is a genuine fire risk. Battery-operated LED tea lights and fairy lights are brighter, flicker realistically, and are completely safe around kids, pets, and dry fall leaves on the porch.
Carving too far before Halloween
Carving two weeks early guarantees a sad, sunken pumpkin by the big night. Time your carving for 3-5 days before Halloween for peak freshness, or carve the weekend before and store the pumpkin in the refrigerator during the day to slow decay.
FAQs
How long do carved pumpkins last once carved?
A carved pumpkin typically lasts 5-7 days outdoors in cool weather. To stretch that to 10 days, rub petroleum jelly on all cut edges, keep it out of direct sun, and bring it inside during warm afternoons. Soaking the whole pumpkin in a bucket of cold water with a tablespoon of bleach for 2 hours also rehydrates the flesh and kills mold spores.
What tools do I need for these easy pumpkin carving ideas?
You need less than you think: a serrated pumpkin saw (a $5 carving kit works great), a large spoon or ice cream scoop for gutting, a dry-erase marker for sketching, and battery-operated tea lights. A power drill with assorted bits is the secret weapon for dotted designs. Skip kitchen knives – they are harder to control and far more dangerous for carving curves.
How do I keep my carved pumpkin from rotting or molding?
Moisture is the enemy. Scrape the inner walls thin (about 1 inch) so there is less flesh to rot, and remove every stringy bit. After carving, spray the inside with a 1:10 bleach-water solution and let it dry. Store the pumpkin in the fridge or a cool garage during the day and display it at night – the temperature swing dramatically slows decay.
Can young kids safely help with pumpkin carving?
Absolutely, with the right jobs. Kids can scoop guts, choose designs, draw faces with markers, place cookie cutters, and paint no-carve pumpkins. Adults should handle all sawing and drilling. For toddlers, the paint-only pumpkin and sticker-decorated pumpkins are perfect – they get full creative control with zero sharp tools involved.
What should I do with the pumpkin guts and seeds?
Do not throw them away. Rinse the seeds, toss with olive oil and salt, and roast at 300F for 40-45 minutes for a delicious snack. The stringy pulp makes excellent compost, and you can simmer leftover pumpkin flesh into puree for pies, soups, and muffins. One medium pumpkin yields about 1 cup of seeds and 3-4 cups of usable flesh.
There you have it – 20 easy pumpkin carving ideas that prove you do not need to be an artist to have the best-looking porch on the block. Whether you go classic with a perfected jack-o’-lantern, modern with drill-bit constellations, or completely knife-free with a painted design, the secret is the same: simple shapes, the right pumpkin size, and a good light inside.
Pick your favorite idea this weekend, carve it a few days before Halloween, and do not forget the petroleum jelly trick to keep it fresh. Pin this post to your Halloween board so you have it ready next October, and share a photo of your glowing creation – I would love to see which design you chose. Happy carving!
What readers are saying
No comments yet — yours could be the first.