 My Small Nest
Every kitchen has one: the tupperware cabinet of doom, where lids launch themselves at your face and containers tumble out in a plastic avalanche. Here’s the truth I learned in my 380-square-foot studio — the problem isn’t you, and it isn’t even the containers. It’s a storage system that was never designed for the job.
These 15 ways to organize tupperware will turn that chaos into a calm, working system. Most take under 30 minutes and cost less than $15, and every one of them has survived the ultimate test: a tiny kitchen with zero spare inches. This is for anyone who’s tired of digging — whether you’re in a studio like mine or a full-size family kitchen.
1. Purge and Match Every Piece First
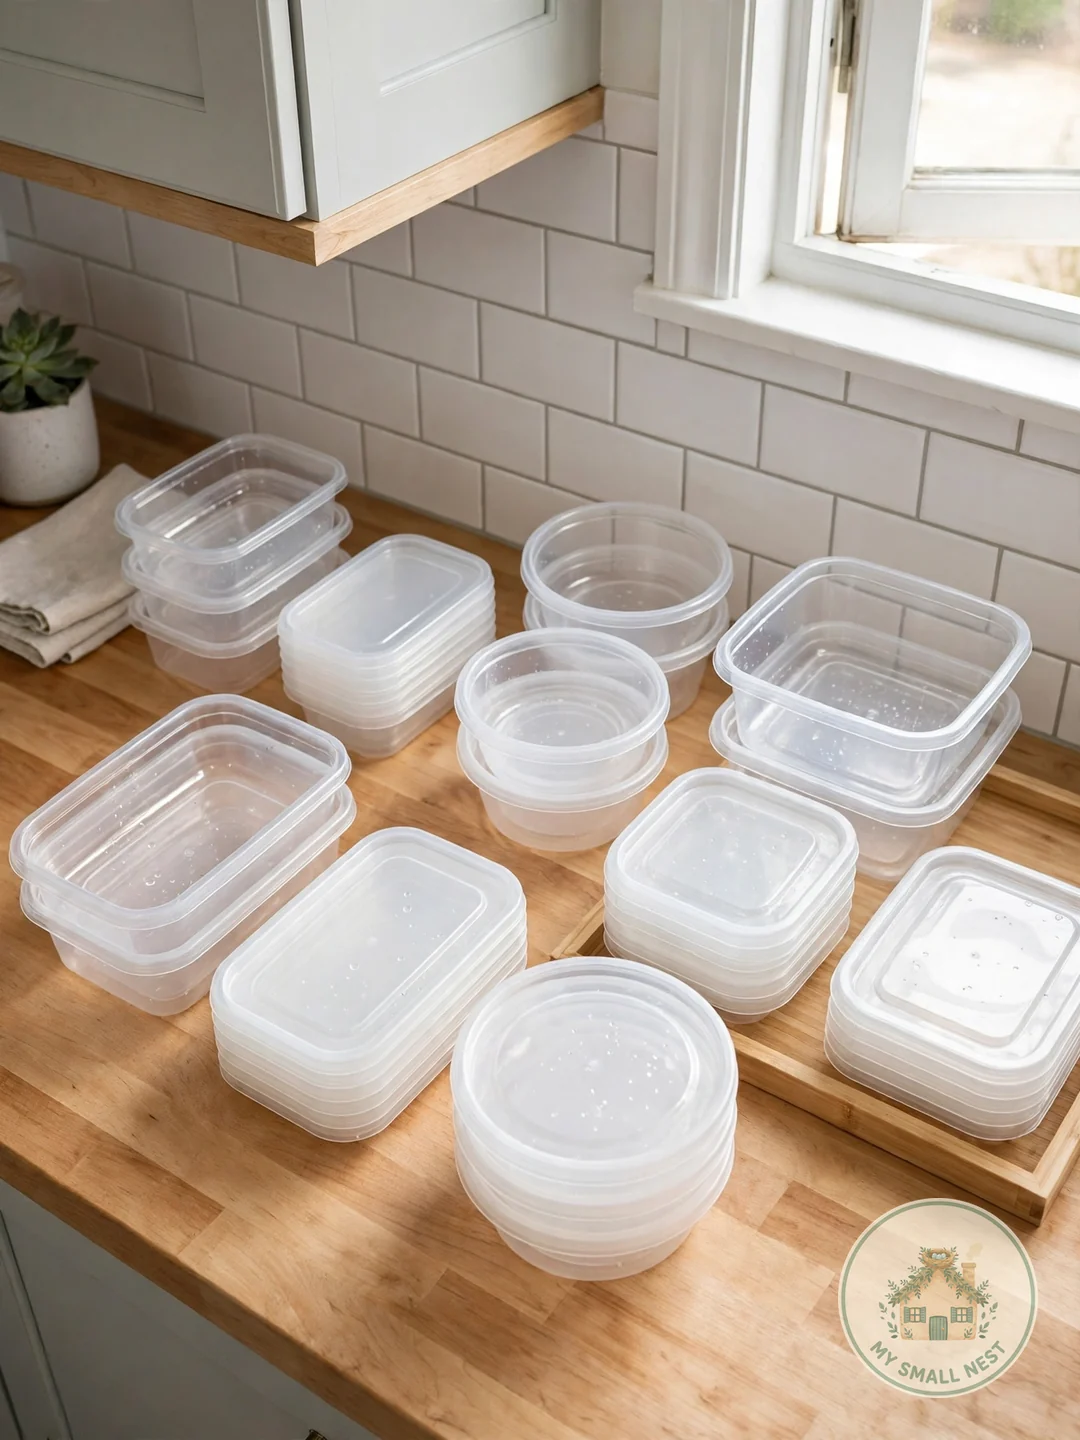
Before buying a single organizer, dump every container and lid onto the counter and match them up — this one unglamorous step eliminates half your chaos in twenty minutes. Toss anything cracked, stained, warped, or lidless; mismatched orphans are the #1 cause of tupperware avalanches because they never nest and never stack. Be ruthless: if you haven’t used it in six months, donate or recycle it. Most households genuinely need only 8-12 containers in 2-3 sizes, and a small matched set is infinitely easier to organize than a mountain of maybes.
Make it work: Recycle #5 plastic containers through a mail-back program like Preserve’s Gimme 5 — curbside recycling usually won’t take them, so they just sit in your cabinet feeling guilty.
 Pin it
2. Nest Containers by Size and Shape
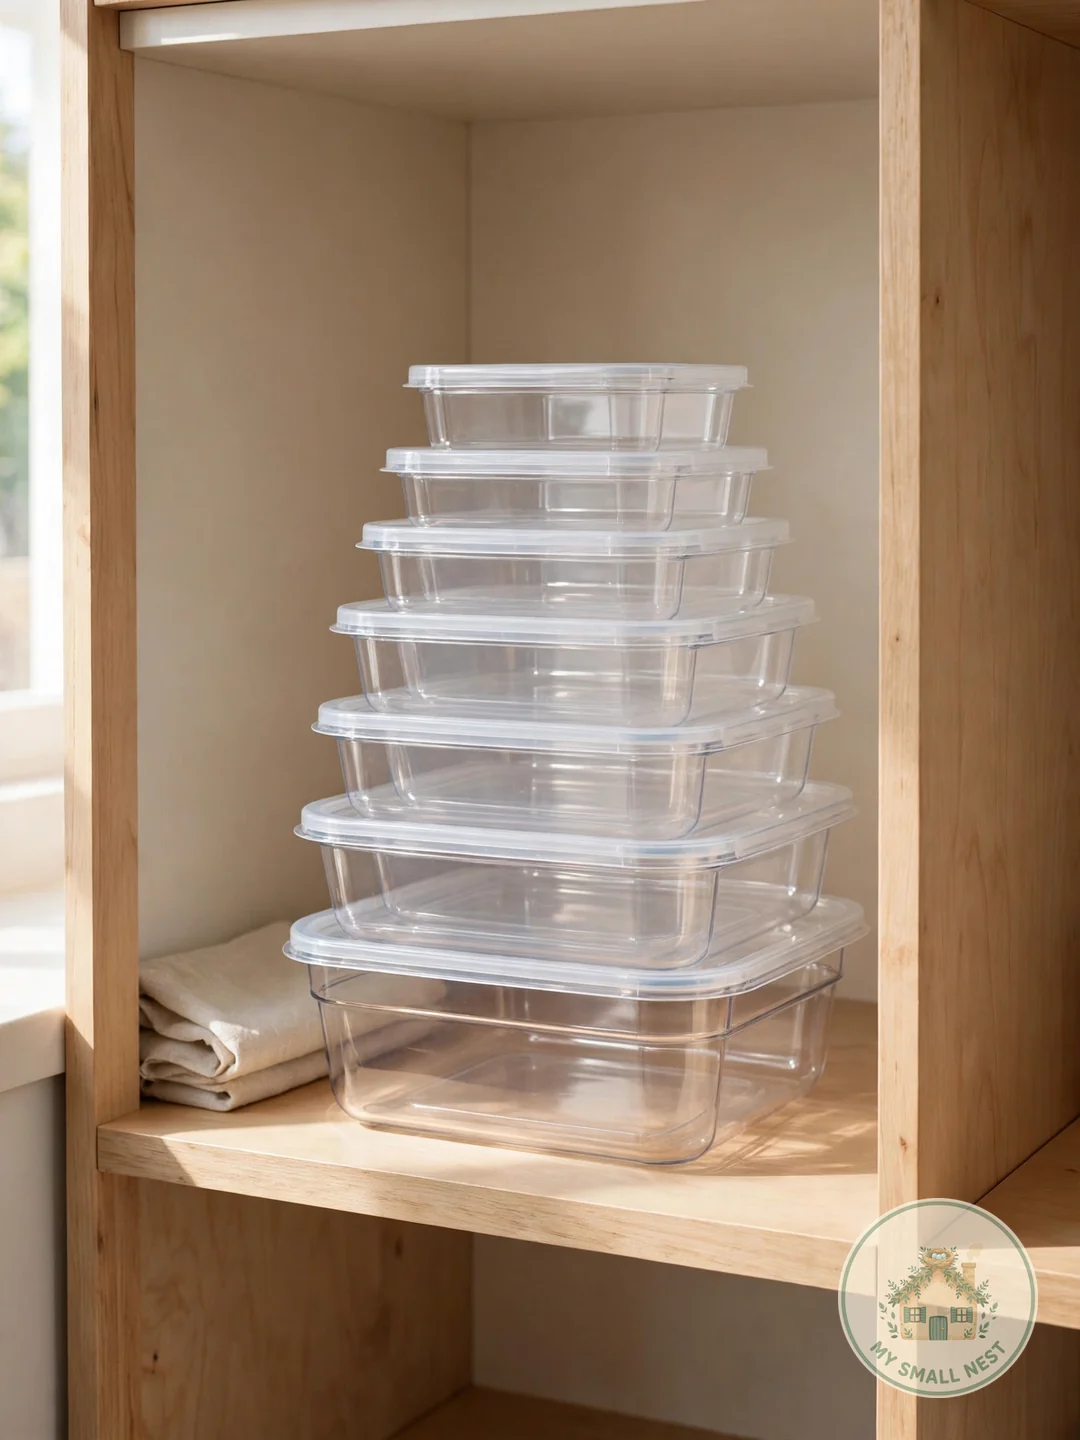
Nesting is the foundation of all tupperware organization: stack containers inside each other by size, largest on the bottom, and never store containers with lids on — lidded storage roughly doubles the space they need. Square and rectangular containers nest far more efficiently than round ones, so if your cabinet is a disaster zone, switching shapes at your next set purchase is the highest-impact upgrade you can make. A nested set of 10 containers takes up the footprint of the single largest one, which is the whole magic trick.
Make it work: Nest by brand as well as size — same-brand containers are engineered to stack, while mixed brands have slightly different tapers that catch and jam.
 Pin it
3. Store Lids Vertically Like Files
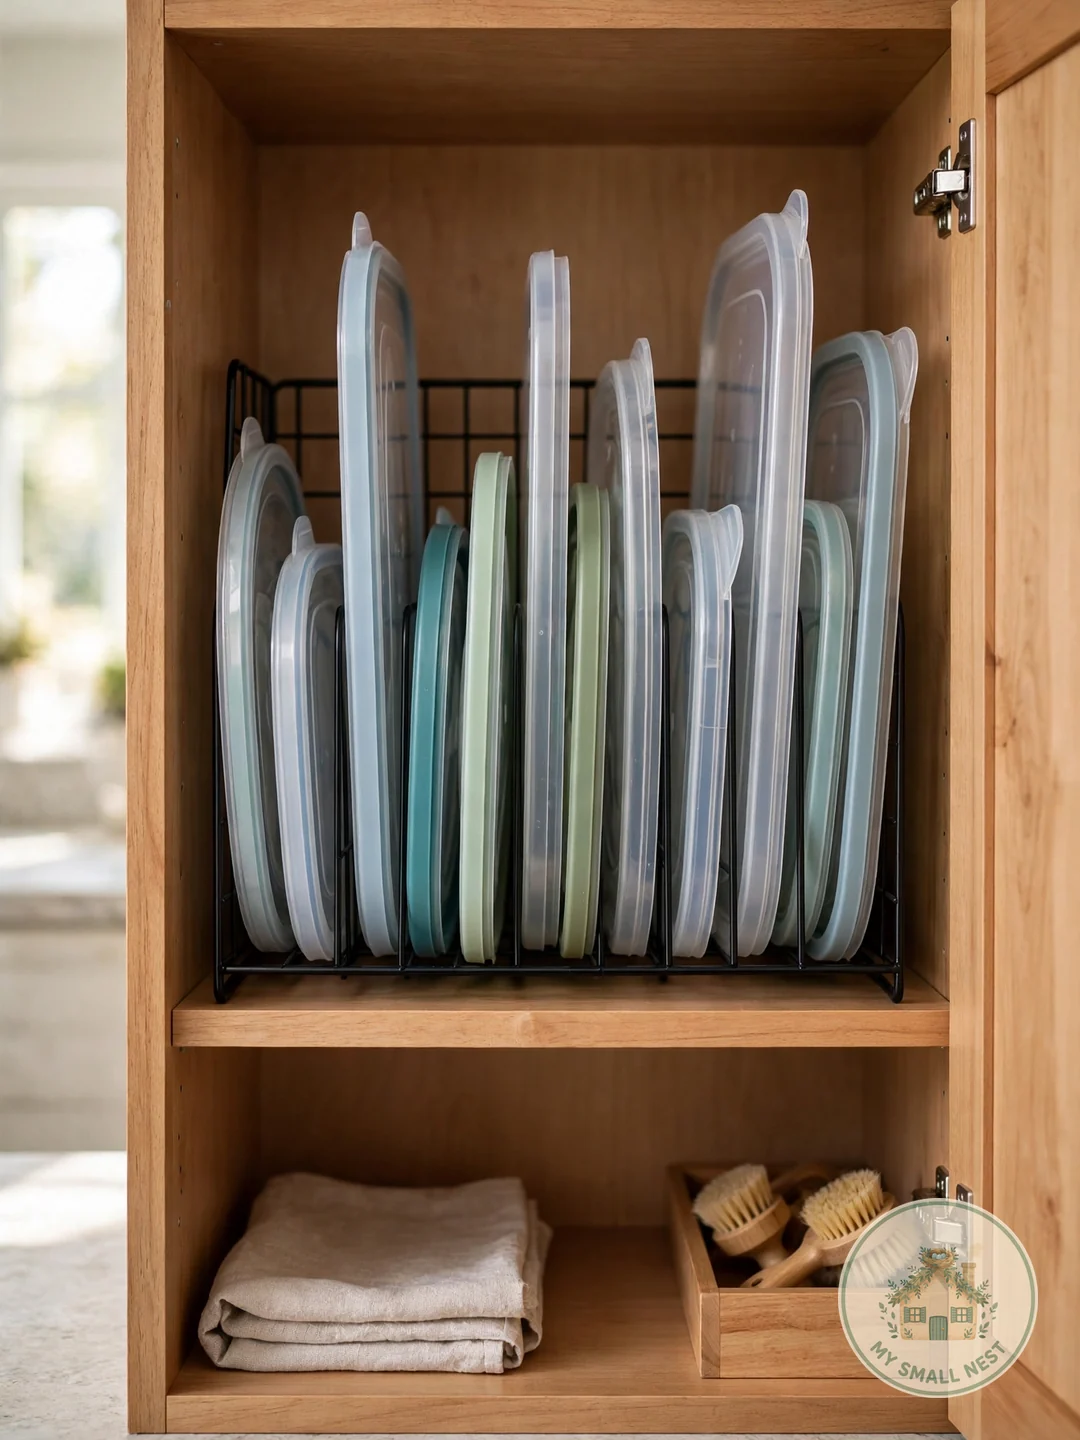
Lids are the real enemy, and the fix is filing them vertically like records — a dish rack, desk file sorter, or plate organizer inside the cabinet holds lids upright, visible, and grabbable in seconds. Sort by size with the largest at the back, and this one change alone ends the avalanche every time you open the cabinet door. A basic metal file sorter costs $8-12 at Target or an office supply store, and it slides into most standard 12-inch-deep cabinets without modification.
Emma’s tip: I tried this in my studio with a $9 bamboo file sorter from Amazon wedged into a cabinet barely 10 inches deep, and it genuinely ended the lid avalanche overnight. Measure your cabinet depth before ordering, though — my first sorter was half an inch too deep and the door wouldn’t close. Rookie mistake, learn from me.
 Pin it
4. Dedicate a Deep Drawer
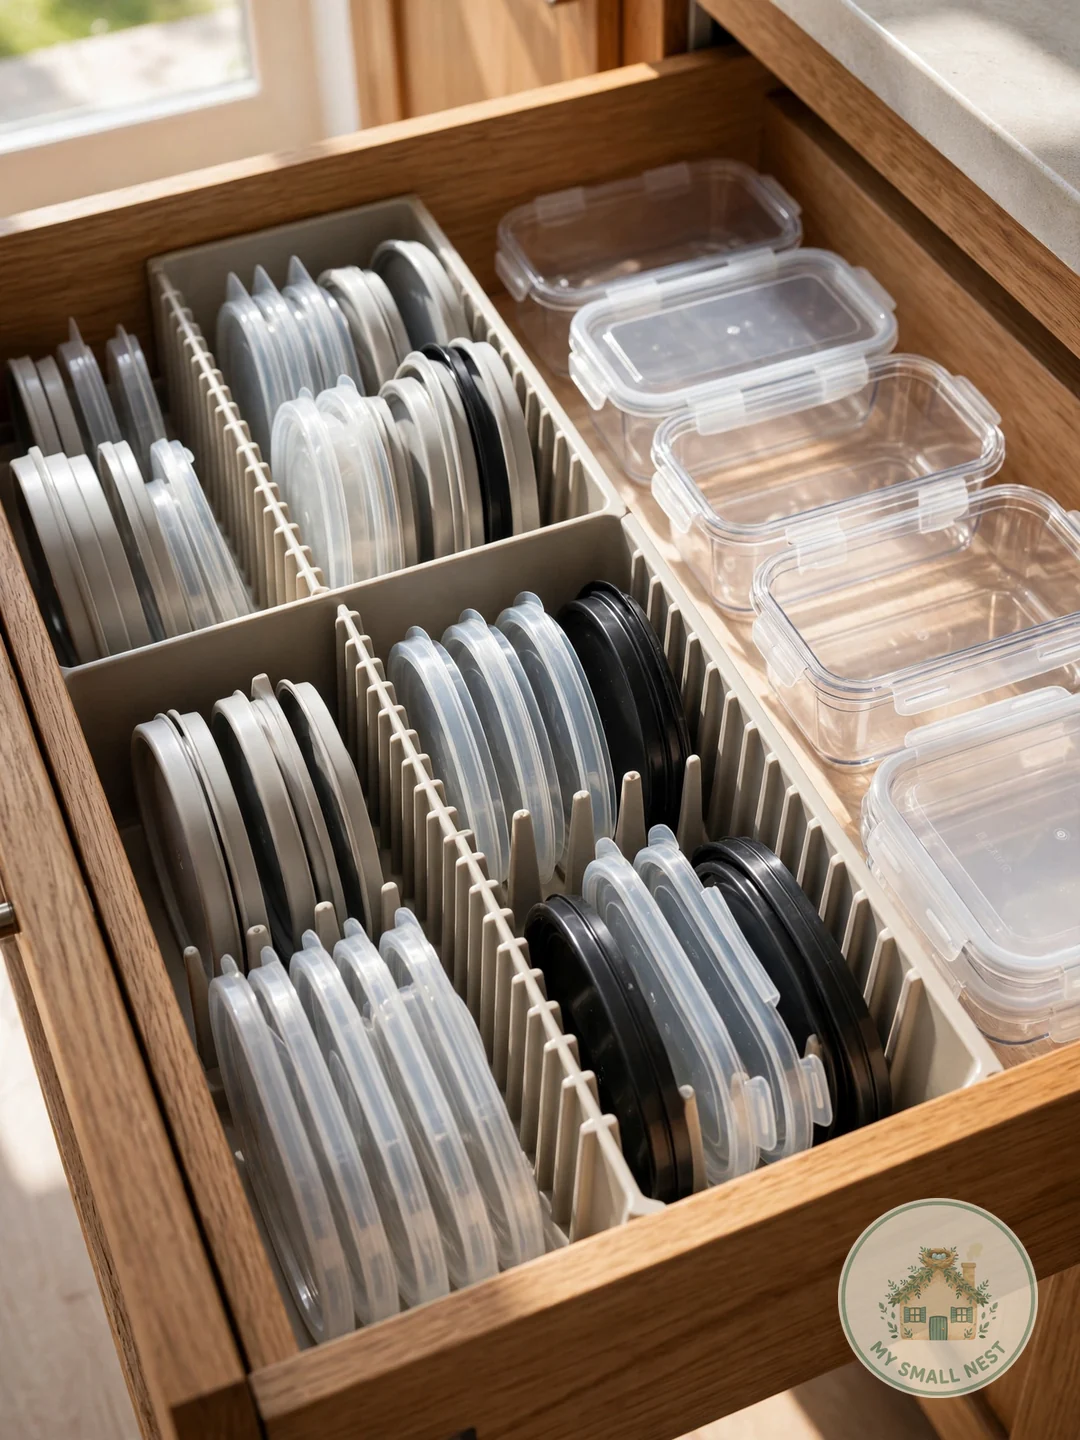
A deep drawer beats a cabinet for tupperware every time because you see everything at a glance instead of digging blind into the back. Dedicate one deep drawer near the dishwasher to containers, with lids filed in a divider at the front — the workflow of dirty dish to clean storage stays in one two-foot zone. Add spring-loaded drawer dividers or a pegboard organizer so stacks don’t migrate, and if you don’t have a spare deep drawer, a $25 pull-out cabinet organizer from Amazon achieves the same effect in a base cabinet.
Make it work: Store the drawer within arm’s reach of where you pack lunches or put away leftovers. Every extra step between the dishwasher and the storage spot is friction that slowly un-organizes the system.
 Pin it
5. Use Adjustable Drawer Dividers
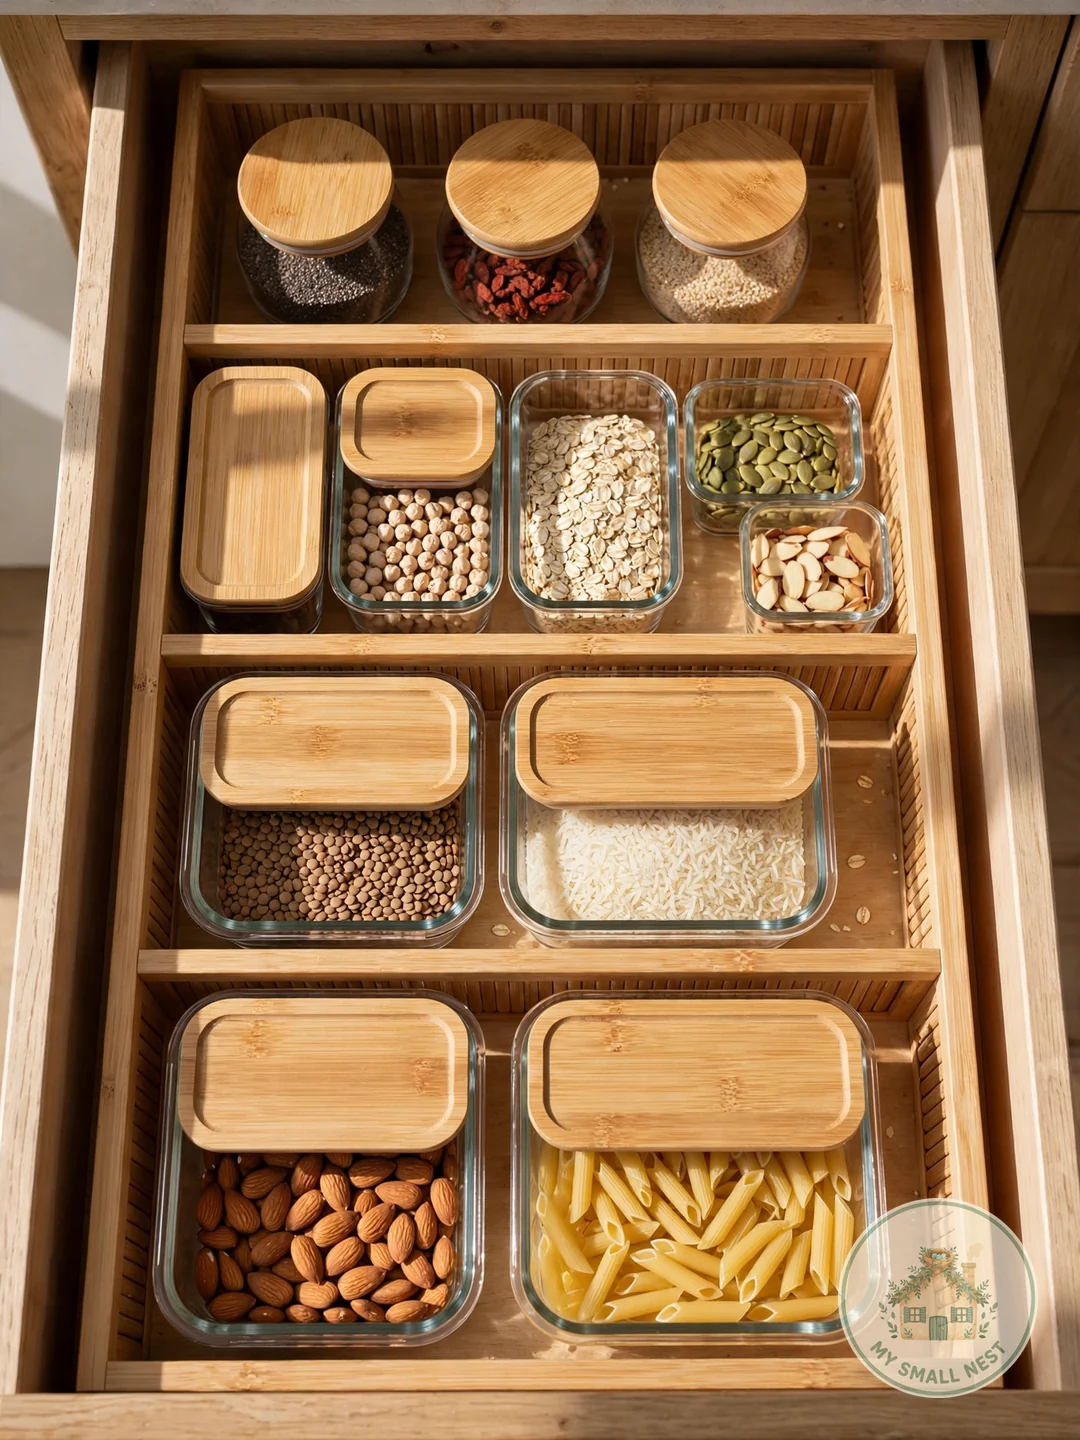
Adjustable drawer dividers turn a junky tupperware drawer into a real filing system: one zone for small containers, one for large, one for lids. Spring-loaded bamboo dividers ($12-15 for a 4-pack on Amazon) fit any drawer with zero installation and no tools. The dividers stop the slow migration that turns organized drawers chaotic within weeks — containers can’t drift when they’re fenced in. When your collection changes, just re-adjust; the system flexes instead of breaking.
Make it work: Leave one divider zone empty on purpose. A system with no slack breaks the first time you buy a new set; one empty zone absorbs growth without a reorganization.
 Pin it
6. Switch to a Uniform Container Set
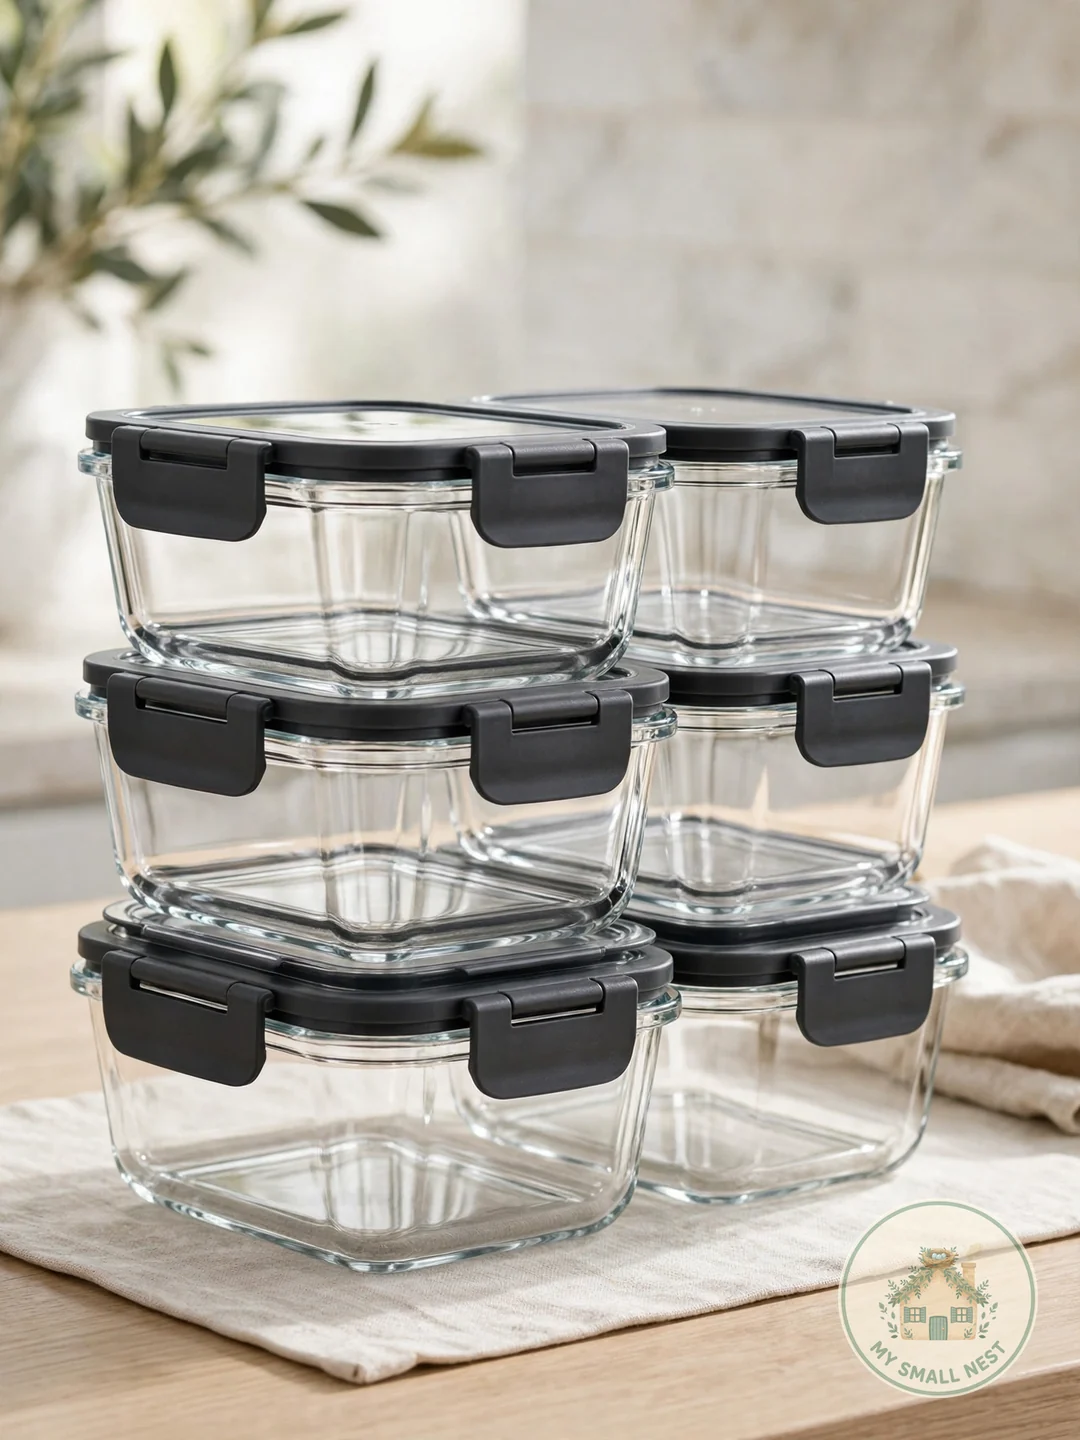
Uniform container sets — same brand, same shape, modular sizes — are the cheat code that makes everything else on this list easy. Everything nests, every lid fits multiple bases, and the cabinet looks instantly tidy even on a rushed morning. Glass sets with snap lids (like the $25-40 Pyrex or Snapware sets at Costco and Target) are the gold standard: they don’t stain, don’t warp, and go from fridge to microwave to table. Replace piecemeal over time — buy one 10-20 piece set, donate the randoms, repeat next quarter.
Make it work: Choose sets where lids are interchangeable across sizes. Fewer unique lid shapes to manage is the entire ballgame — three lid sizes covering twelve containers beats twelve unique lids every time.
 Pin it
7. Use the Cabinet Door Interior
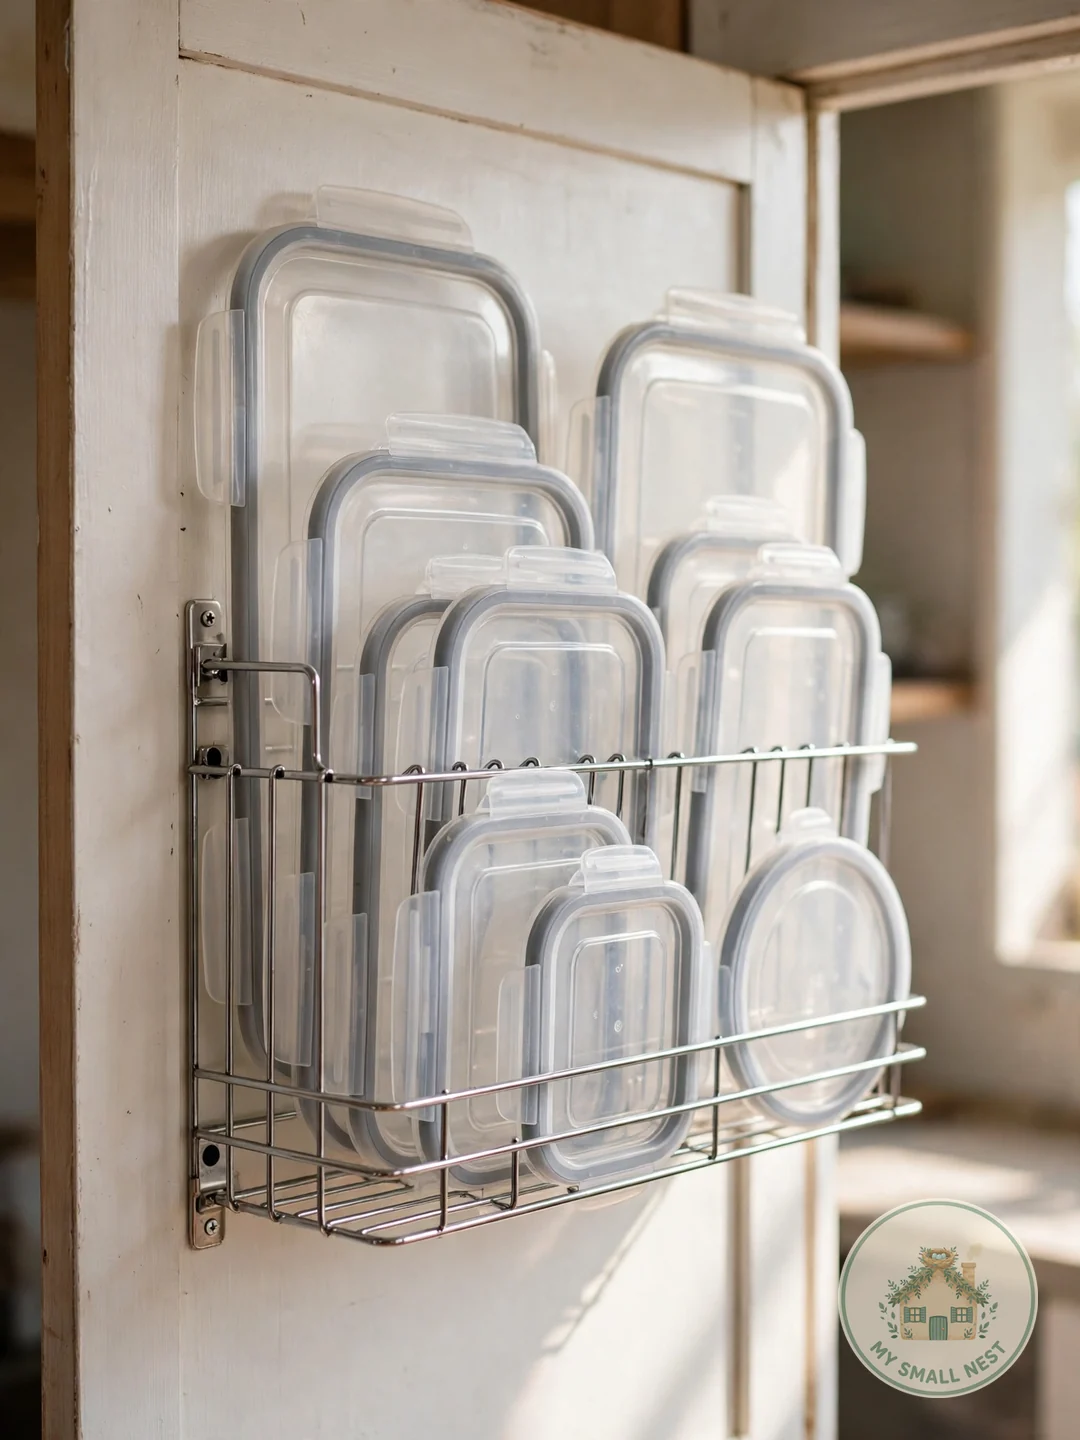
The inside of a cabinet door is free real estate most people completely ignore: mount a narrow wire rack, adhesive hooks, or a slim basket to hold flat lids, wraps, or small containers without eating a single inch of shelf space. Use damage-free adhesive mounts (Command strips hold up fine for light lids) if you rent — no drilling, no deposit drama. Measure door clearance first: the rack must clear the cabinet frame when the door closes, so keep it under 2 inches deep.
Emma’s tip: I tried this in my studio where my entire tupperware “cabinet” is one 18-inch door — a $7 adhesive wire rack from the Container Store now holds six flat lids on the door interior, and it freed up an entire shelf. In a tiny kitchen, the door isn’t bonus space, it’s survival space. Just keep it to flat, light items; heavy containers will strain the hinges over time.
 Pin it
8. Add Under-Shelf Baskets or Risers
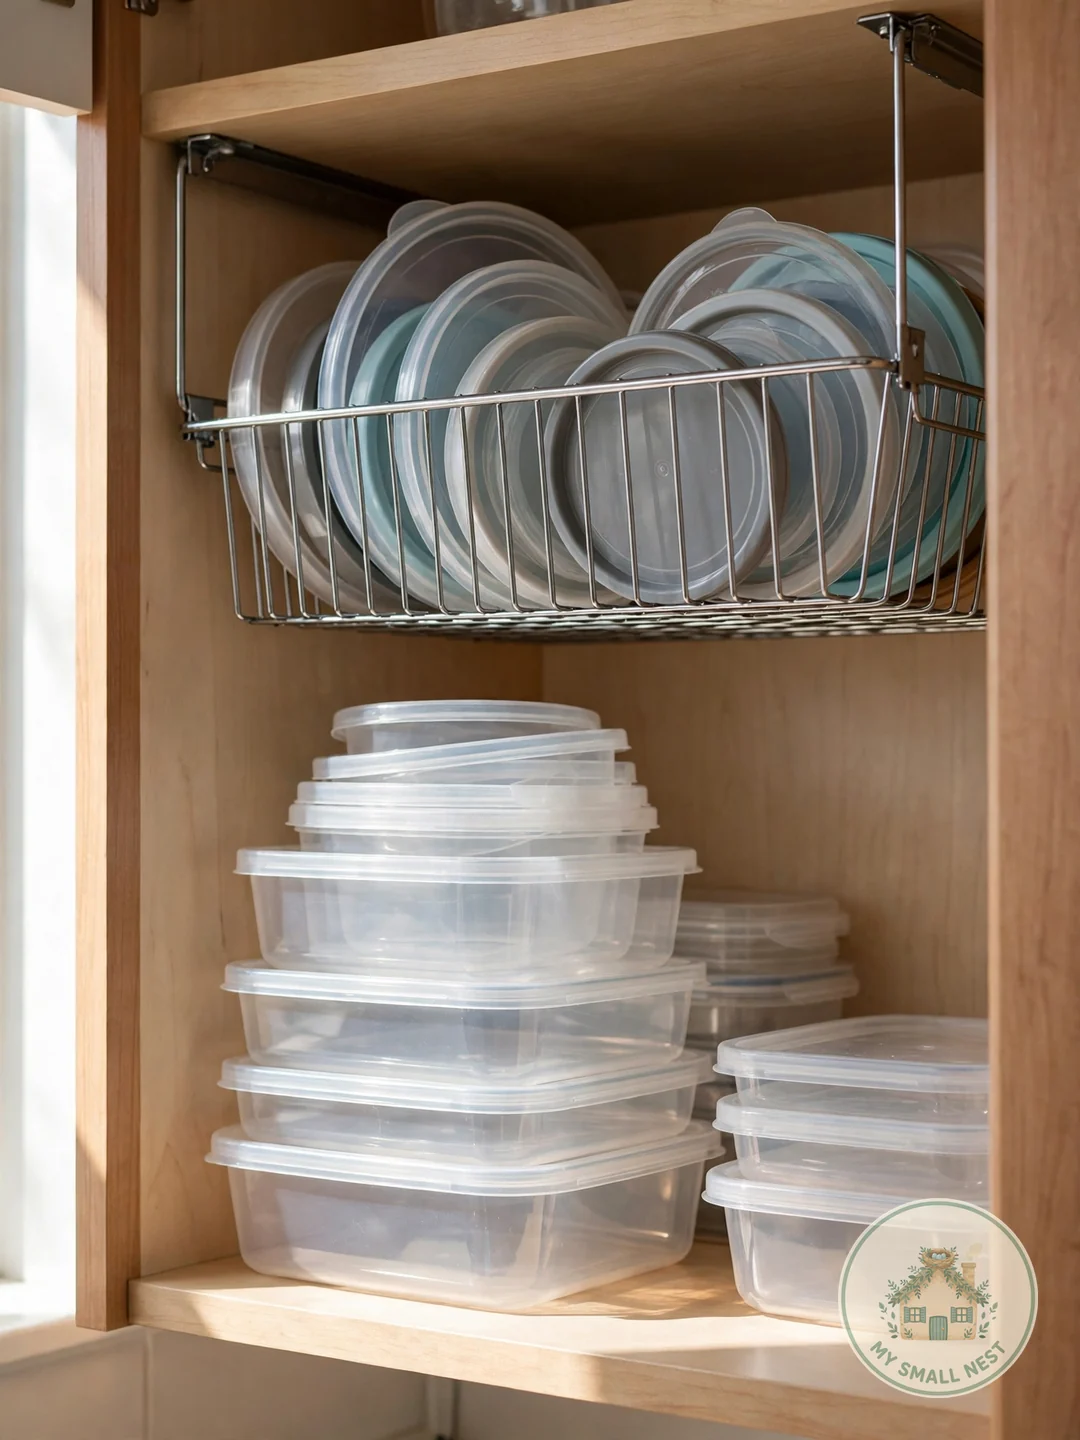
Stacking containers directly on cabinet shelves wastes all the vertical air above them — add a freestanding under-shelf basket or a small riser shelf and you get a second level for lids or small containers with zero tools. Wire under-shelf baskets ($8-12 at Target or Walmart) hook onto existing shelves in seconds, and in deep cabinets they effectively double your storage without anything resembling a renovation. This is the fastest win on this list: buy it, hook it, done in two minutes.
Make it work: Keep daily-use containers on the easy-reach level and occasionals up high. The golden rule of small kitchens: the things you touch daily should require zero stretching, bending, or step-stools.
 Pin it
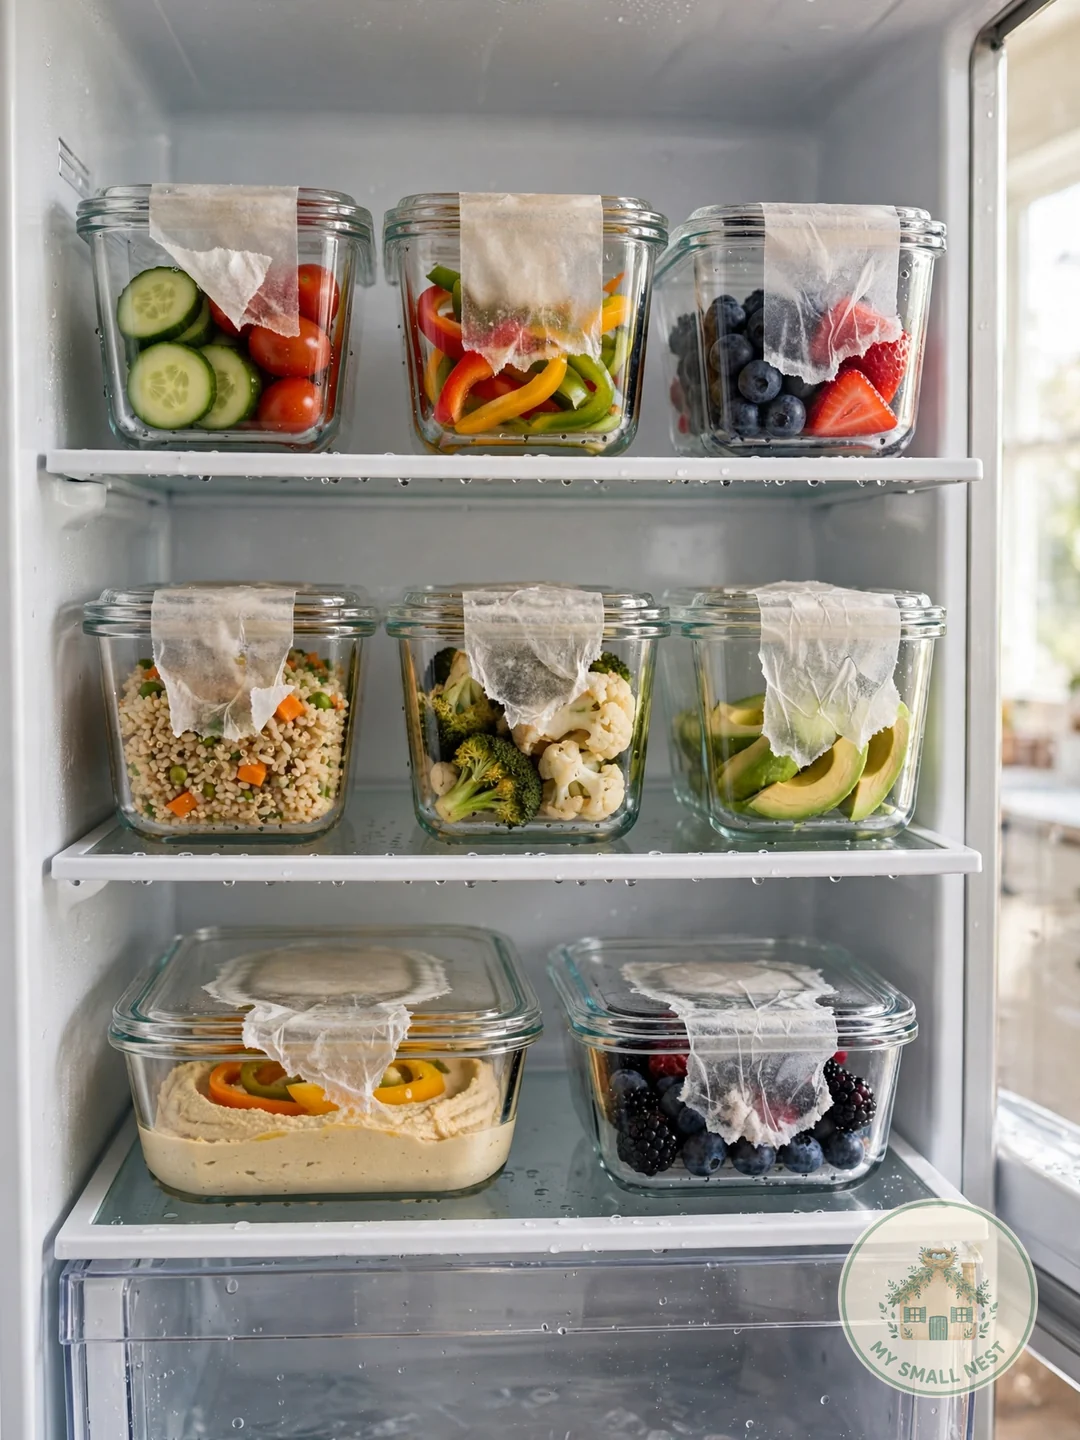
9. Label Everything With Dates
Label containers with what’s inside and the date using dissolvable labels or a grease pencil, and the era of mystery leftovers growing science experiments ends immediately. Dissolvable labels ($6 for a pack of 60 on Amazon) wash off completely in the dishwasher, so containers stay clean with no sticky residue. Labels also quietly train the whole household: when every container says what goes in it, family members and roommates put things back in the right spot without being asked.
Make it work: Write a “use by” date, not just the contents — “Chicken soup — eat by Fri” ends the eternal “is this still good?” debate and cuts food waste at the same time.
 Pin it
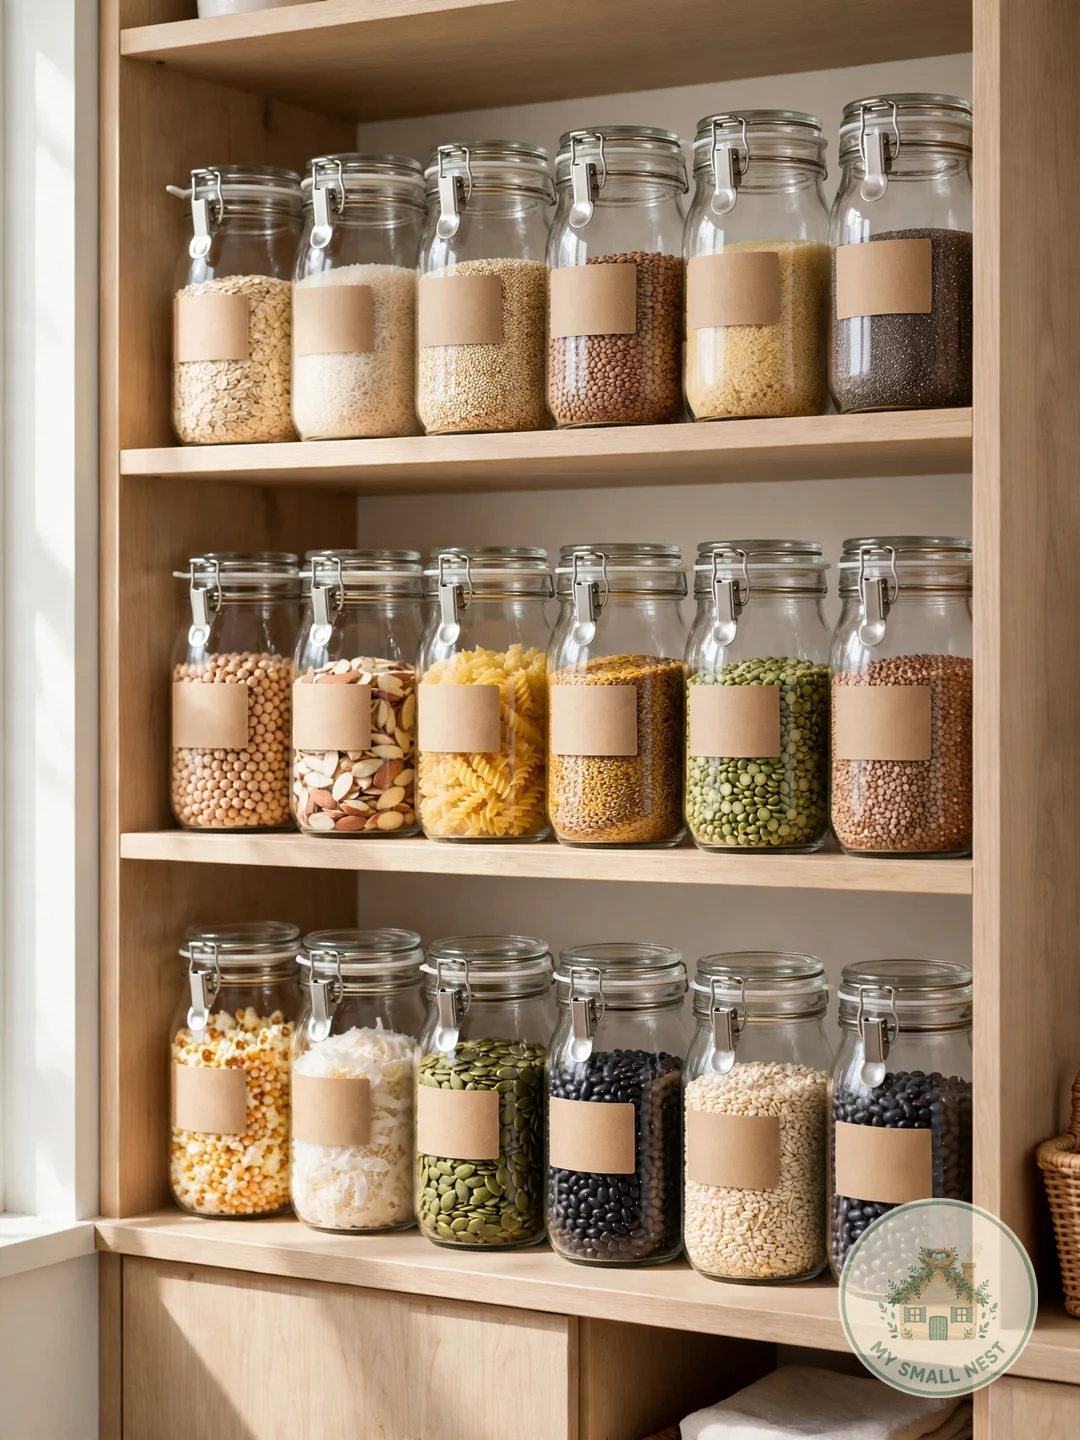
10. Decant Pantry Goods Into Uniform Jars
Decanting bulk dry goods — flour, rice, pasta, snacks — into uniform airtight containers looks beautiful and keeps food genuinely fresher, since the original bags and boxes were never designed for resealing. Square containers line up with zero wasted space on pantry shelves; the OXO Good Grips POP containers are the famous option, but the $20-30 Mainstays or Better Homes sets at Walmart do the same job. Go all-in on one container style for the pantry even if your leftover containers differ — visual uniformity is what makes a pantry look magazine-worthy, and it makes it obvious at a glance what’s running low.
Make it work: Measure your shelf height before buying anything — tall cereal dispensers don’t fit standard 12-inch shelves, and discovering that after the purchase is a special kind of frustration.
 Pin it
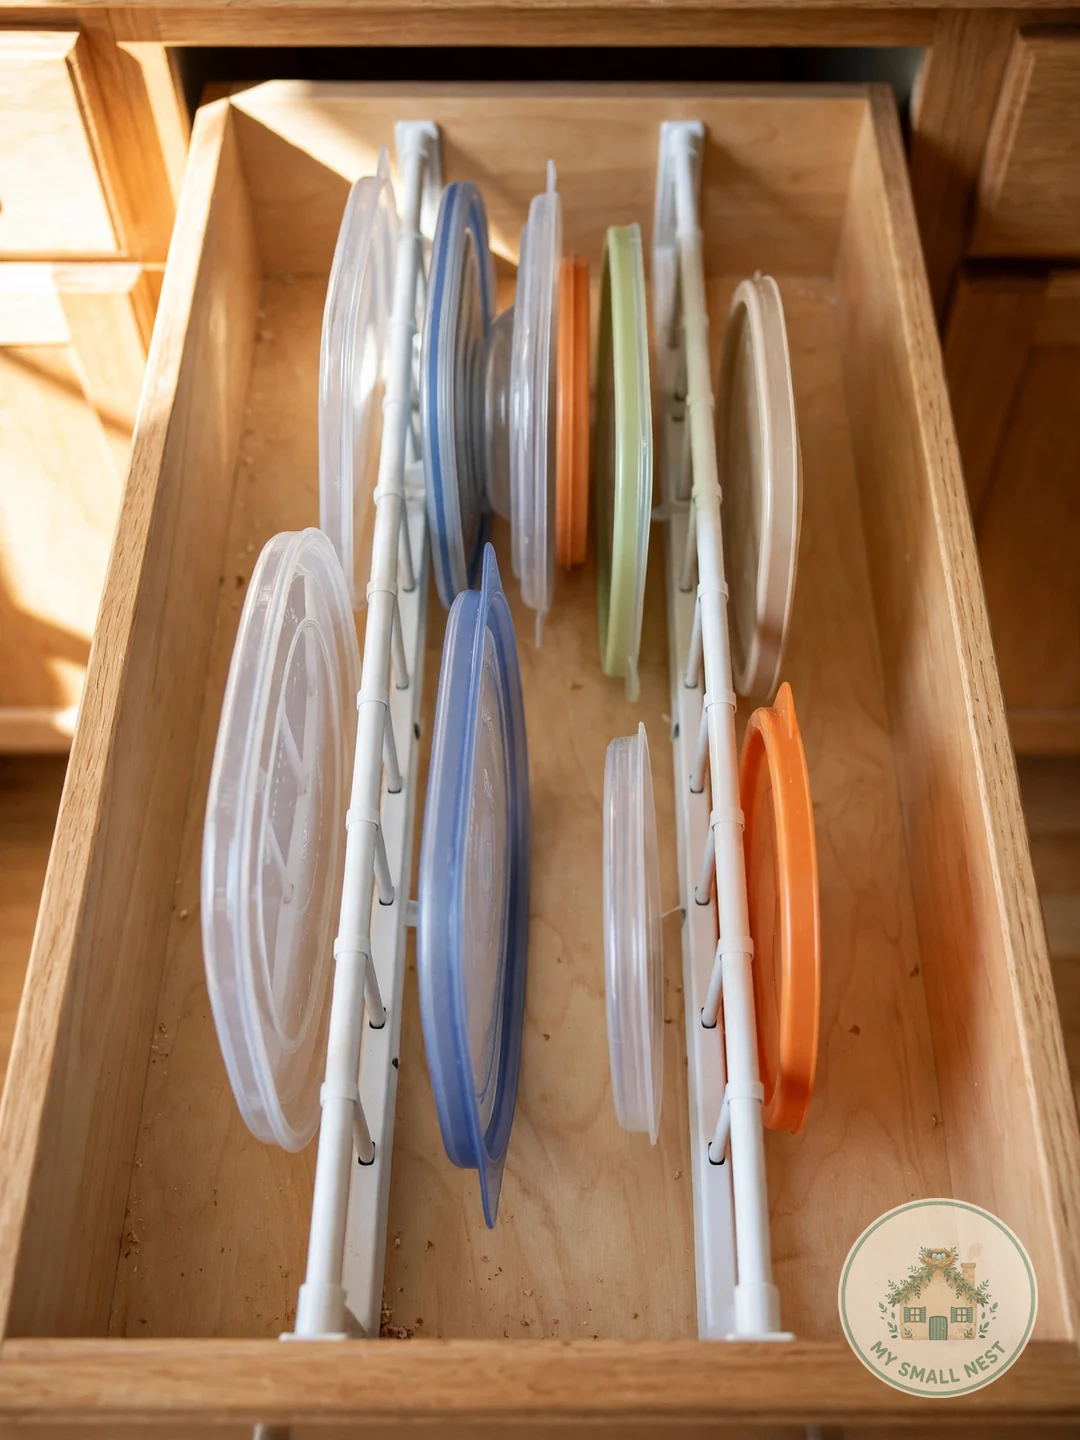
11. Try the Tension Rod Lid Trick
A $5 tension rod mounted vertically inside a deep drawer or cabinet creates perfect slots for lids — slide each lid behind the rod and they stay upright, separated, and grabbable. Measure the interior height and buy a rod that fits snugly; most kitchen drawers need the 9-12 inch size. This works best for flat lids in drawers, while bulky snap lids do better in file organizers — match the method to the lid type and both stay put.
Emma’s tip: I tried this in my studio’s one deep drawer and the rod slipped for a week until I wrapped both ends in rubber bands for grip — five-cent fix, never slipped again. Total cost of the whole project: $5.39, and it’s the organizer I recommend first to anyone because the price-to-impact ratio is honestly unbeatable.
 Pin it
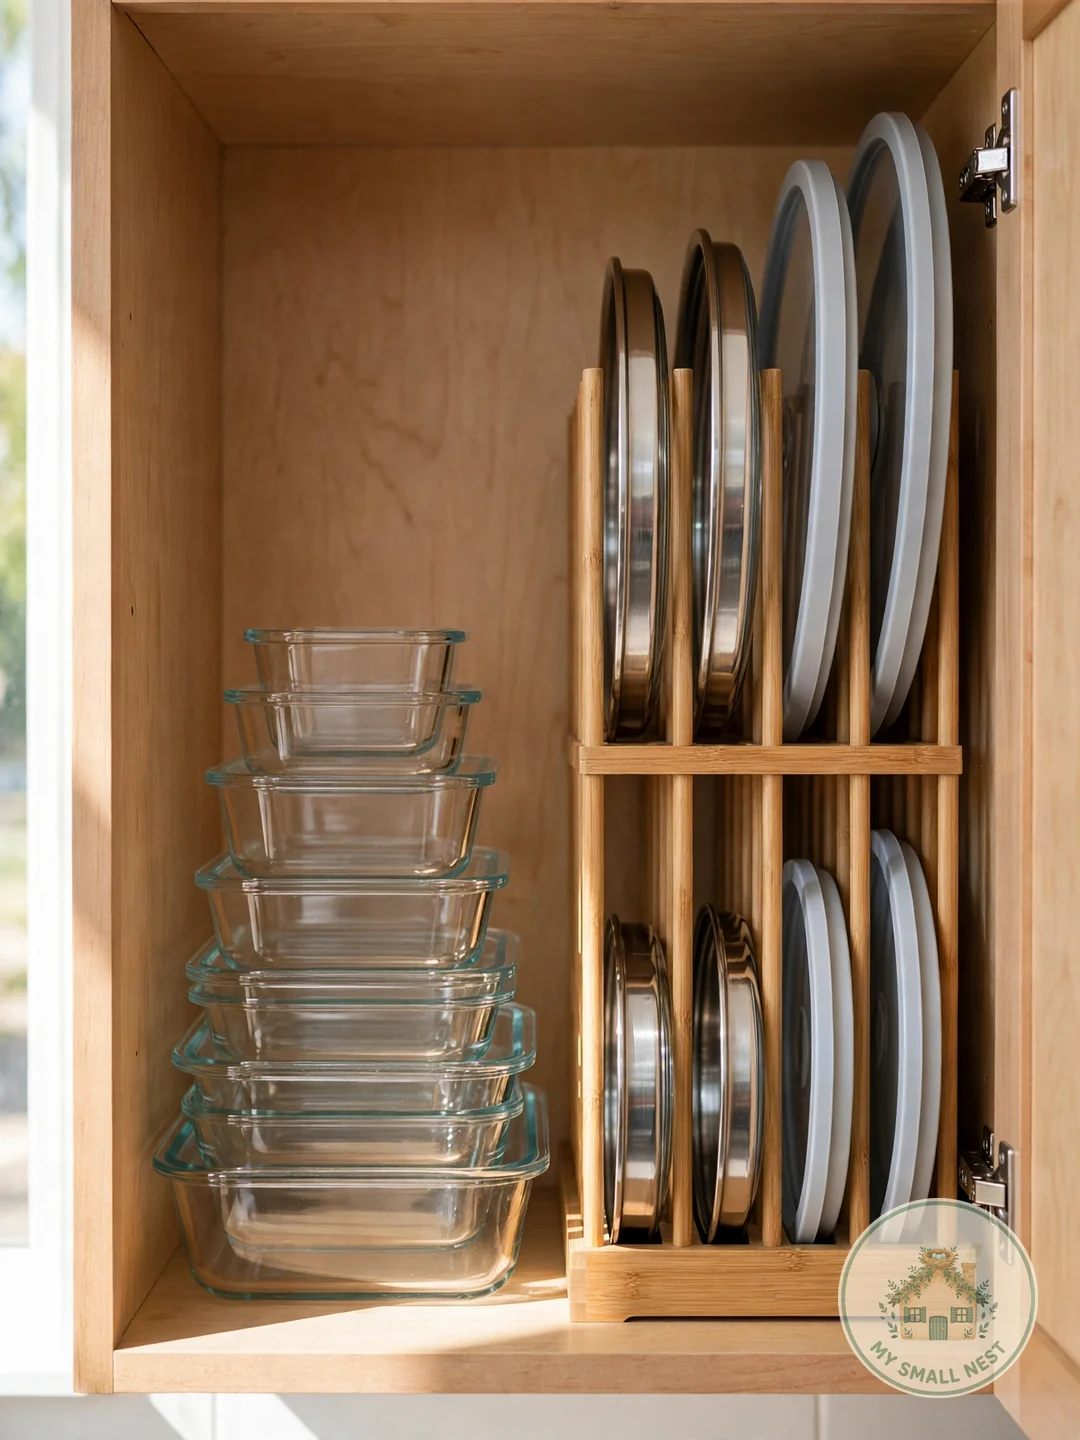
12. Never Store Containers With Lids On
Storing containers with lids on feels tidy but wastes enormous space and traps moisture — that musty smell when you open a “clean” container is trapped humidity with nowhere to go. Always store lids separately: containers nest, lids file vertically. The one exception is the two or three everyday containers you grab daily for lunches; keep those lidded for speed and give everything else the nest-and-file treatment. Leave freshly washed containers unstacked for an hour so they air-dry fully before nesting, or you’ll seal dampness inside the stack.
Make it work: If a container still smells musty after air-drying, wipe it with a baking-soda paste and let it sit overnight. The smell is usually in the lid gasket, so pop gaskets out and wash them separately when you can.
 Pin it
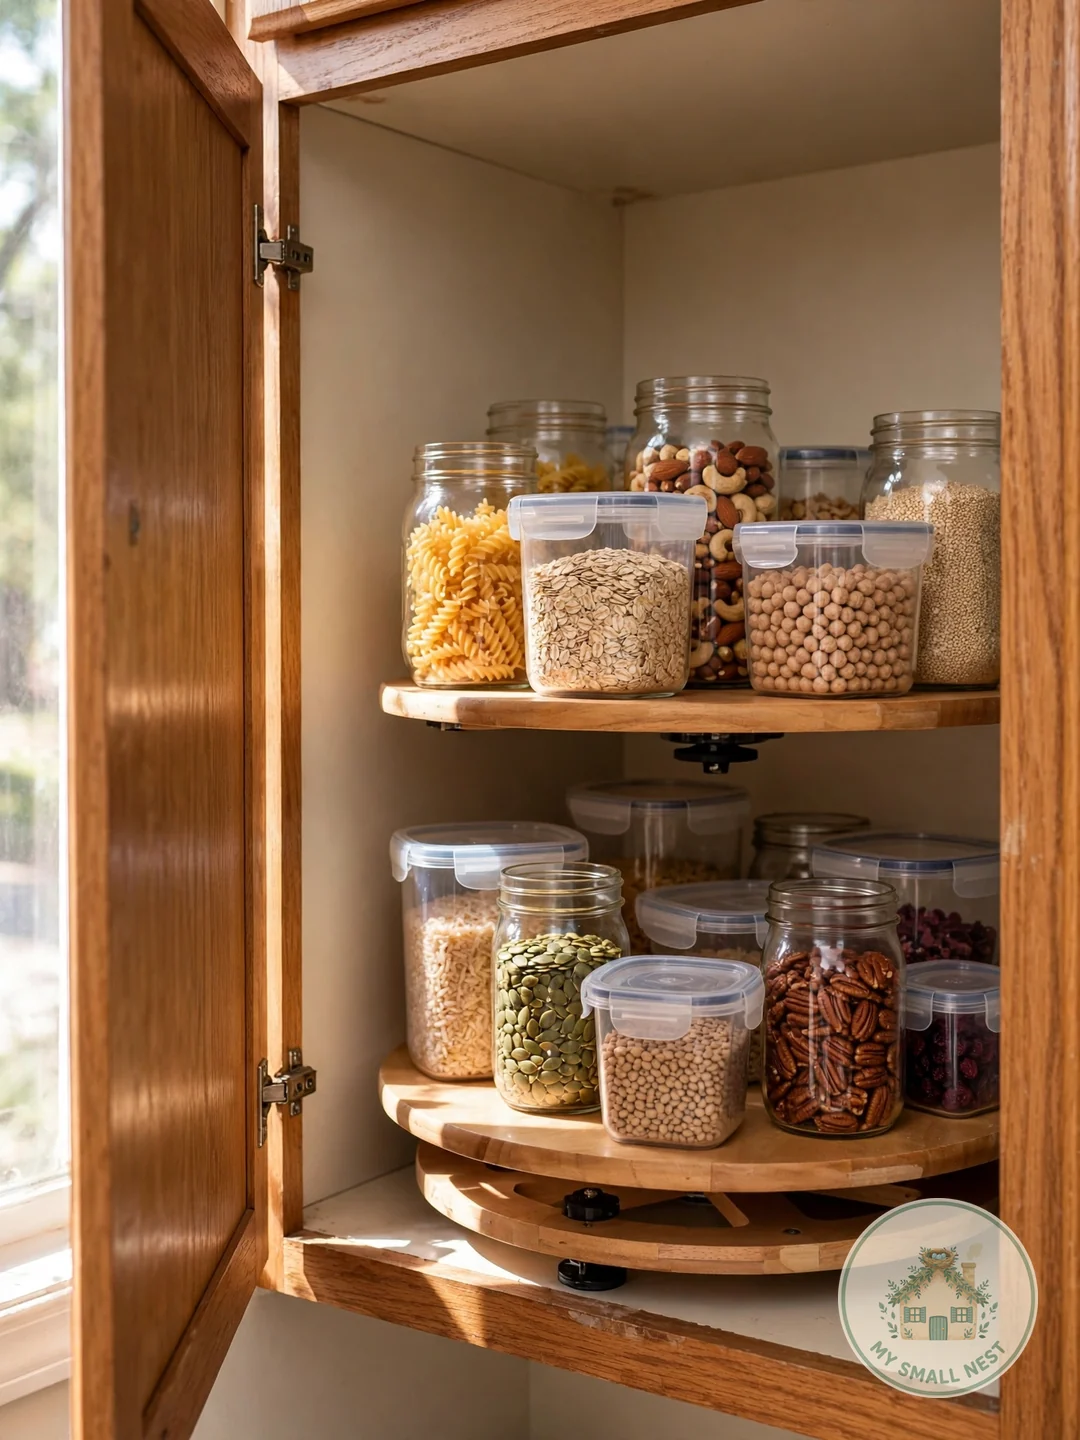
13. Add a Lazy Susan to Corner Cabinets
A lazy Susan in a deep corner cabinet ends the black-hole problem for good — spin, and every container comes to you instead of you excavating the back. Choose one with a raised rim (about $10-15 for a 12-inch turntable at Target) so containers don’t slide off mid-spin, and group small containers in a bin on top so they spin as one unit. This is the single best fix for blind corner cabinets where tupperware goes to die, and installation is literally “place it on the shelf.”
Make it work: Don’t overload it — a turntable packed edge-to-edge won’t spin. Leave a one-inch margin around the edge and it glides; pack it tight and it becomes a very expensive stationary shelf.
 Pin it
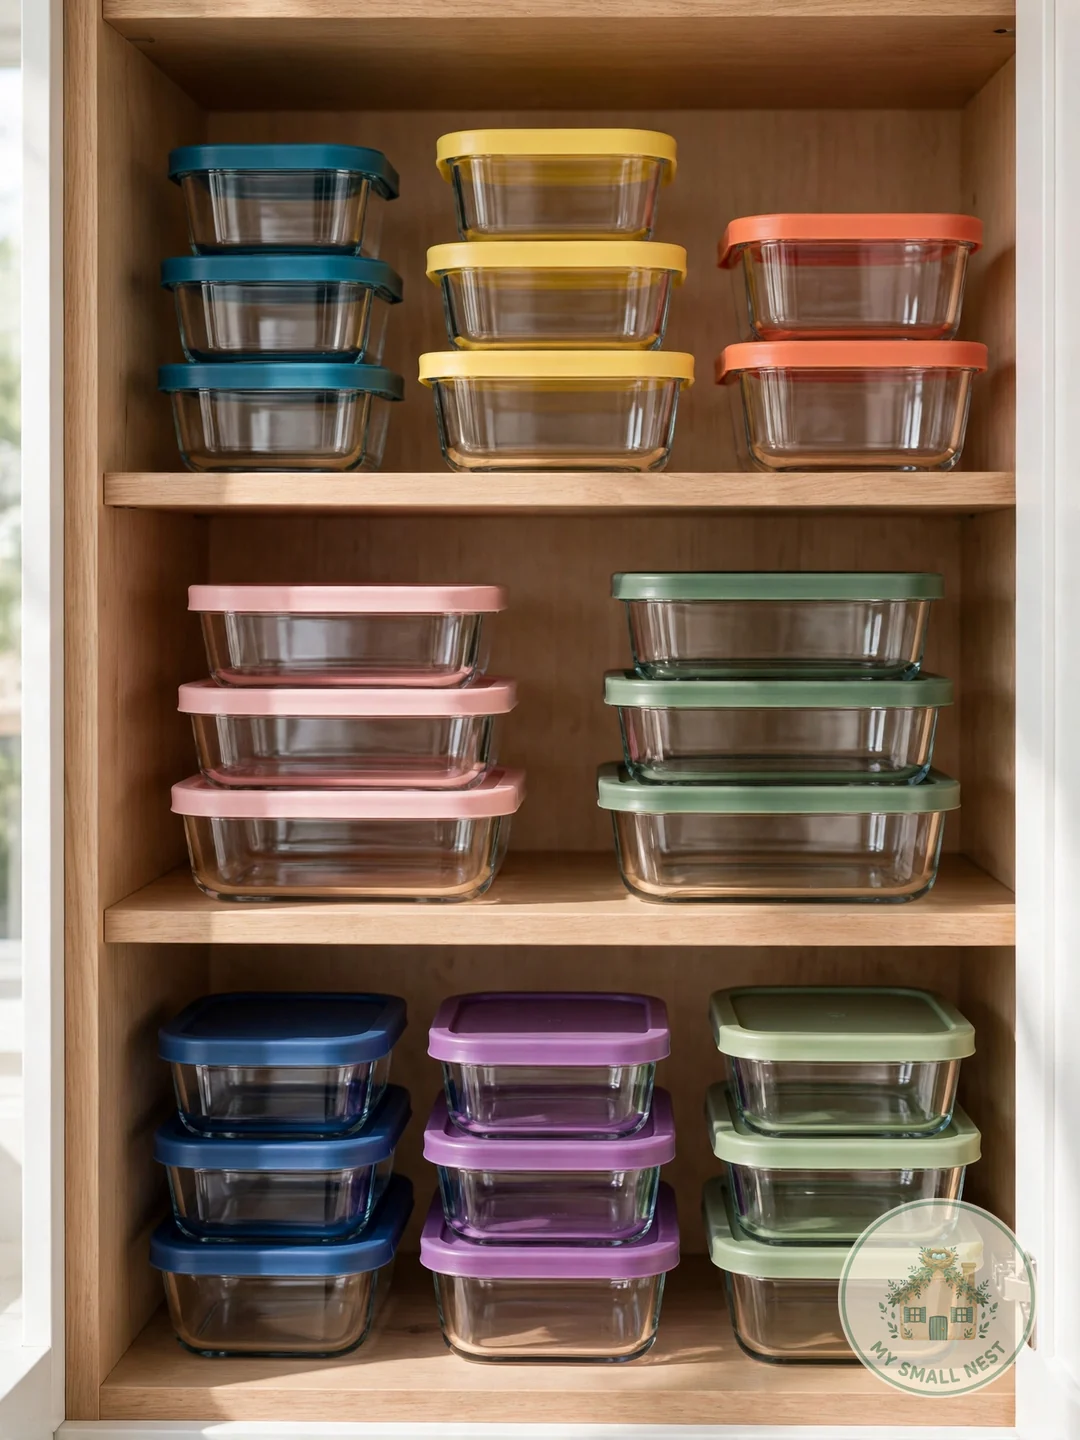
14. Migrate Stain-Prone Storage to Glass
Tomato sauce and curry stain plastic permanently — the fix is migrating your most-used leftover containers to glass with snap lids. Glass doesn’t stain, doesn’t warp, doesn’t absorb odors, and goes from fridge to microwave to table in one vessel. Keep a few plastic containers for lunchboxes and kids (lighter, unbreakable), but make glass the default for food storage. Buy glass sets when they go on sale — prices drop 30-40% during holiday sales at Target and Costco, and that’s the time to stock up.
Make it work: Start with the five containers you use most rather than replacing everything at once. You’ll feel 80% of the benefit from the first small set, and the old plastics can retire to garage or craft storage instead of the trash.
 Pin it
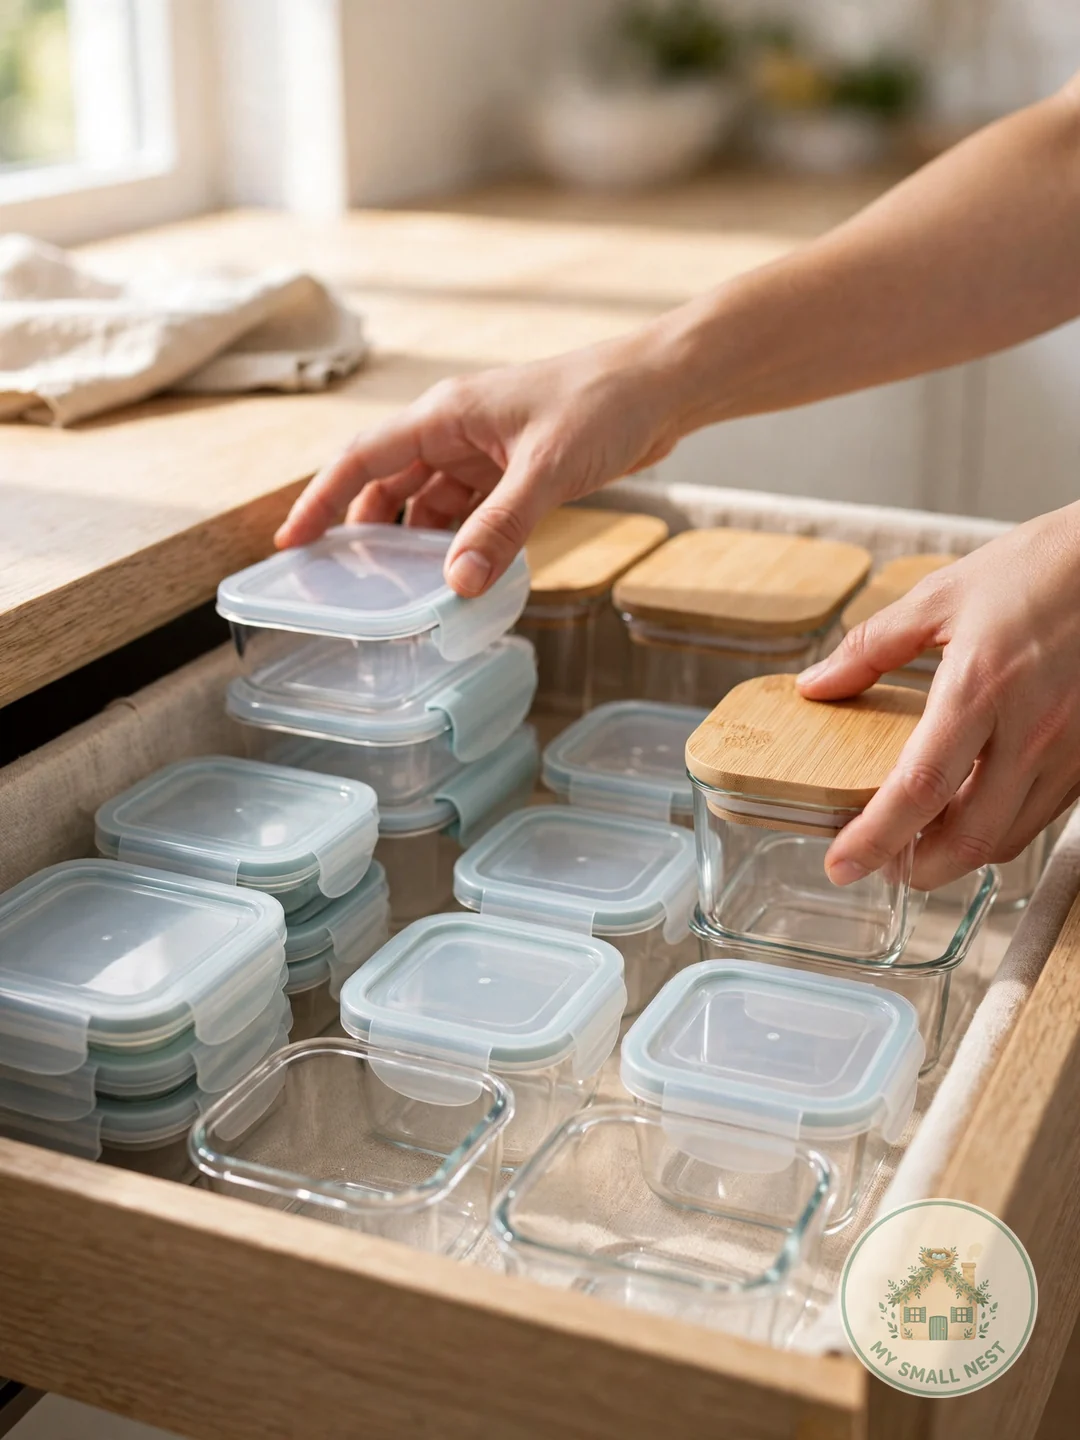
15. Do a Quarterly 10-Minute Audit
Organization decays without maintenance — schedule a 10-minute tupperware audit every few months: re-match lids to bases, toss warped pieces, re-nest everything properly. Do it while waiting for pasta water to boil or the microwave to run and it never feels like a chore; catching chaos early keeps the system working for years instead of months. Tie the audit to a season change — “spring clean the tupperware drawer” is easy to remember and easy to actually do.
Emma’s tip: I tried this in my studio on the first Sunday of every season, phone timer set for 10 minutes, and I’ve never once needed the full ten — because the system works, the audit is mostly just confirming it’s still working. That’s the real test of any organization method: maintenance should be boring. If your system needs heroic effort to maintain, the system is wrong, not you.
 Pin it
5 Mistakes to Avoid
Organizing before purging
Buying organizers for a collection full of lidless, cracked, warped containers just organizes the chaos. Purge first, then organize what’s left — you’ll need fewer products than you think.
Storing containers with lids on
It feels tidy but doubles the space needed and traps moisture. Nest containers, file lids vertically — always separate.
Mixing shapes and brands randomly
Round, square, five brands, three lid styles — nothing nests, nothing matches. Standardize to one or two modular sets and the system maintains itself.
Using deep cabinets without helpers
Deep shelves become black holes where containers disappear. Add risers, pull-outs, or a lazy Susan — or move tupperware to a drawer where you can see everything.
Skipping maintenance
Even the best system drifts. A 10-minute quarterly audit — re-match, re-nest, toss the warped — keeps things working. To truly organize tupperware for good, maintenance is part of the system.
FAQs
What’s the best way to organize tupperware lids?
Store lids vertically like files in a dish rack, file organizer, or plate holder inside the cabinet or drawer. This ends the avalanche, makes every lid visible, and is the single highest-impact change when you organize tupperware.
Should I store food containers with lids on or off?
Off. Nest containers inside each other and store lids separately and vertically. Lidded storage wastes roughly twice the space and traps moisture that causes musty smells.
How many food containers do I actually need?
Most households need 8–12 containers in 2–3 sizes. If you meal prep weekly, add a matching set of 5–7 same-size containers. Anything beyond that is clutter, not convenience.
Glass or plastic containers — which is better?
Glass wins for leftovers: no staining, no warping, microwave-to-table convenience. Plastic wins for lunchboxes and kids (light, unbreakable). A mix with glass as the default is the sweet spot.
How do I organize tupperware in a small kitchen?
Use a deep drawer instead of a cabinet, nest aggressively, file lids vertically, use cabinet-door racks for flat lids, and standardize on one modular set. Small kitchens benefit most from the purge — fewer pieces, perfectly organized.
Tupperware chaos is a systems problem, not a personal failing — and now you have the system. Purge the orphans, nest the keepers, file the lids vertically, and give everything a dedicated home.
Start with the purge today (it takes 15 minutes), then add one organizer at a time. Save these ideas to organize tupperware for your next kitchen reset — the avalanche ends here.

What readers are saying
No comments yet — yours could be the first.